When I started my 365 Days of Birds photography project last year on January 24th, I did not know the true journey upon which I have embarked. The obvious goal was to improve my photo taking skills and move away from the “auto” setting on my camera. What I discovered and is reviewed in this post, the benefits were much more dramatic than I had anticipated.
I started my project with the requirement that I take at least one photograph of a bird every day. By the end of my year, my jaunts around the Northland (the Arrowhead region of northern MInnesota) had grown to also include sessions 100% dedicated to photographing the Aurora Borealis / Northern Lights and Lake Superior Landscapes.
Equipment (Birding / Landscape Photography on a Budget)
If you ever head out into the woods with photography in mind, you will invariably see photographers with amazing equipment. While spending thousands and thousands of dollars on camera equipment will certainly provide you great potential, remember that the biggest input into creating images which other people want to view is the person behind the camera. How one frames the picture, and what is included in the image is critical to the end result. If you know how to use your camera, and understand its limitations, even a person with a smart phone is able to take gorgeous photos.
I started this project with a Canon SX40. This camera is known as a “super zoom bridge” camera. I purchased my SX40 as a factory refurbished directly from Canon for $200. It’s super zoom capability (40x telephoto) gave me the ability to photograph birds at a distance. The main limitation of this camera is a smaller sensor which equates to needed more perfect photographic conditions (sunshine good, gloomy cloudy days bad). Nine months I upgraded camera’s to Canon’s new SX60 and its bigger reach … a 65x zoom capability.
Perhaps my essential piece of equipment is a $15 telescoping monopod. Put simple, birds move and you move. When fully zoomed to capture a somewhat distant bird, trying to capture an excellent image without the benefit of a monopod to help hold the camera stead (or a tripod) is almost impossible. I almost never took photographs in solely a hand held manner. The benefit of a monopod over a tripod is size and weight. Birds do not usually pose for pictures right next to a car or bike you happen to be driving / riding. A monopod is easy to take along a hike without getting heavy.
Finally, a Canon Super Zoom Bridge Camera may also be utilized for night time photography with a simple, legal, software hack called CHDK. The hack is just some simple software one loads onto your simm / memory card. With this adjustment, one may use the camera in either its native mode, or the “hack” mode.
Learn more about CHDK. View my Northern Lights photos.
My Favorite Camera Settings for Bird Photography
Birds move fast! This may seem like an obvious statement, but one must understand this item at its most basic level if you want to take good bird photos. While I have seem some web sites advocate using “aperture priority” for bird photography, I disagree. In the aperture priority mode, your camera will determine the optimum shutter speed. Remember the comment about “fast birds”? Add this knowledge to the fact that you will most often be utilizing a heavy zoom ratio. The combination means the bird is moving fast in your viewfinder. Thus, I prefer shutter priority or manual mode. Using either of these settings means I am able to pick the shutter speed necessary to “stop time” and insure clear photos without any blur (unless desired to give the impression of speed).
One may ask, why not just use “shutter priority” and not worry about the other settings. Remember, when utilizing shutter priority your camera will make the choice for your aperture and ISO setting. While at times during quickly varying light conditions, letting the camera choose the other settings is nice, manual mode gives full control over these tradeoffs: 1) small aperture lets in more light, and creates a depth of field where the background is less detailed, often blury … this end result is often nice because it focuses the image upon the main subject. 2) large aperture brings the background into focus which may or may not be desirable depending upon how you are composing the image. 3) high ISO means more light sensitivity and faster possible shutter speeds, but as ISO increases so does the end resulting “noise” in your end result photograph
Small Bird Camera Settings: Small birds mover very fast. Thus I like to use a fast shutter speed … 1/1000th of a second or less. I like to open up my aperture to obtain a bit more light and slightly blur the background (aperture of 5.6 or 6.3). For a flight shot I will use an aperture of 7.1 or 8 which makes the entire photo more likely to be in focus.
Large Bird Camera Settings: Large raptors mover slower. I find I can utilize a slower shutter speed, perhaps 1/800th of a second or less. I use the same aperture settings as with small birds.
Bird in Flight Settings: I like a shutter speed of at least 1/1200th of a second or less. For fast flying birds I really want 1/1600th of a second. Light conditions dictate whether I am able to achieve these settings. I also want to keep my ISO settings below 800.
Other Comments: Given bright sunny conditions, I will always increase the shutter speed. Conversely, given low light I will lengthen the shutter speed down to as long as 1/500th of a second and hope the bird stands still. In really gloomy conditions, I will switch over to aperture priority and hope for a motionless bird. In fact, in ugly weather I will often restrict my outings to finding birds which I know are more likely to sit motionless for periods of time.
My Favorite Camera Settings for Landscape Photography
Eleven months into this project I purchased a SONY NEX-5T mirrorless camera. Sony cameras are know for their low light capabilities. This camera has allowed me to increase the quality of my landscape and northern lights photographs for a minimal investment ($299 via Amazon for the camera and a 30 / 55 zoom kit lens). For landscape photography during the day I am almost always in an aperture mode of 8.0 or higher. At night I use the lowest aperture setting possible to let in the greatest amount of light. Finally, for both these kinds of photographs I always use a camera or tripod with a two second timer. When pressing the shutter, you will ever so slightly move the camera. Using the timer in conjunction with a tripod or monopod will yield crisp, sharp images.
Landscape Image Examples: Lake Superior / Northern Minnesota / Northern Lights
Bird Habitat and Habits Learnings
Most birds are scared of humans, which makes bird photography difficult, but also rewarding! The easiest item to help you find birds is: find food and water … find birds. During the cold severe Minnesota winter this fact is even more true. Thus, try to think like a bird. Unlike we humans, birds must expend valuable energy to find food. Expending to much energy means starvation. Thus, when birds find good eating, they will not stray far.
There are direct benefits that drive results from the “find food and water … find birds”. For instance, if you wind a raptor (eagle, hawk, owl, etc), wait at a distance and watch where it hunts. Pay particular attention to specific perches it uses (i.e. trees, telephone poles, etc) and the time of day. If the raptor is successful, there is a high degree of probability that you will be able to watch the same bird at the same exact location for days, or even weeks at a time. The direct benefit is one may return to a given location when photographic conditions are optimal, which for me means the golden hour right after sunrise, or before sunset.
Regardless of habitat, I always try to get outside and underway by sunrise. Birds are most active first thing in the more hungry. Being active tends to equate with easier to find, and more interesting photographic opportunities. By two hours after sunrise things really slow down. If conditions are picture perfect clear, I will often be out before sunrise.
The Birding / Photography Community
Finding birds on your own is fun, but make certain you use the networks in your own area to make this task easier. Most regions now have Facebook groups where birding / photo enthusiasts post both location information and photos from their outings. In Minnesota, I am a member of: Minnesota Birding, Northest Minnesota Birding Group, Owl About Minnesota and Sax-Zim Bog. In addition I track reports from the Minnesota Ornithologist Union.
Learn more about these groups and Minnesota birding locations via my blog
Going Forward
Although I do not intend to conduct another 365 bird photography project, I will continue to spend lots of time hiking and photographing the Minnesota Northwoods, including birds. The results will most often be posted here. The project was fun, but by the end I was feeling intense pressure. It can be darned difficult to find birds during the Minnesota winter, let alone take a good photo. This project not only taught me an incredible amount about photograph and birds, I met and became friends with some great people. You will now find me working occasionally as a Welcome Center volunteer up at the Sax-Zim Bog, and helping other folks with my knowledge.
Five Photos from my Project
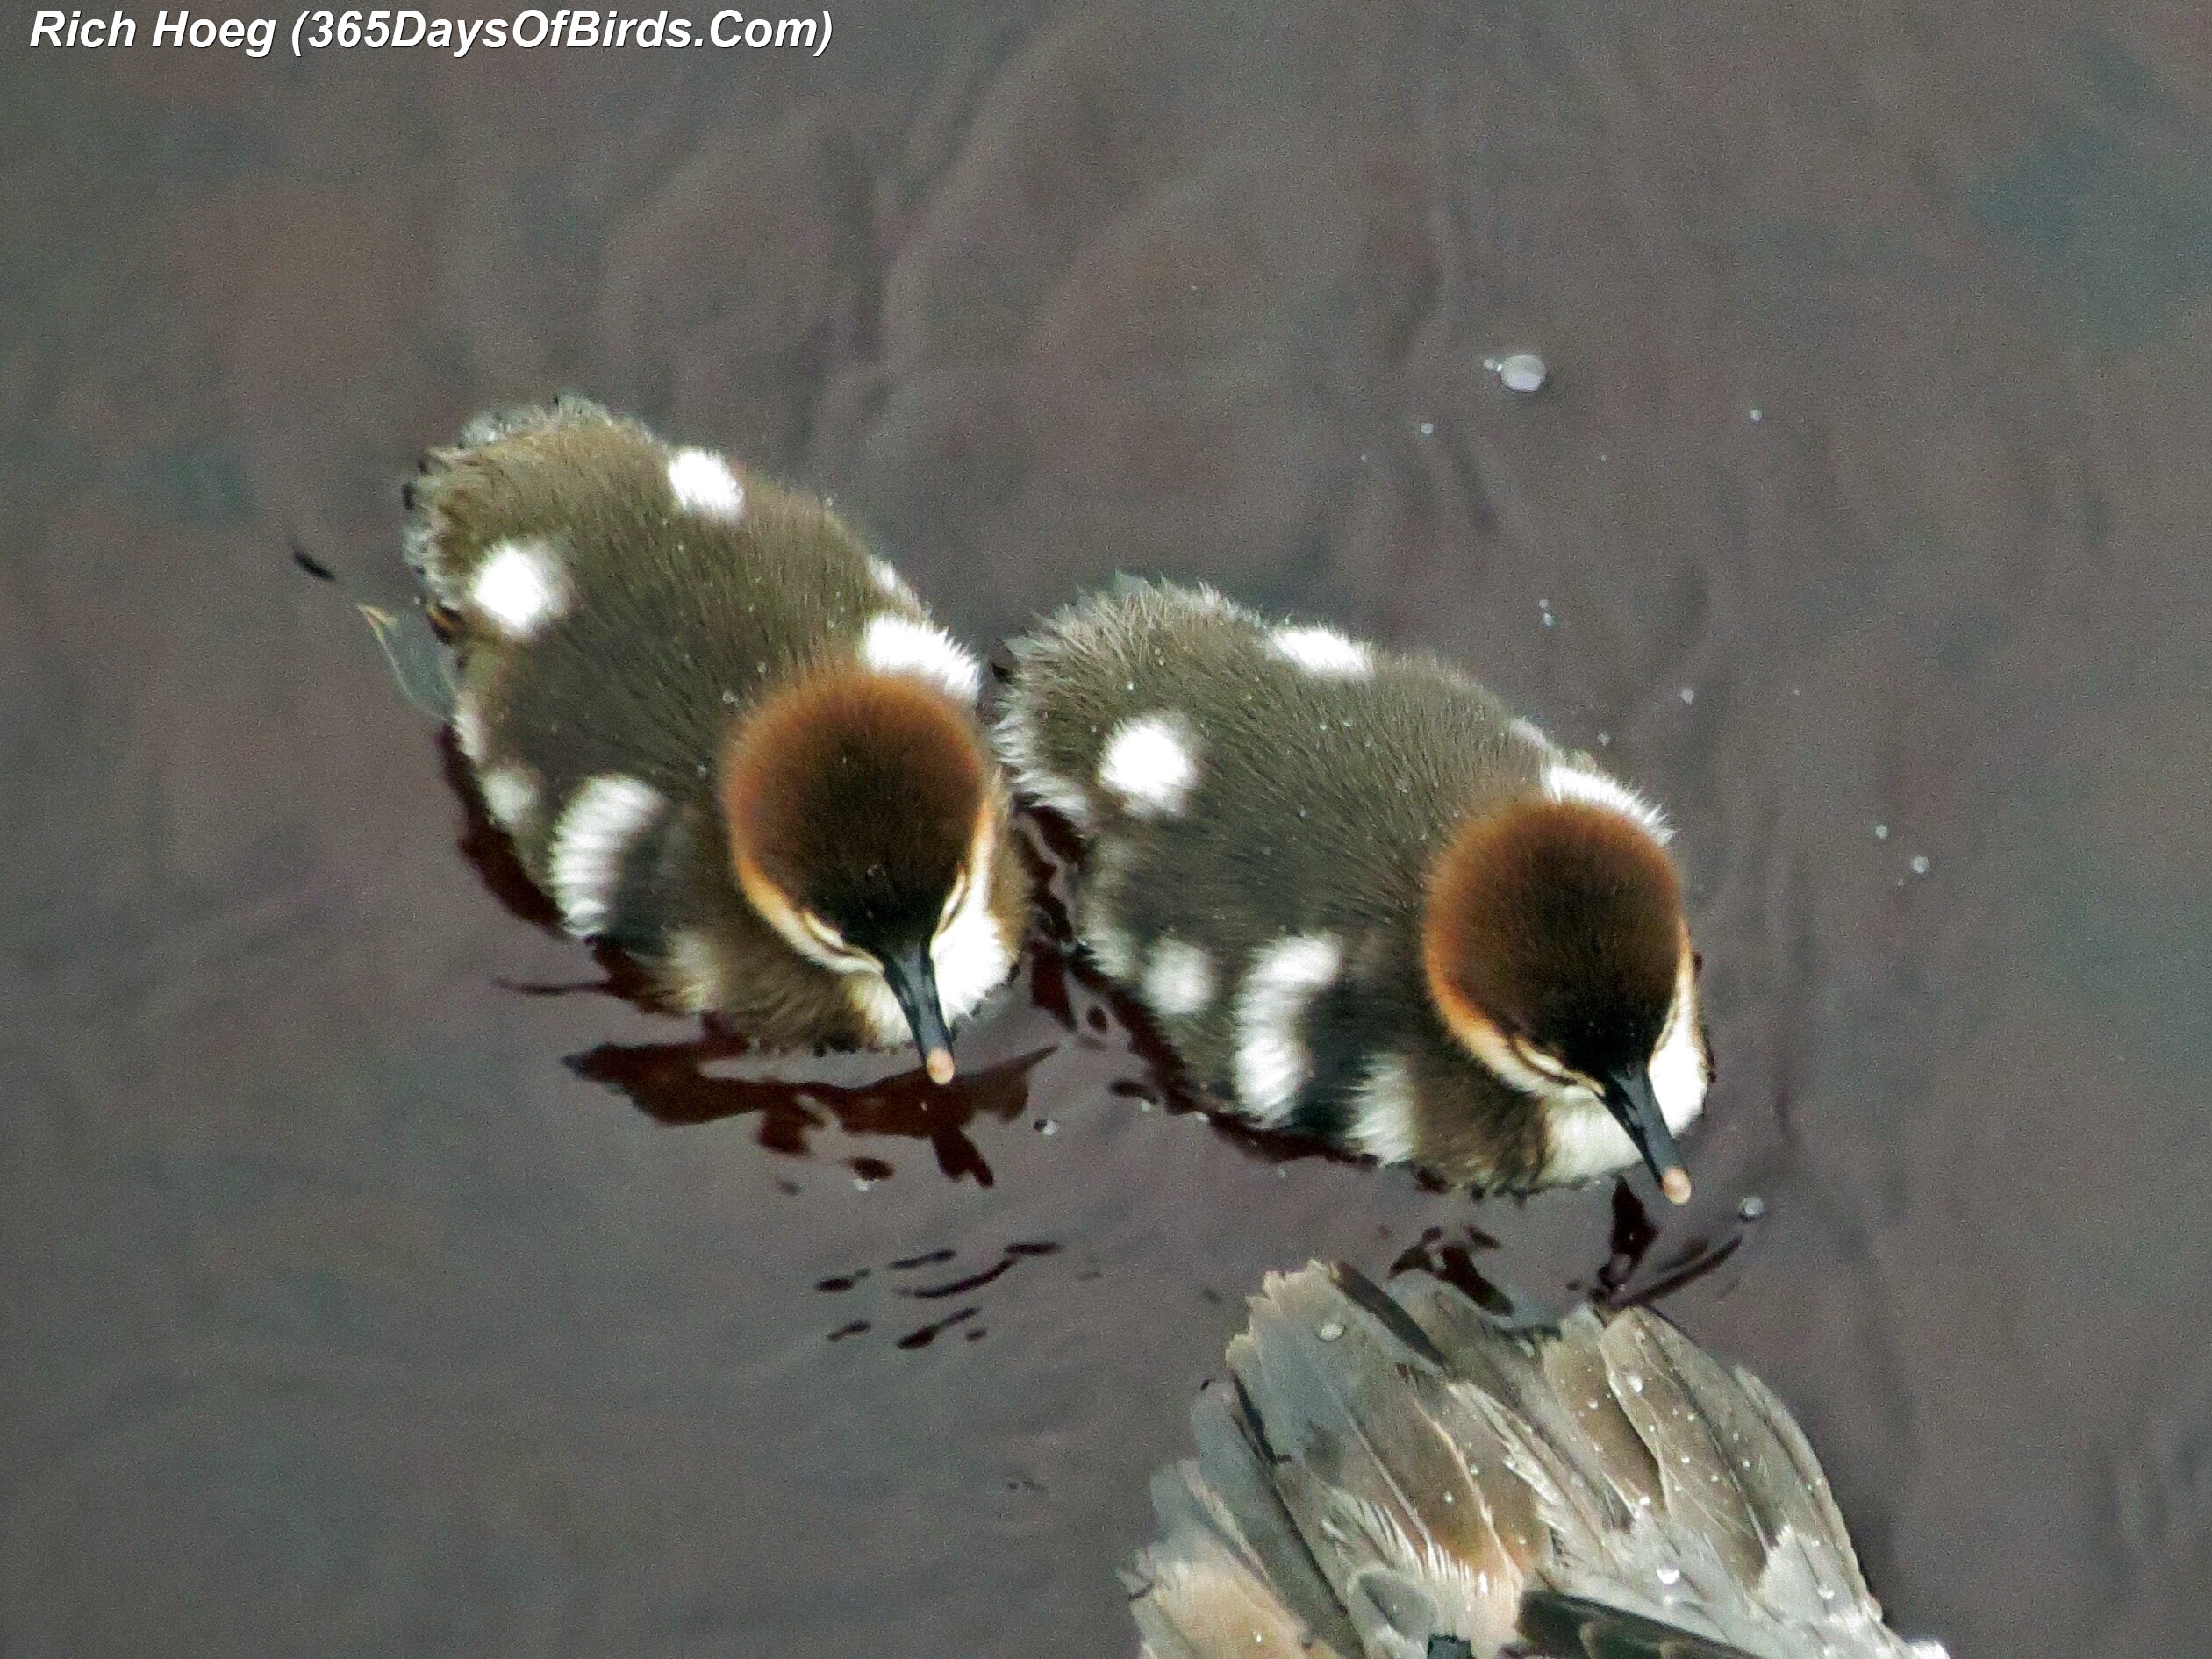
Common Merganser Chicks
———-
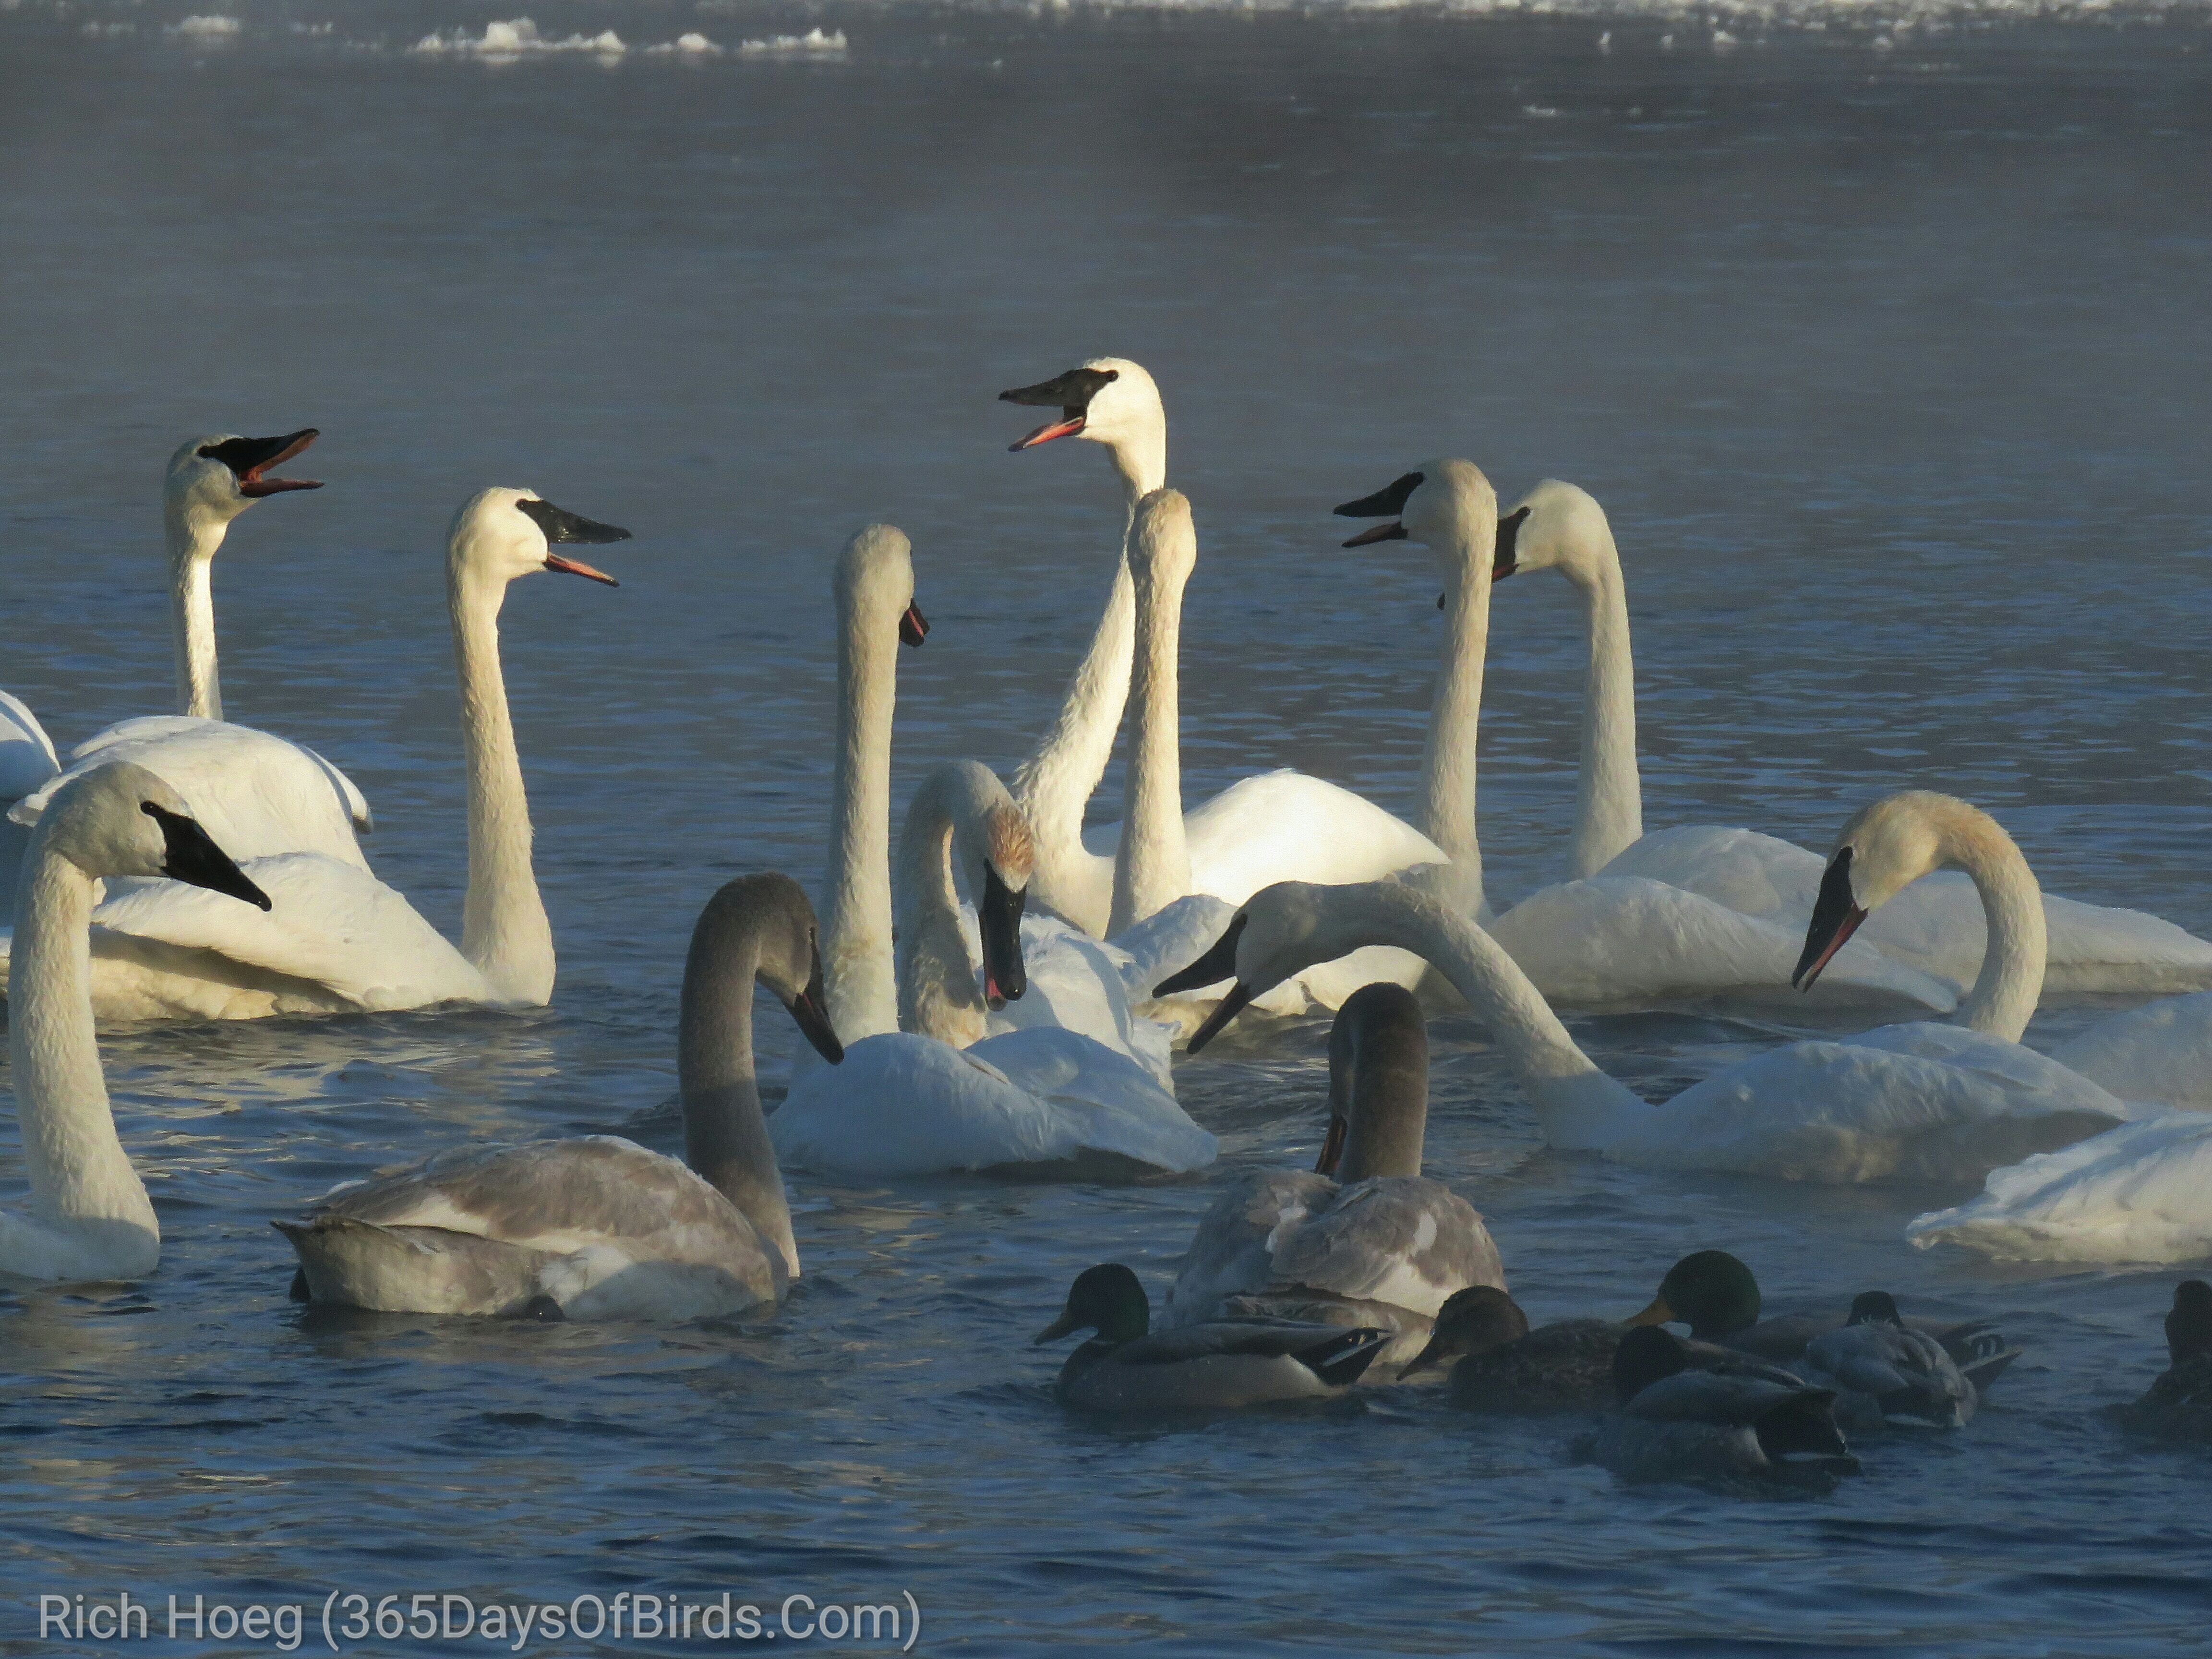
Trumpeter Swans a Trumpeting
———-
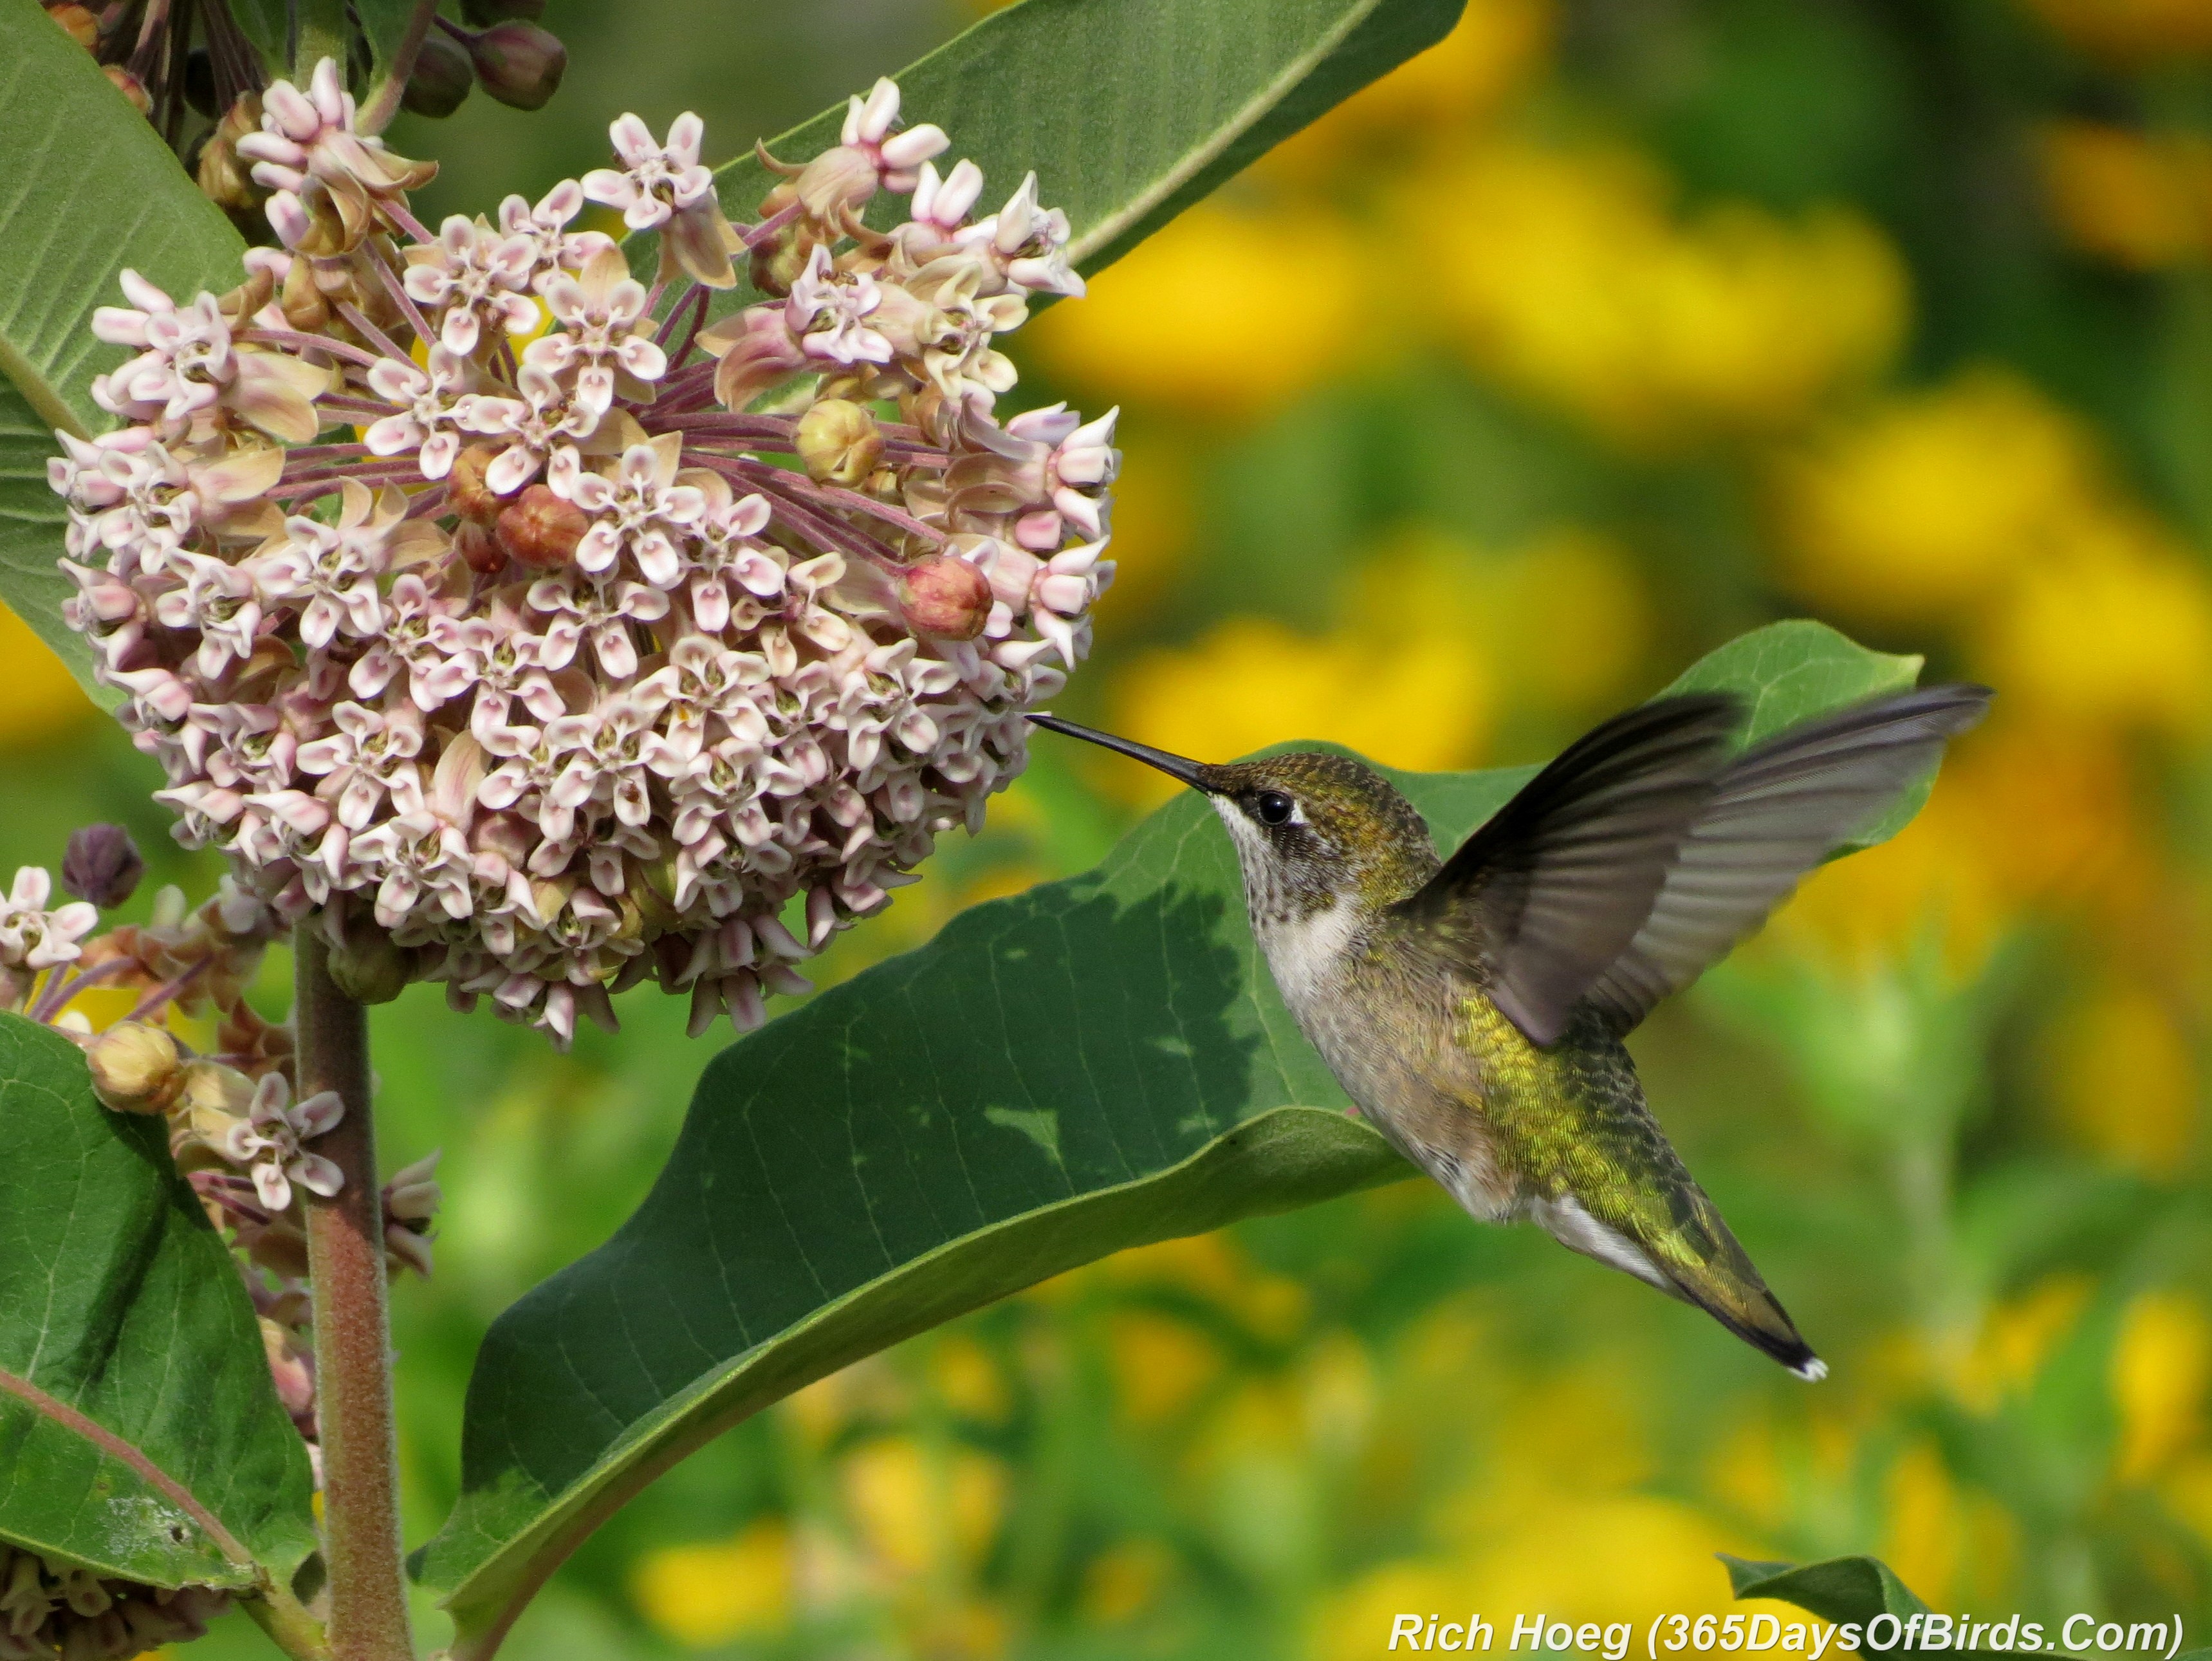
Ruby-Throated Hummingbird and Milkweed
———-
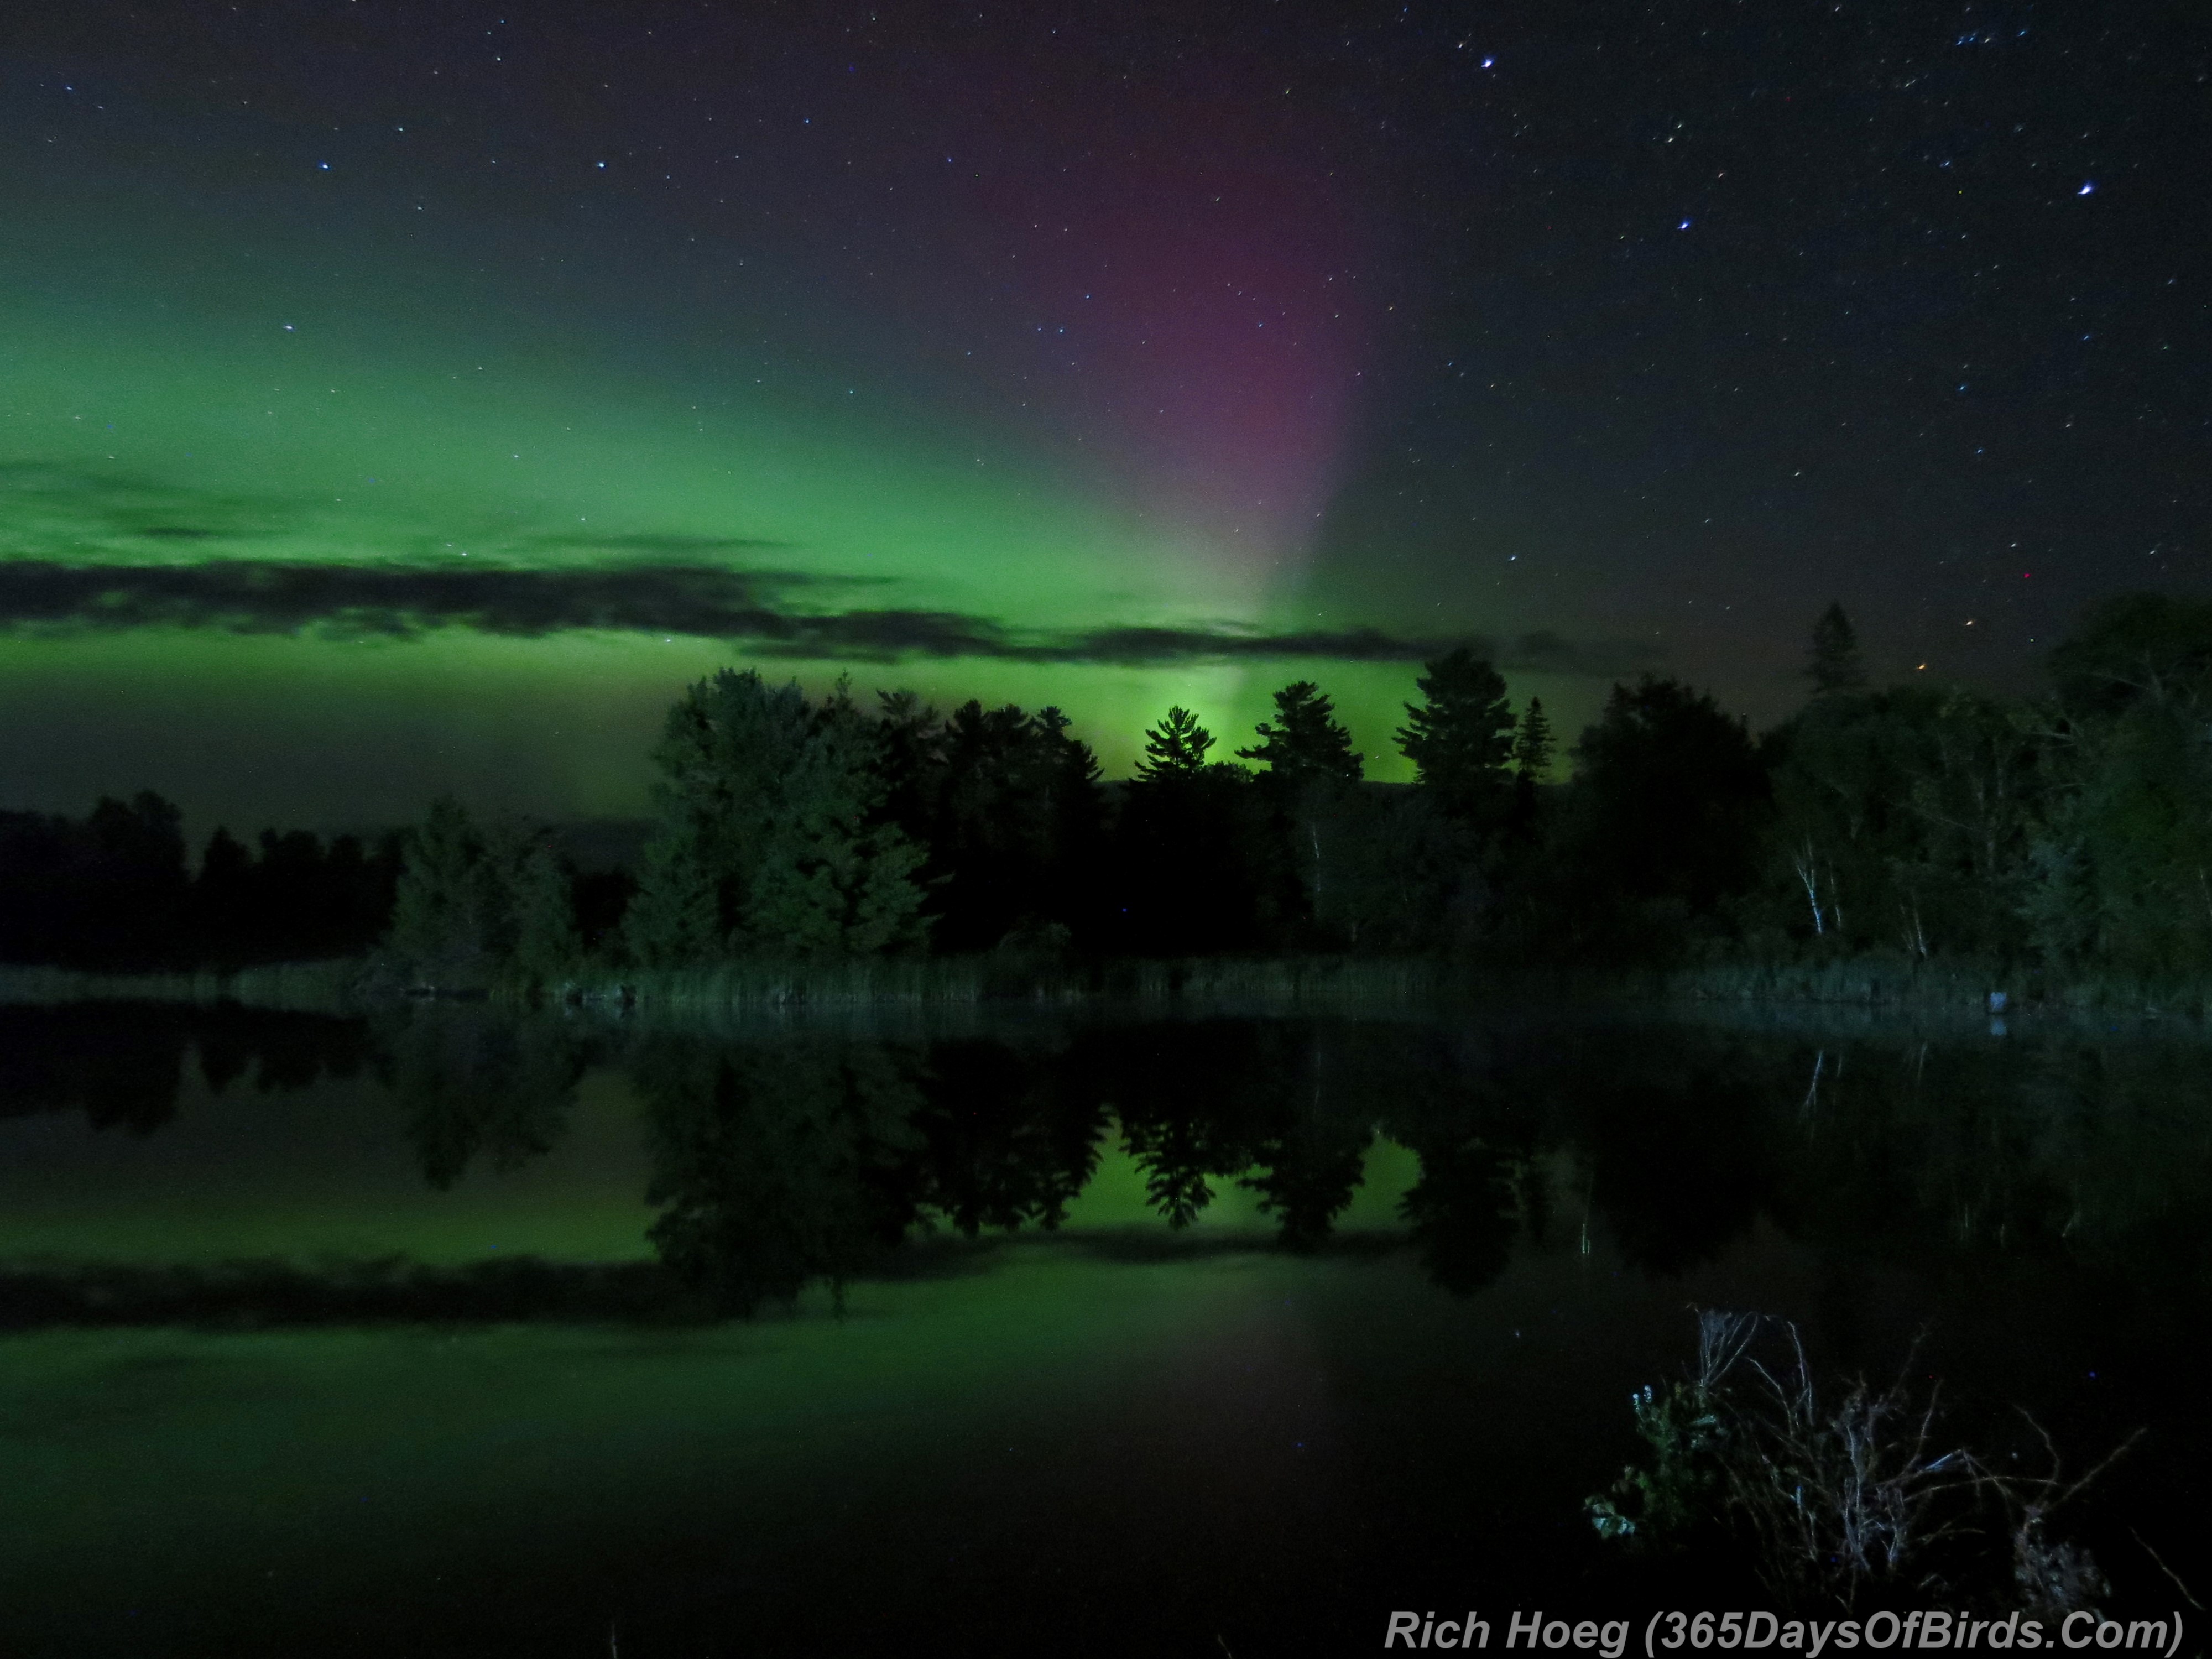
Northern Lights Over Bolder Lake
———-
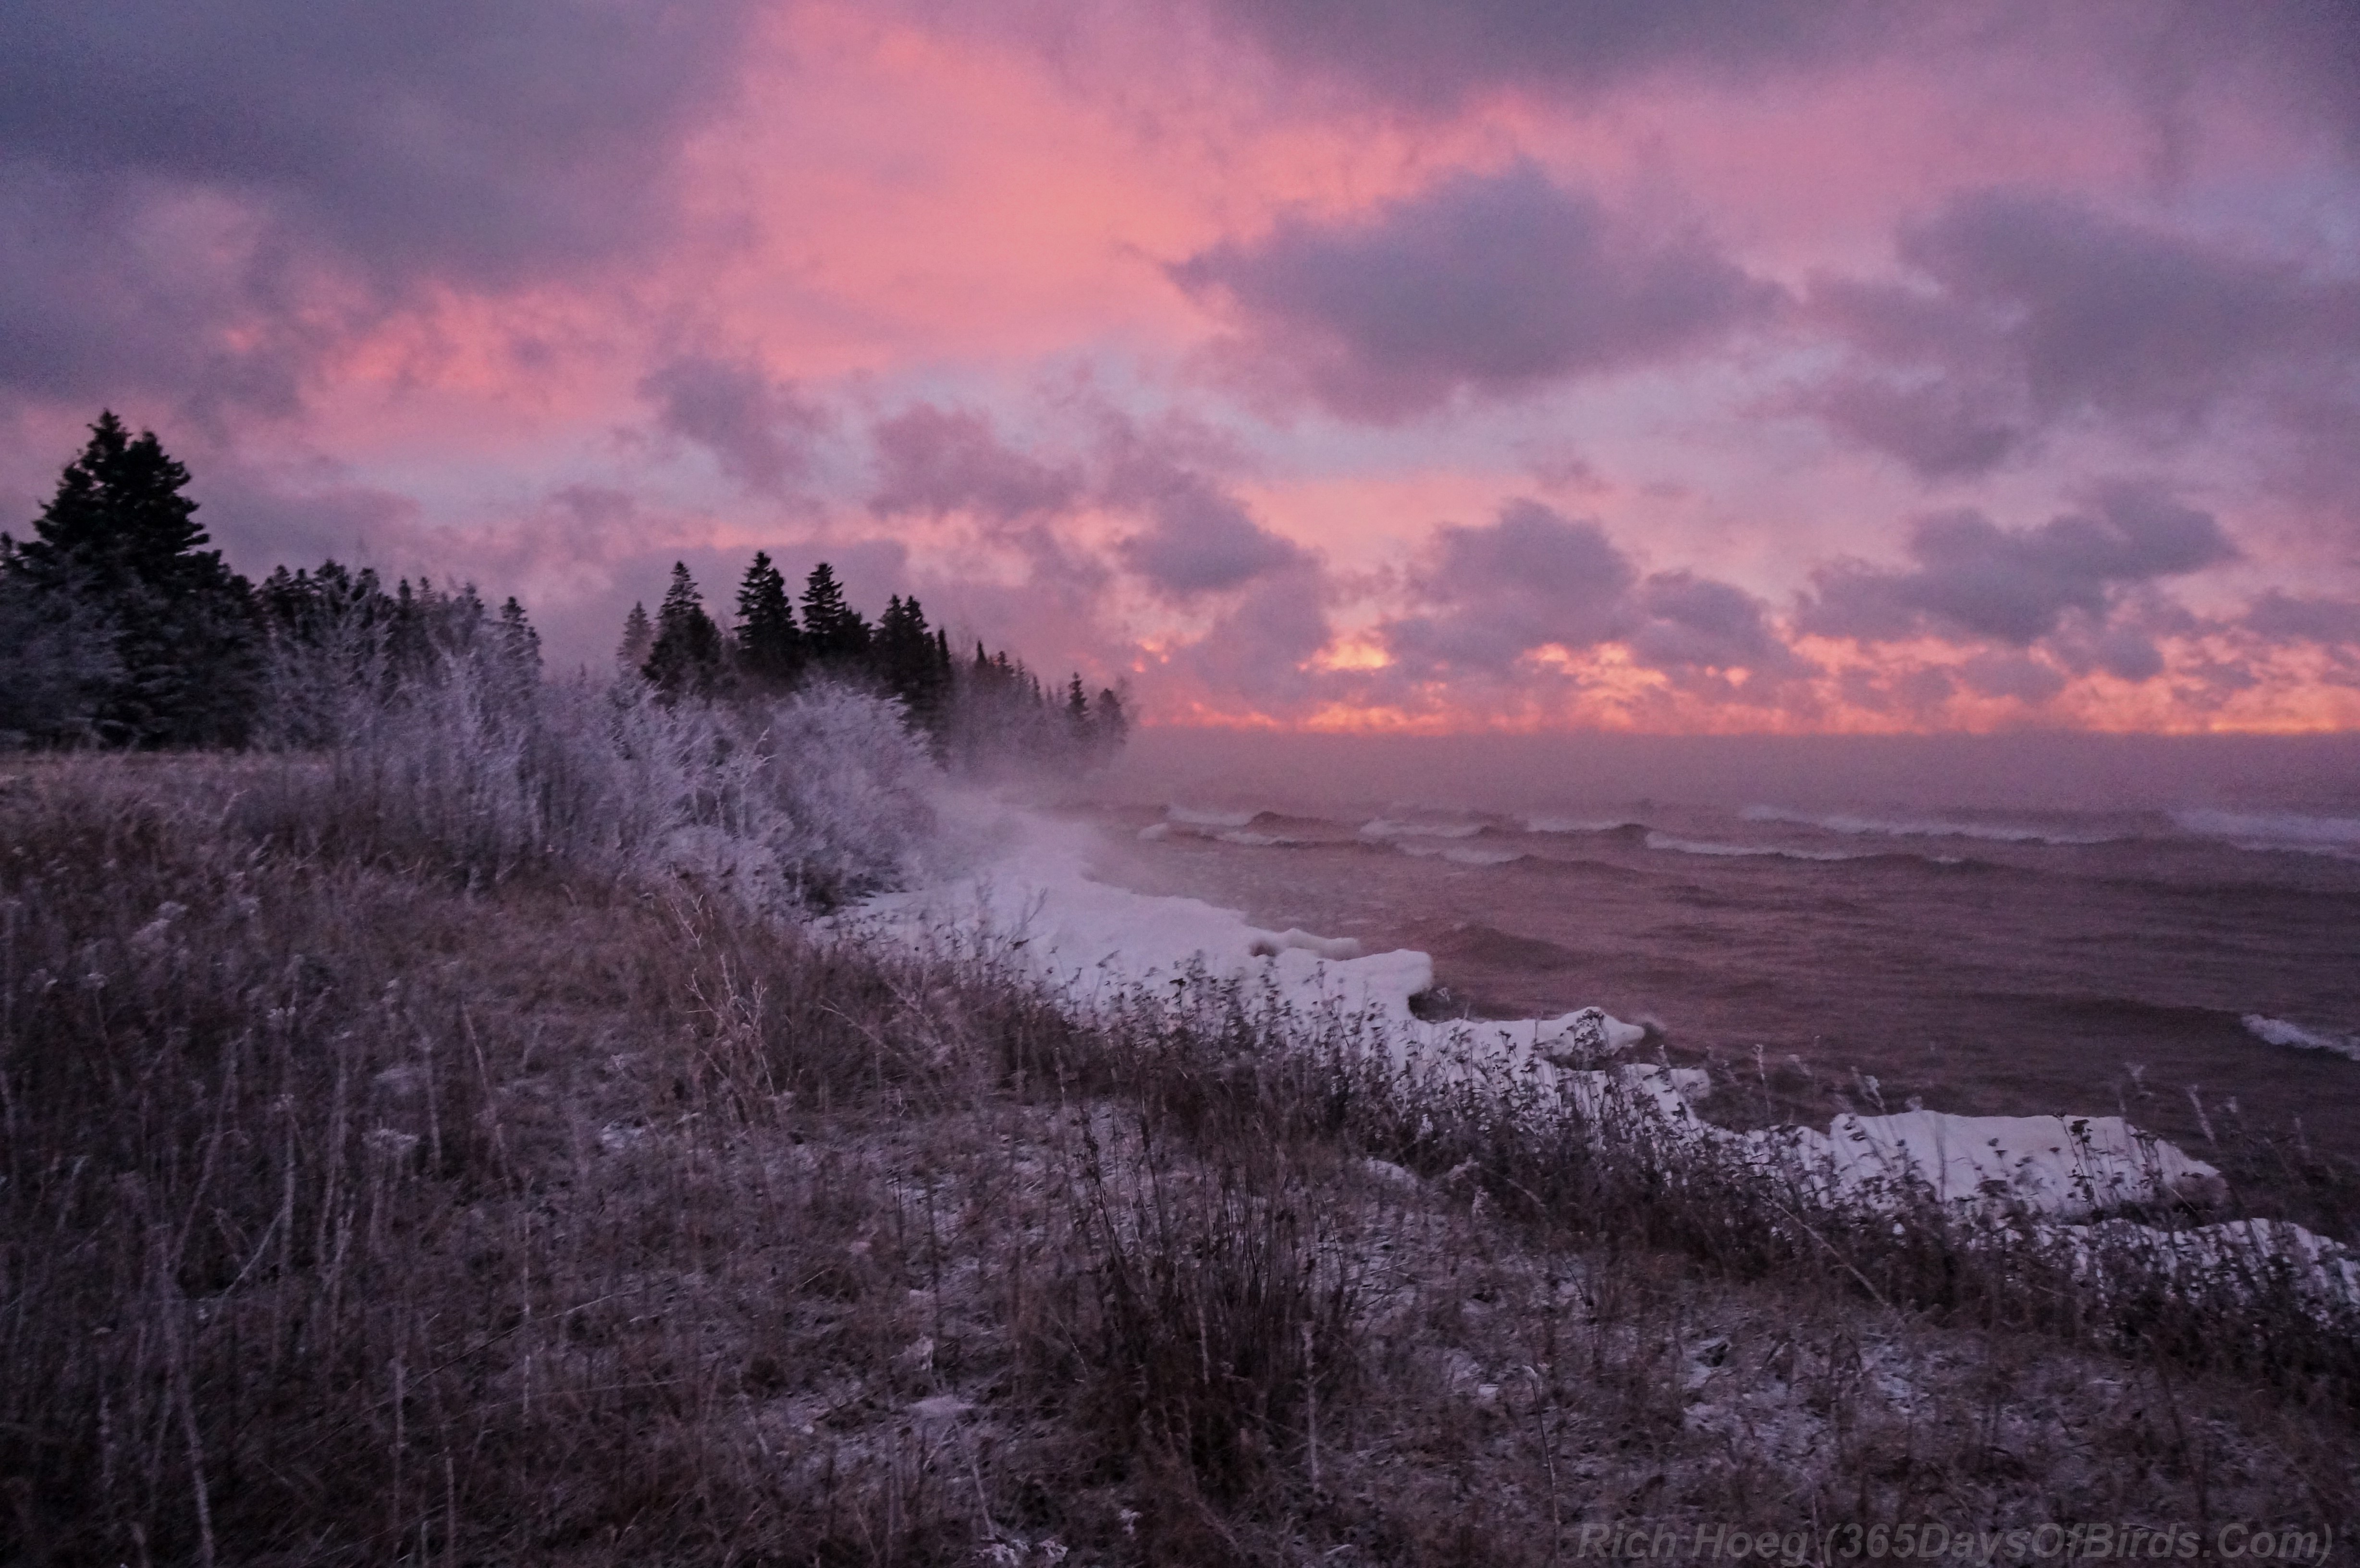
Stoney Point Lake Superior Sunrise