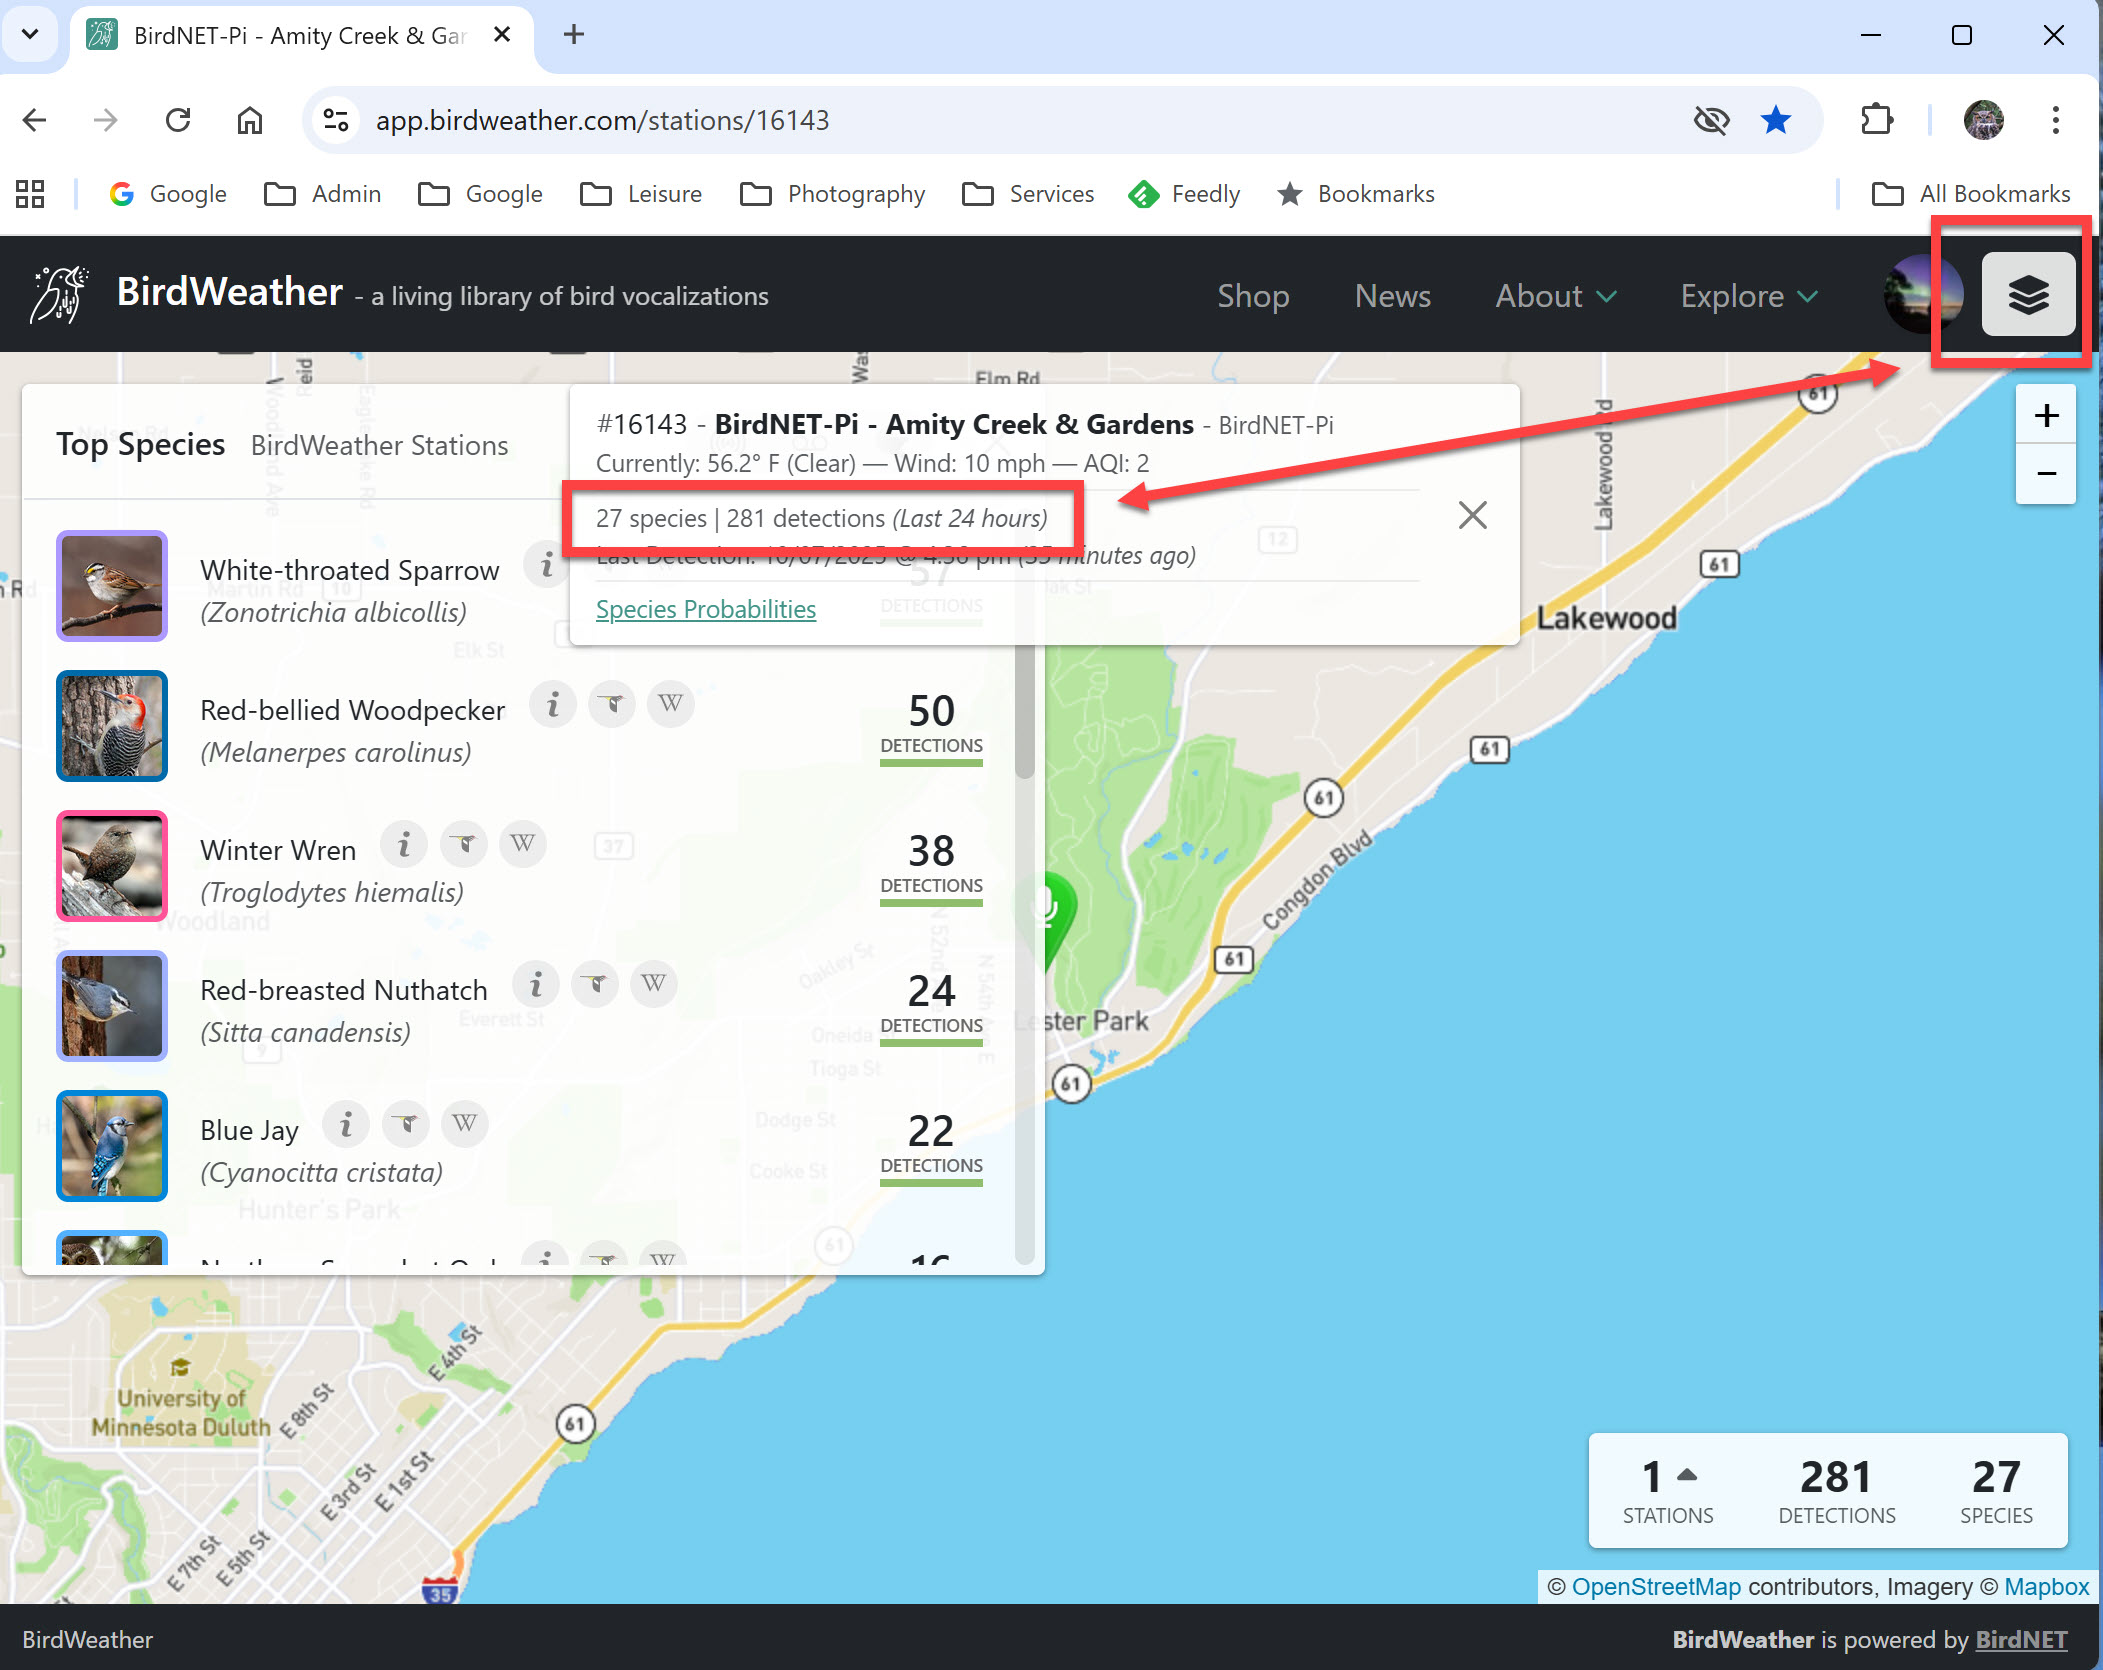
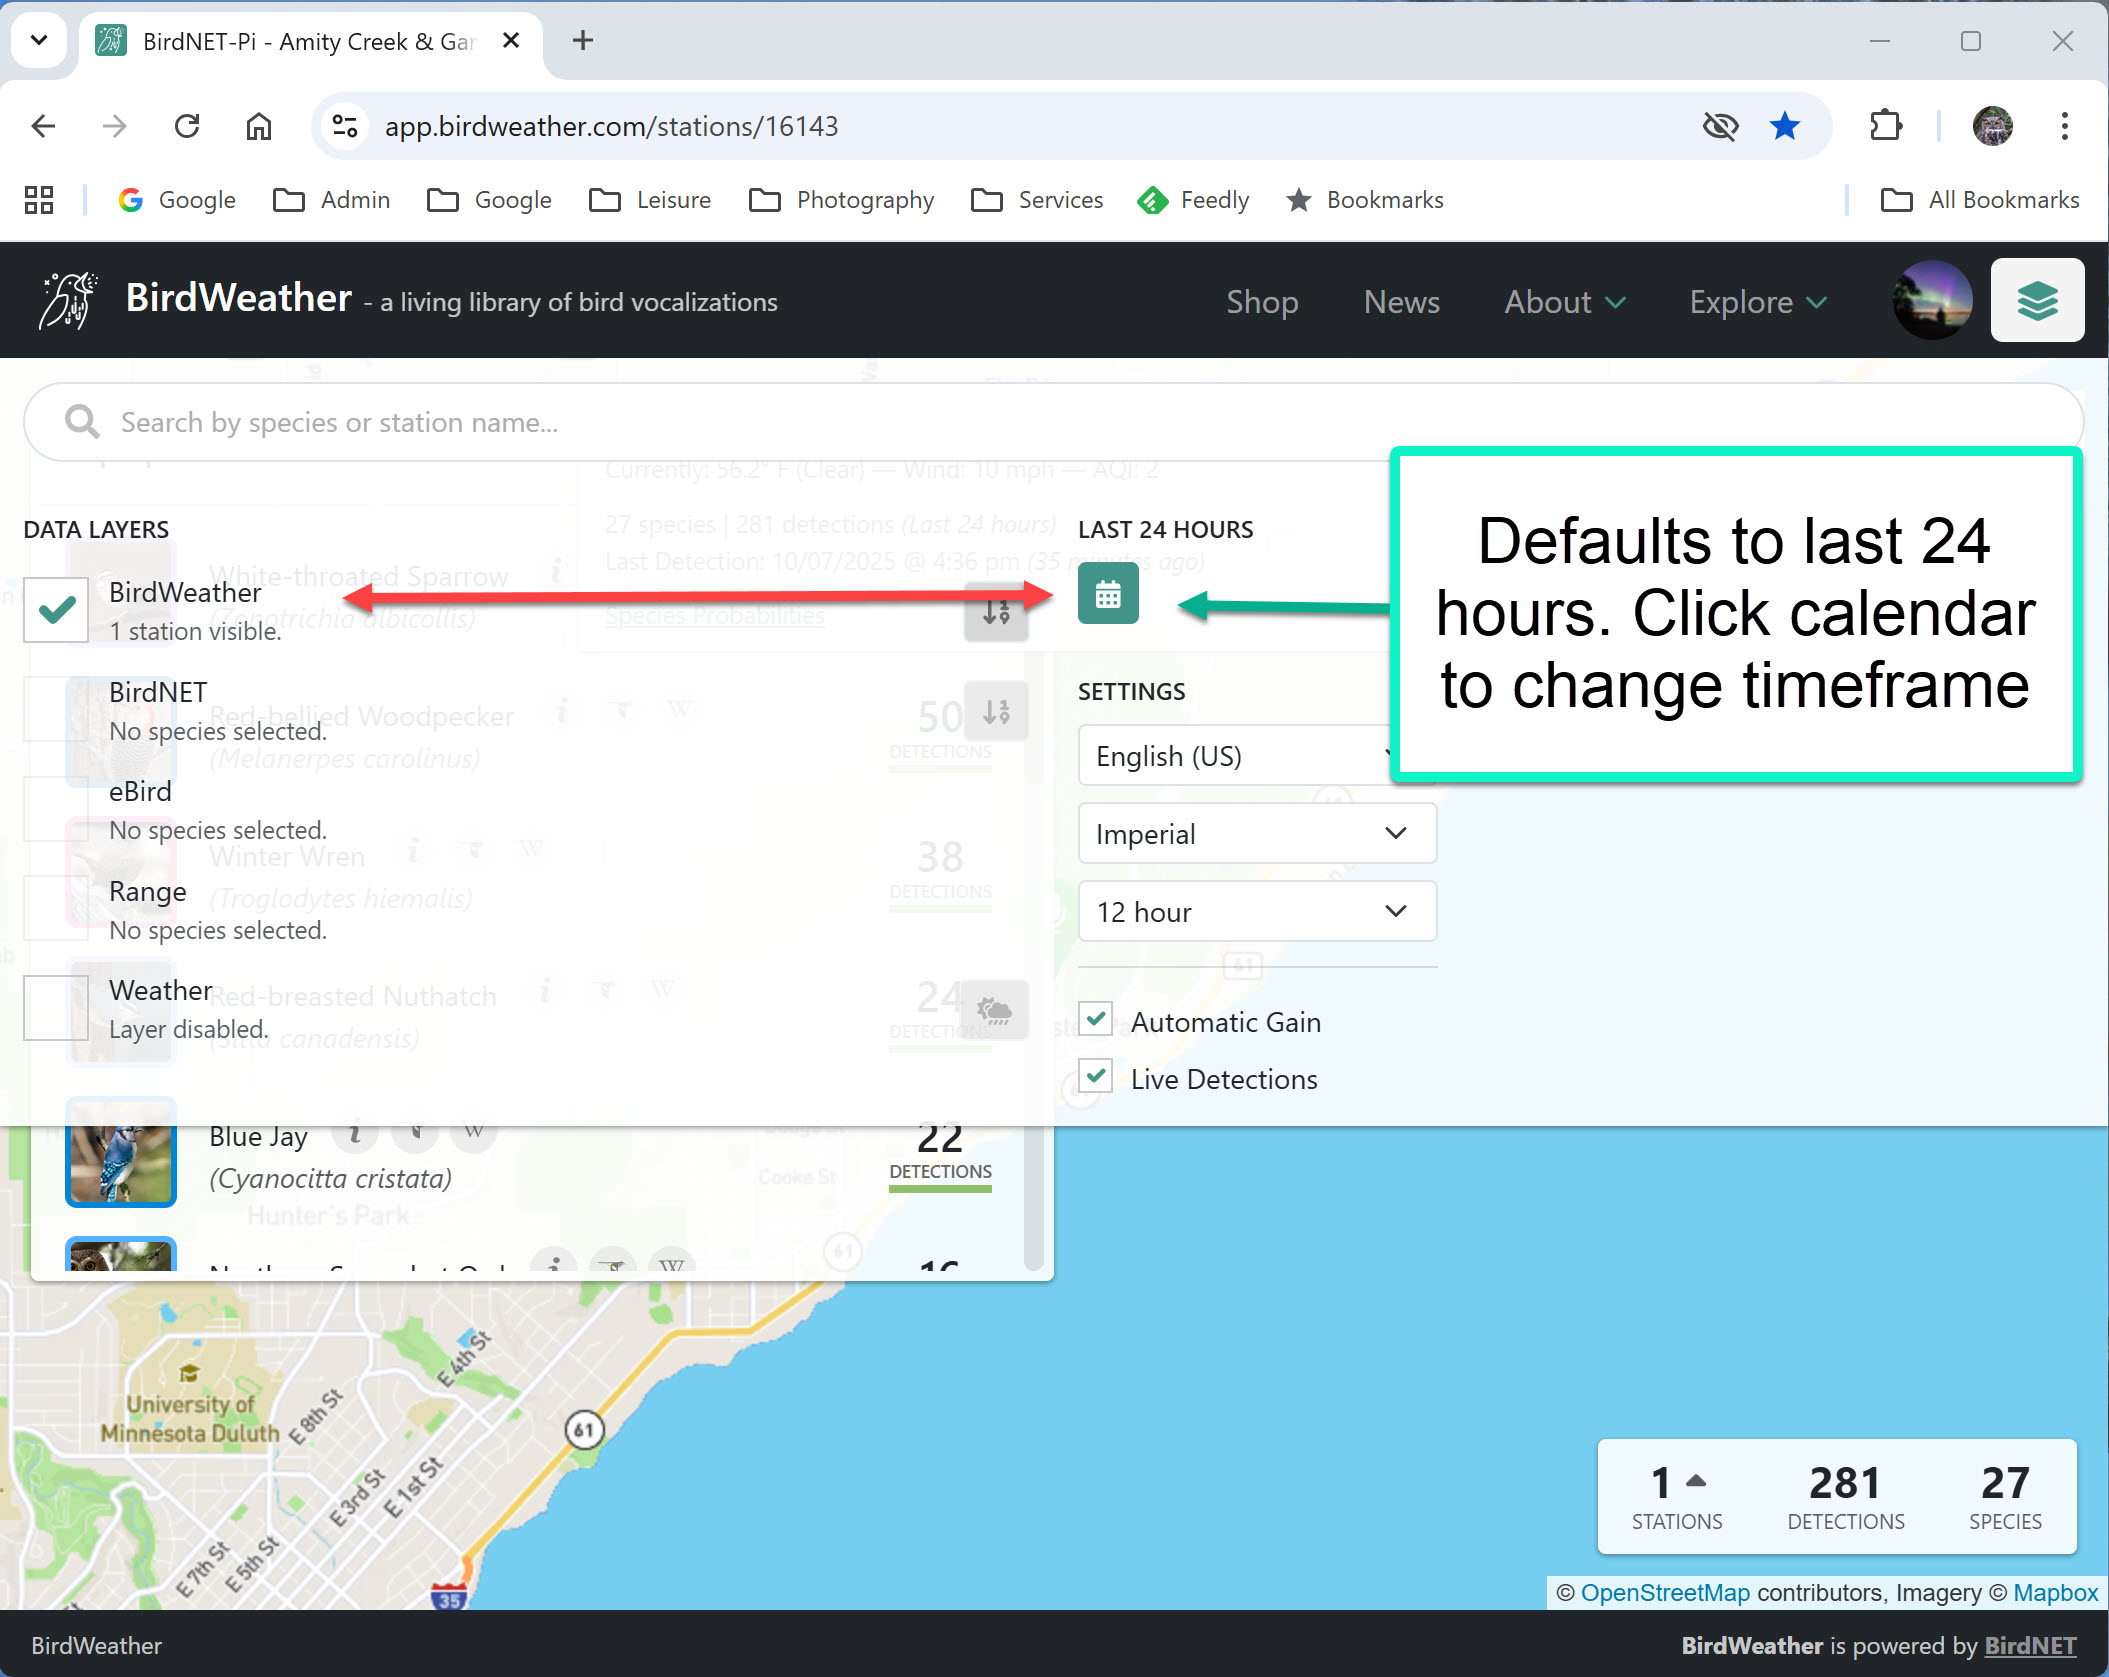
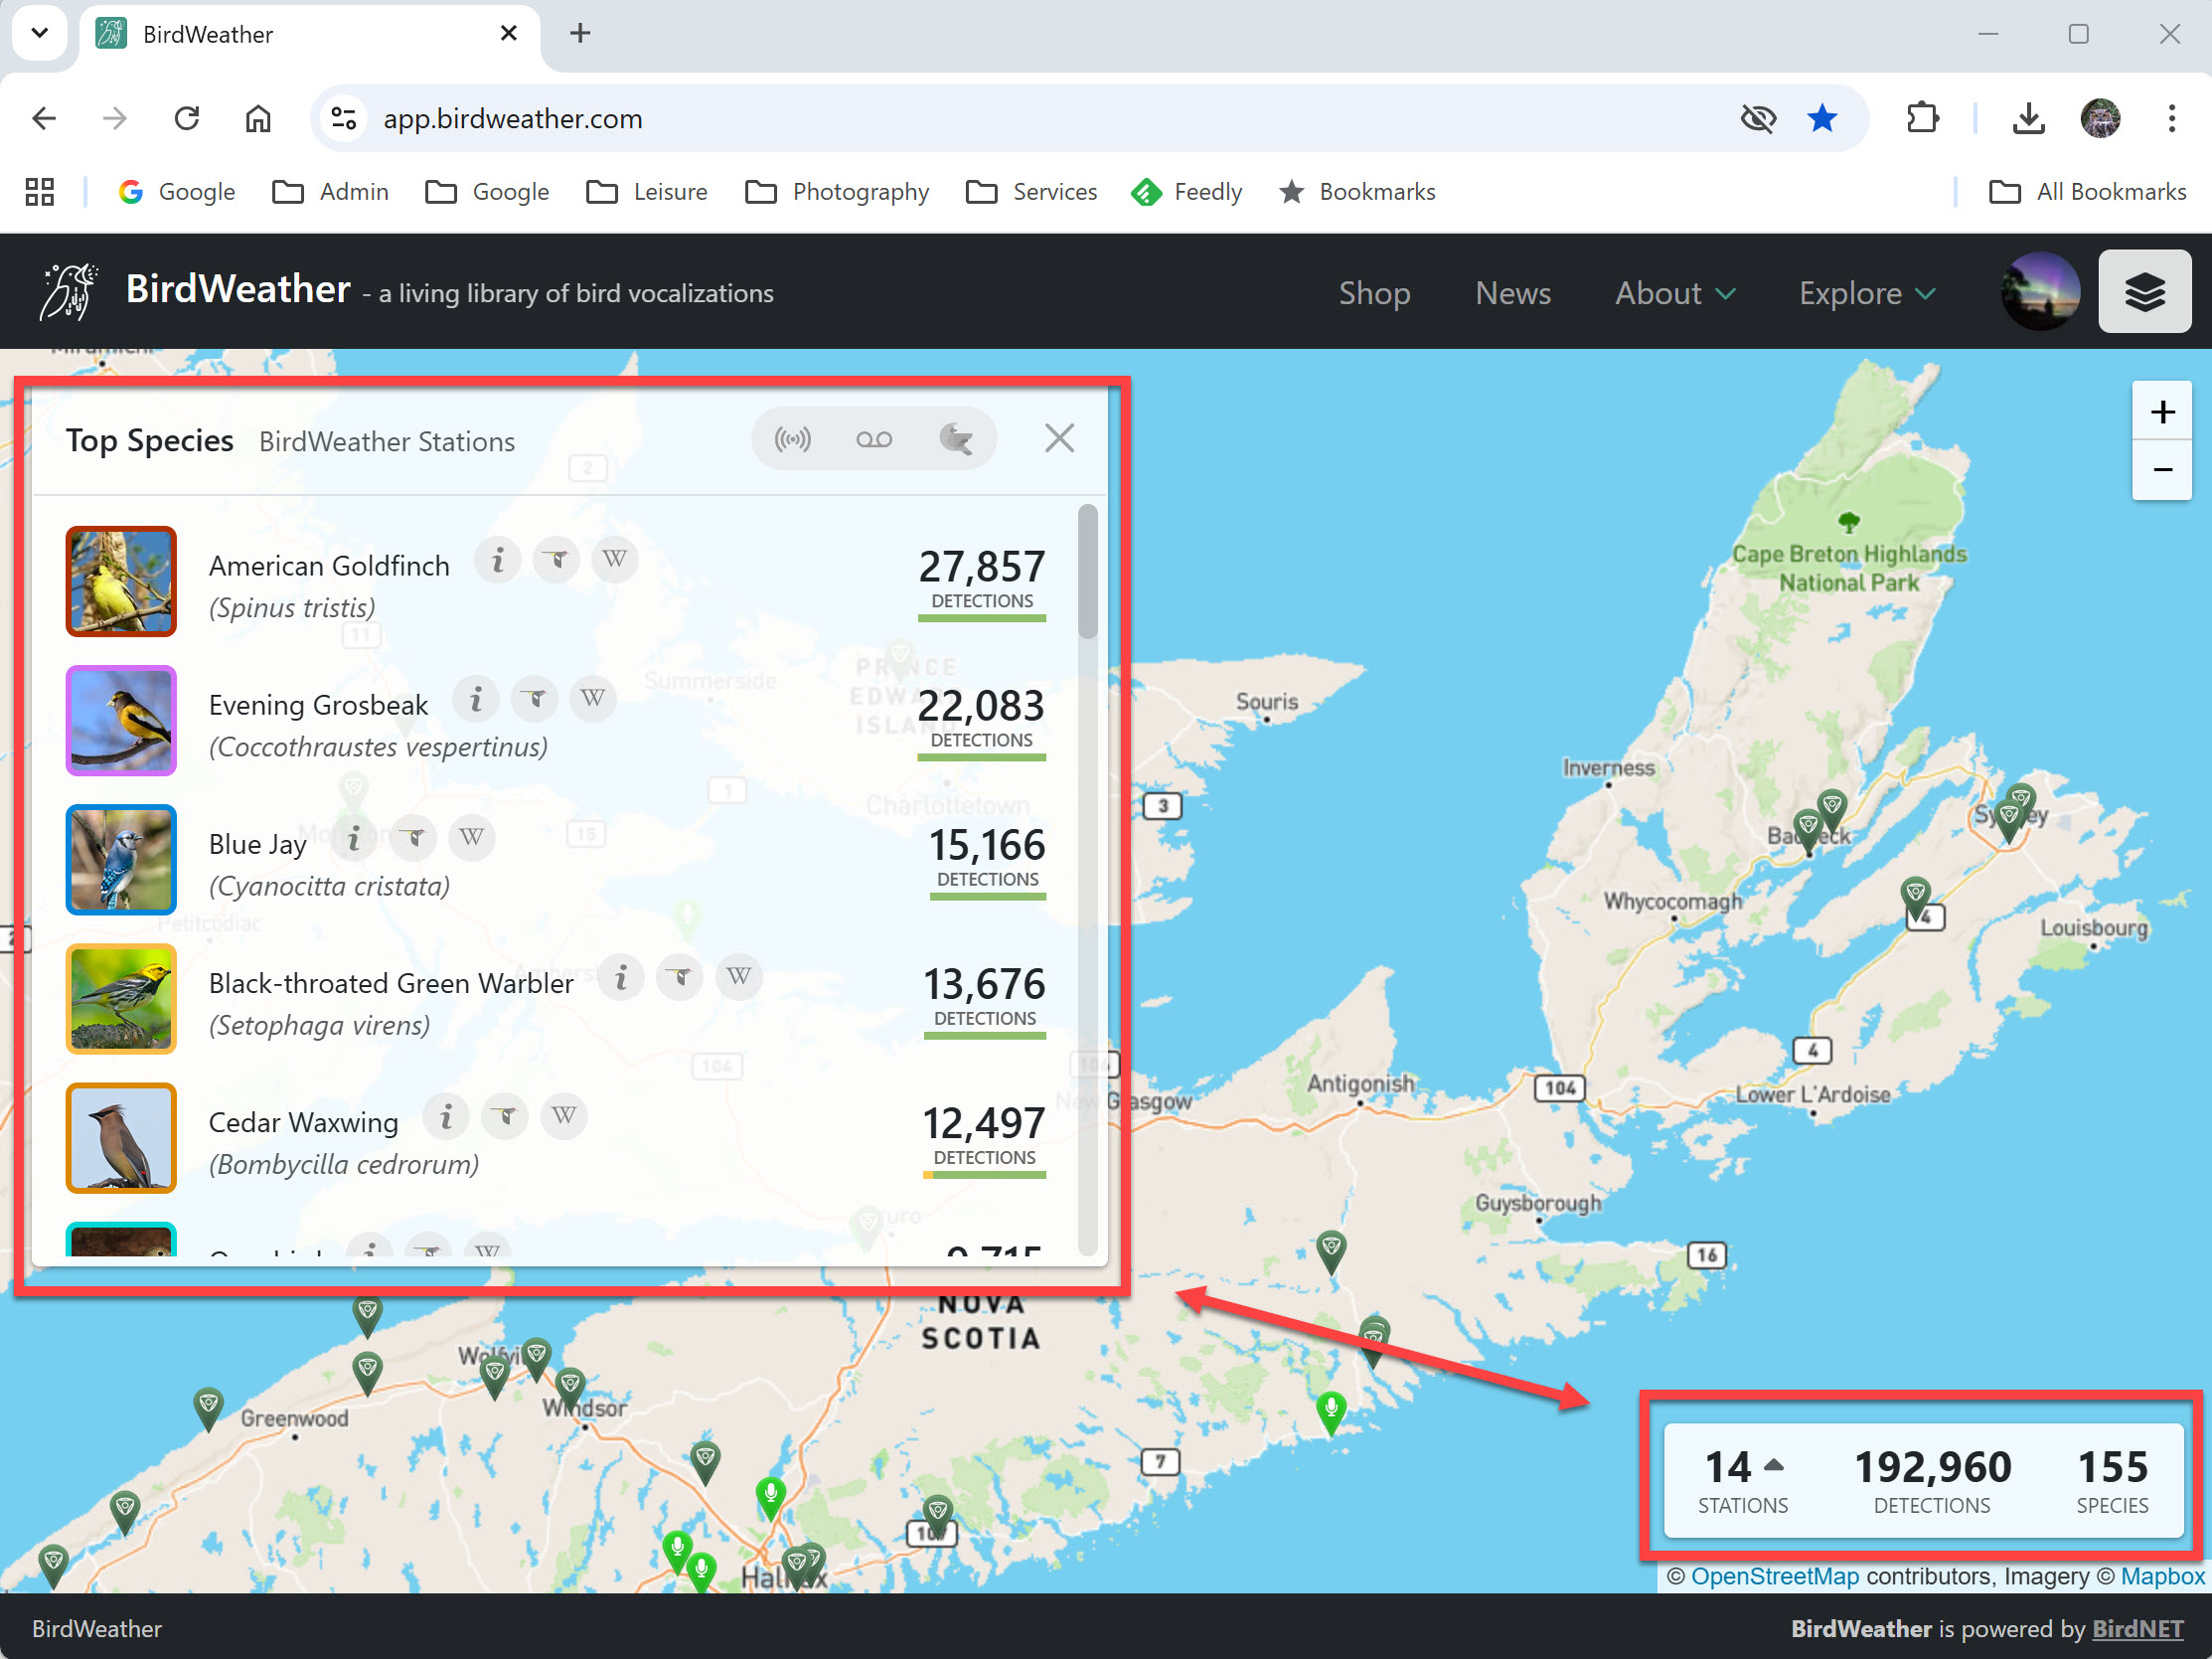
I have immensely enjoyed using my BirdNET-Pi bird song listening devices. I have built one for my home, cabin, and several friends. These BirdNET-Pi’s are connected to both the internet and electrical grid, and upload their sound ID’s automatically to BirdWeather, which enables me (and anyone) to remotely monitor both resident and migrating birds:
- Past 365DaysOfBirds blog posts on …
- Building a BirdNET-Pi
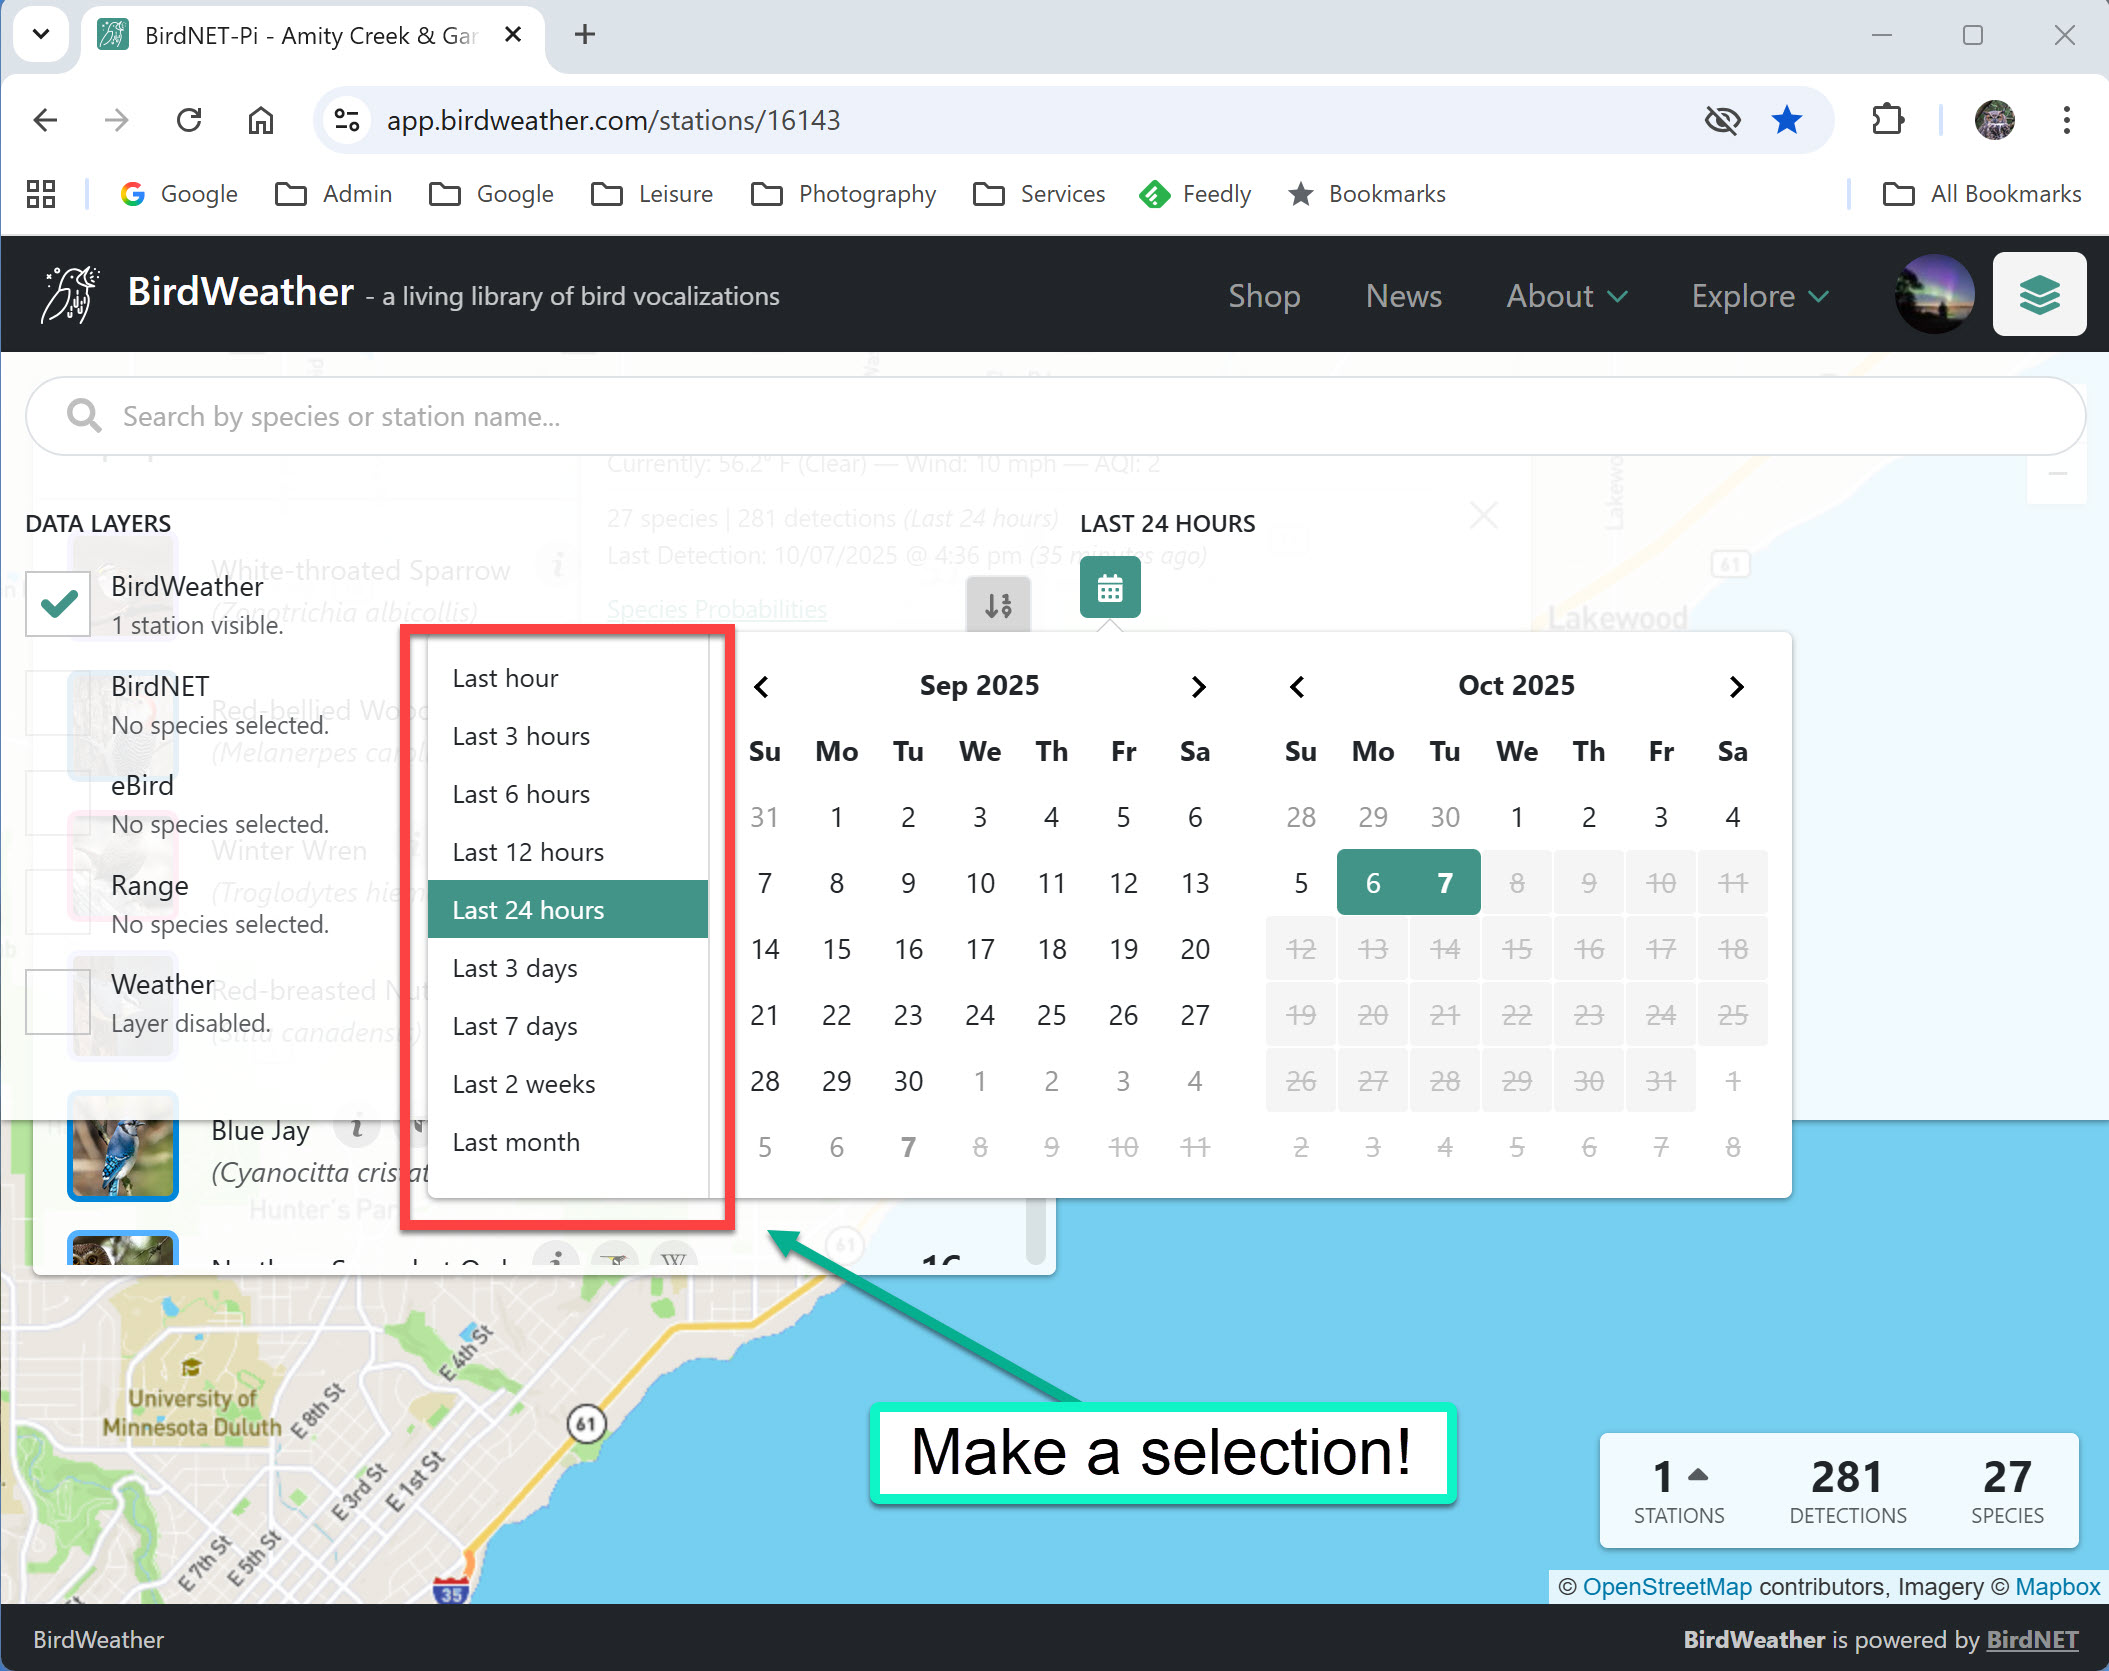
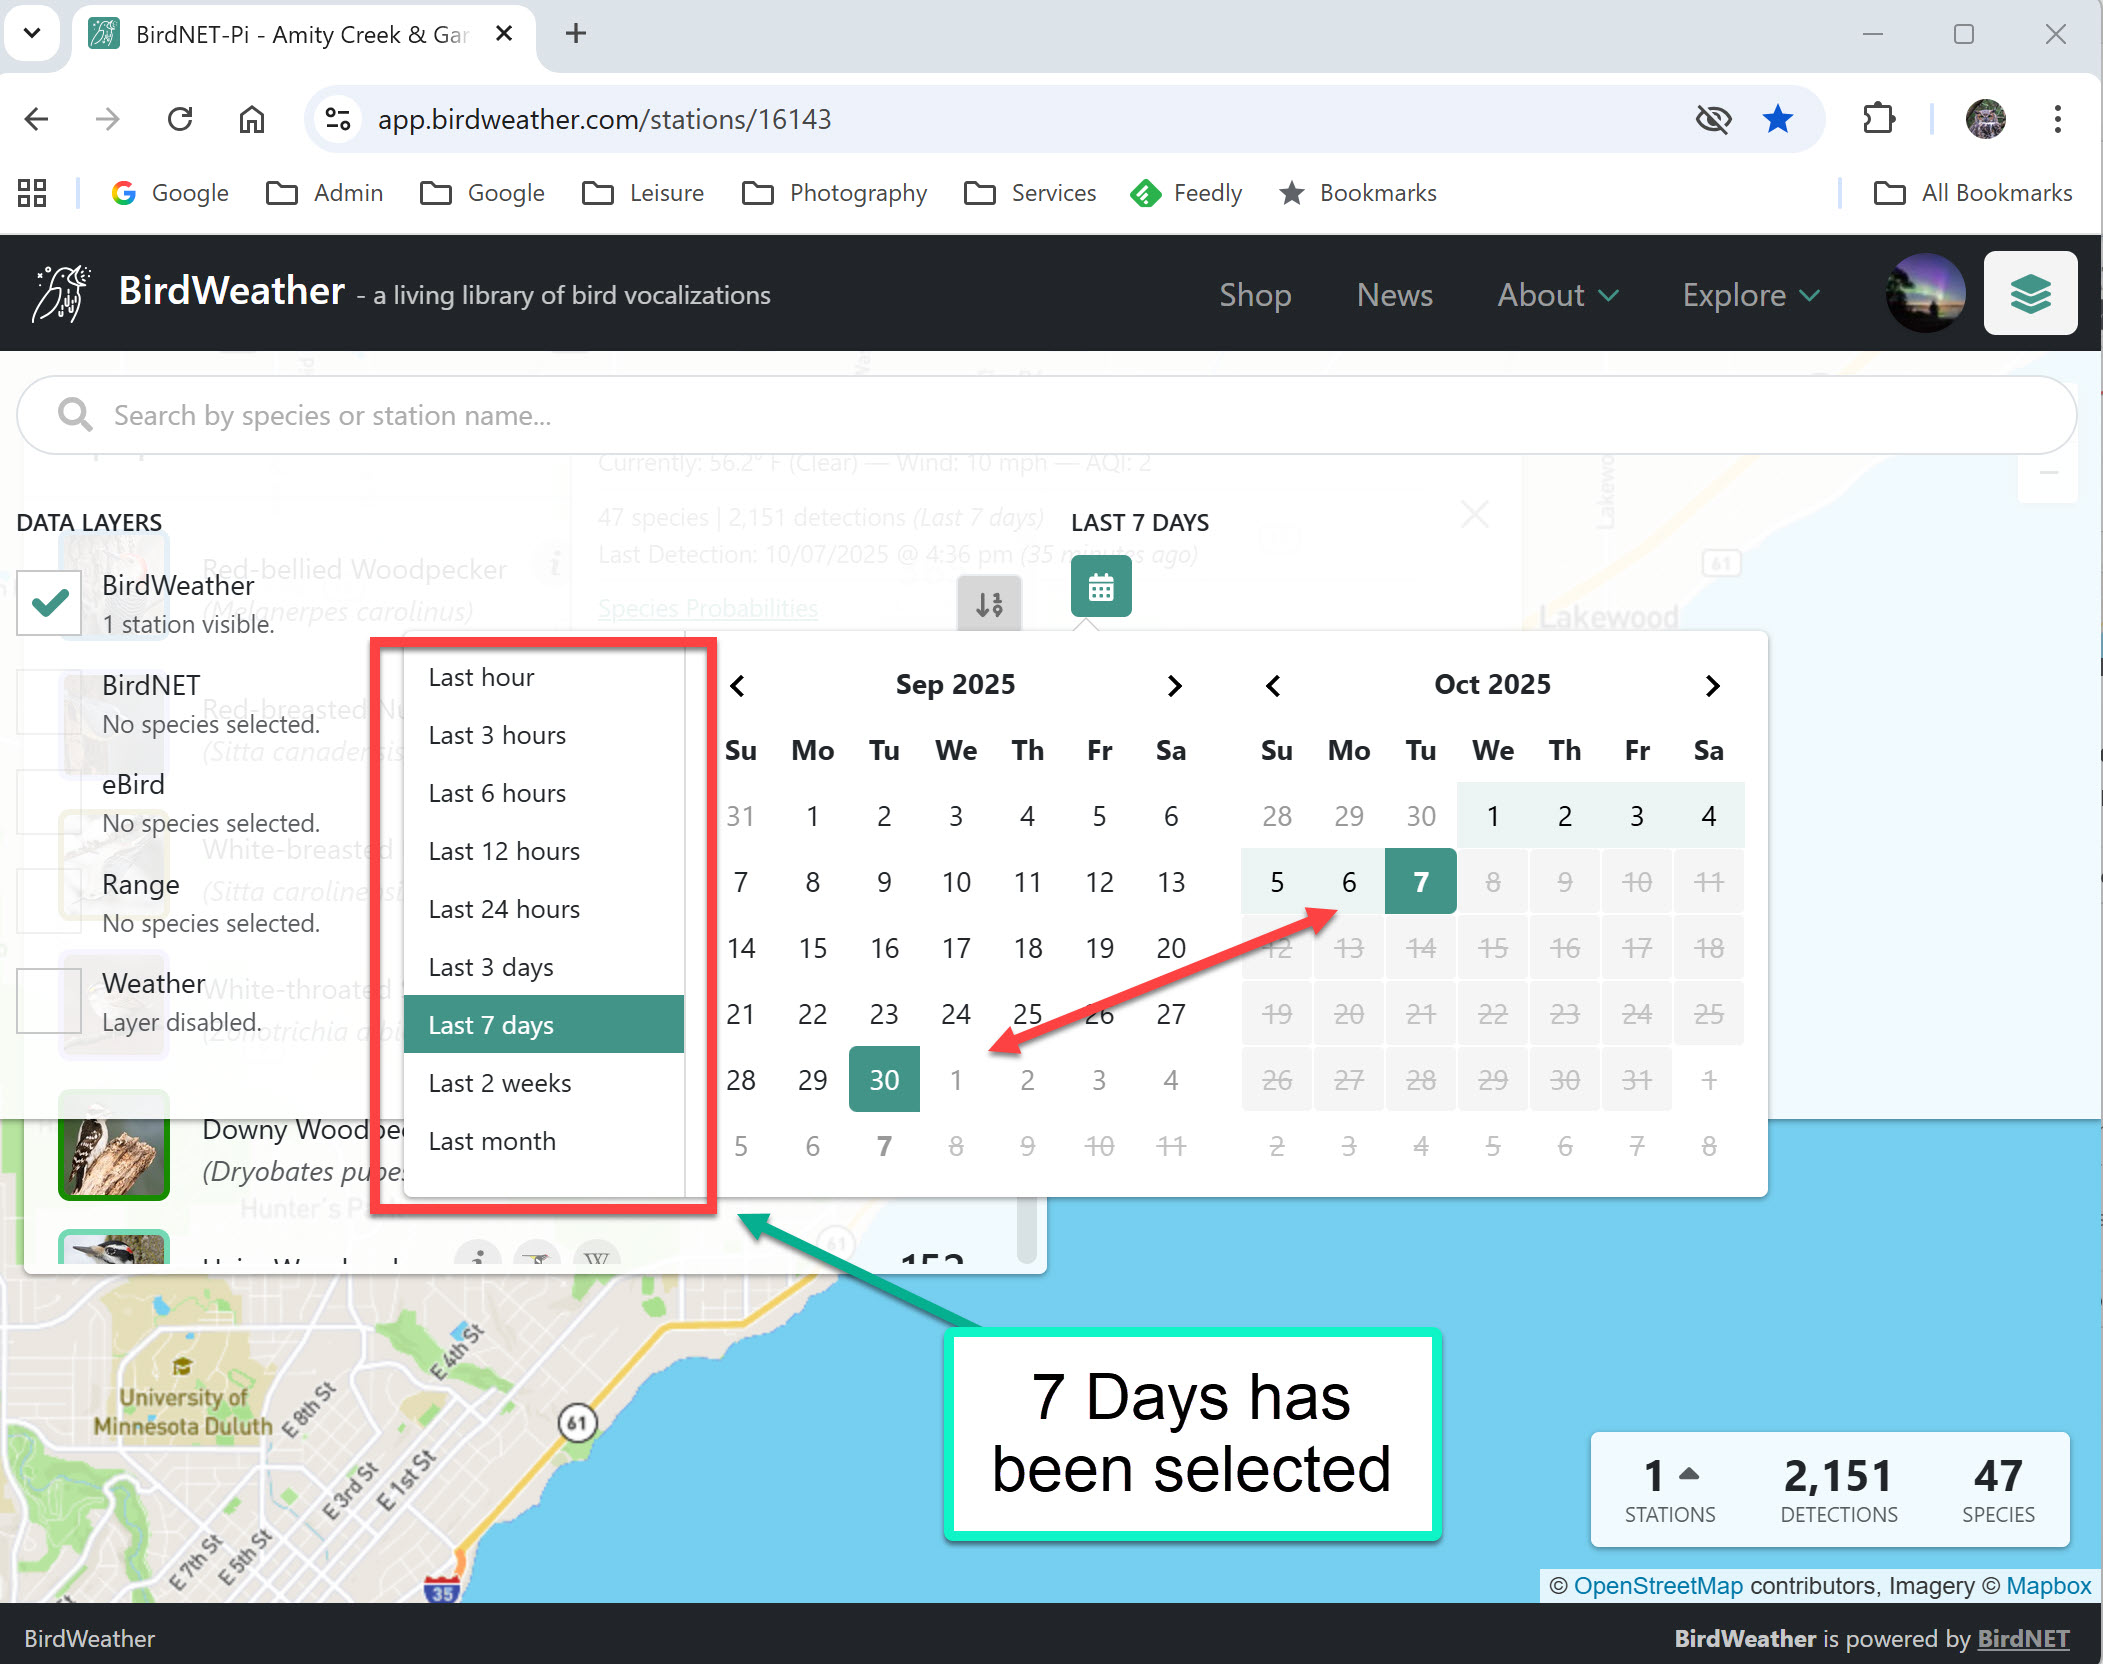
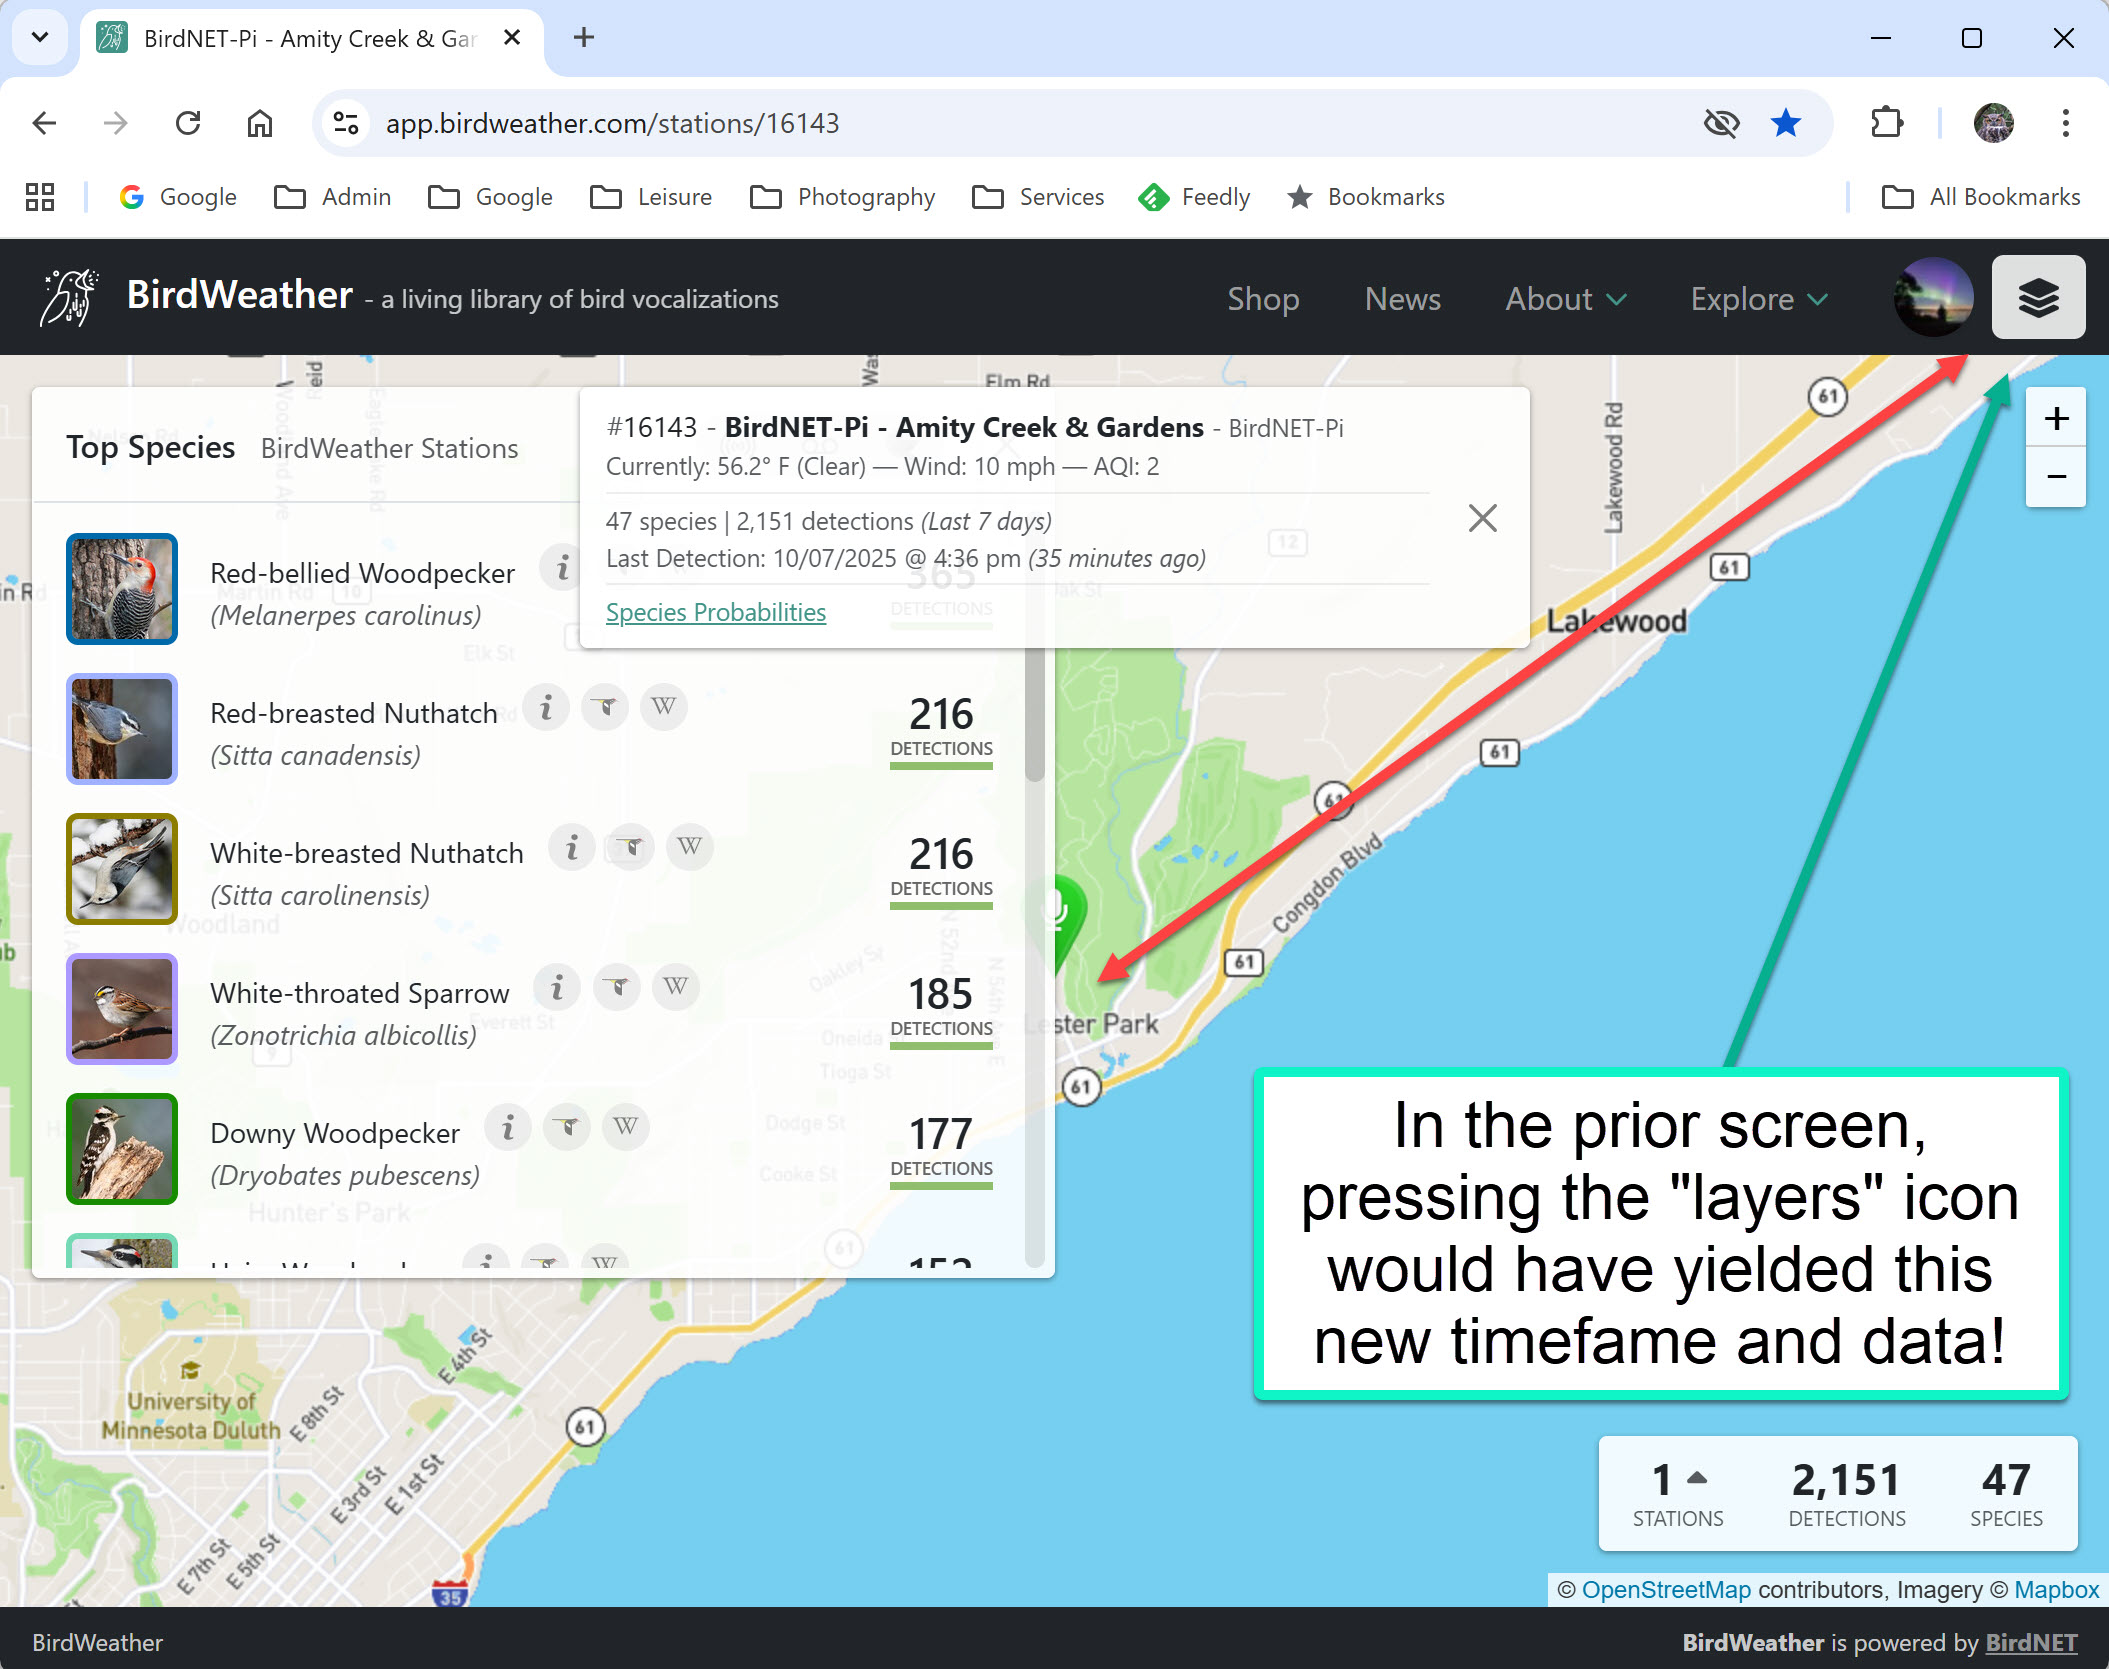
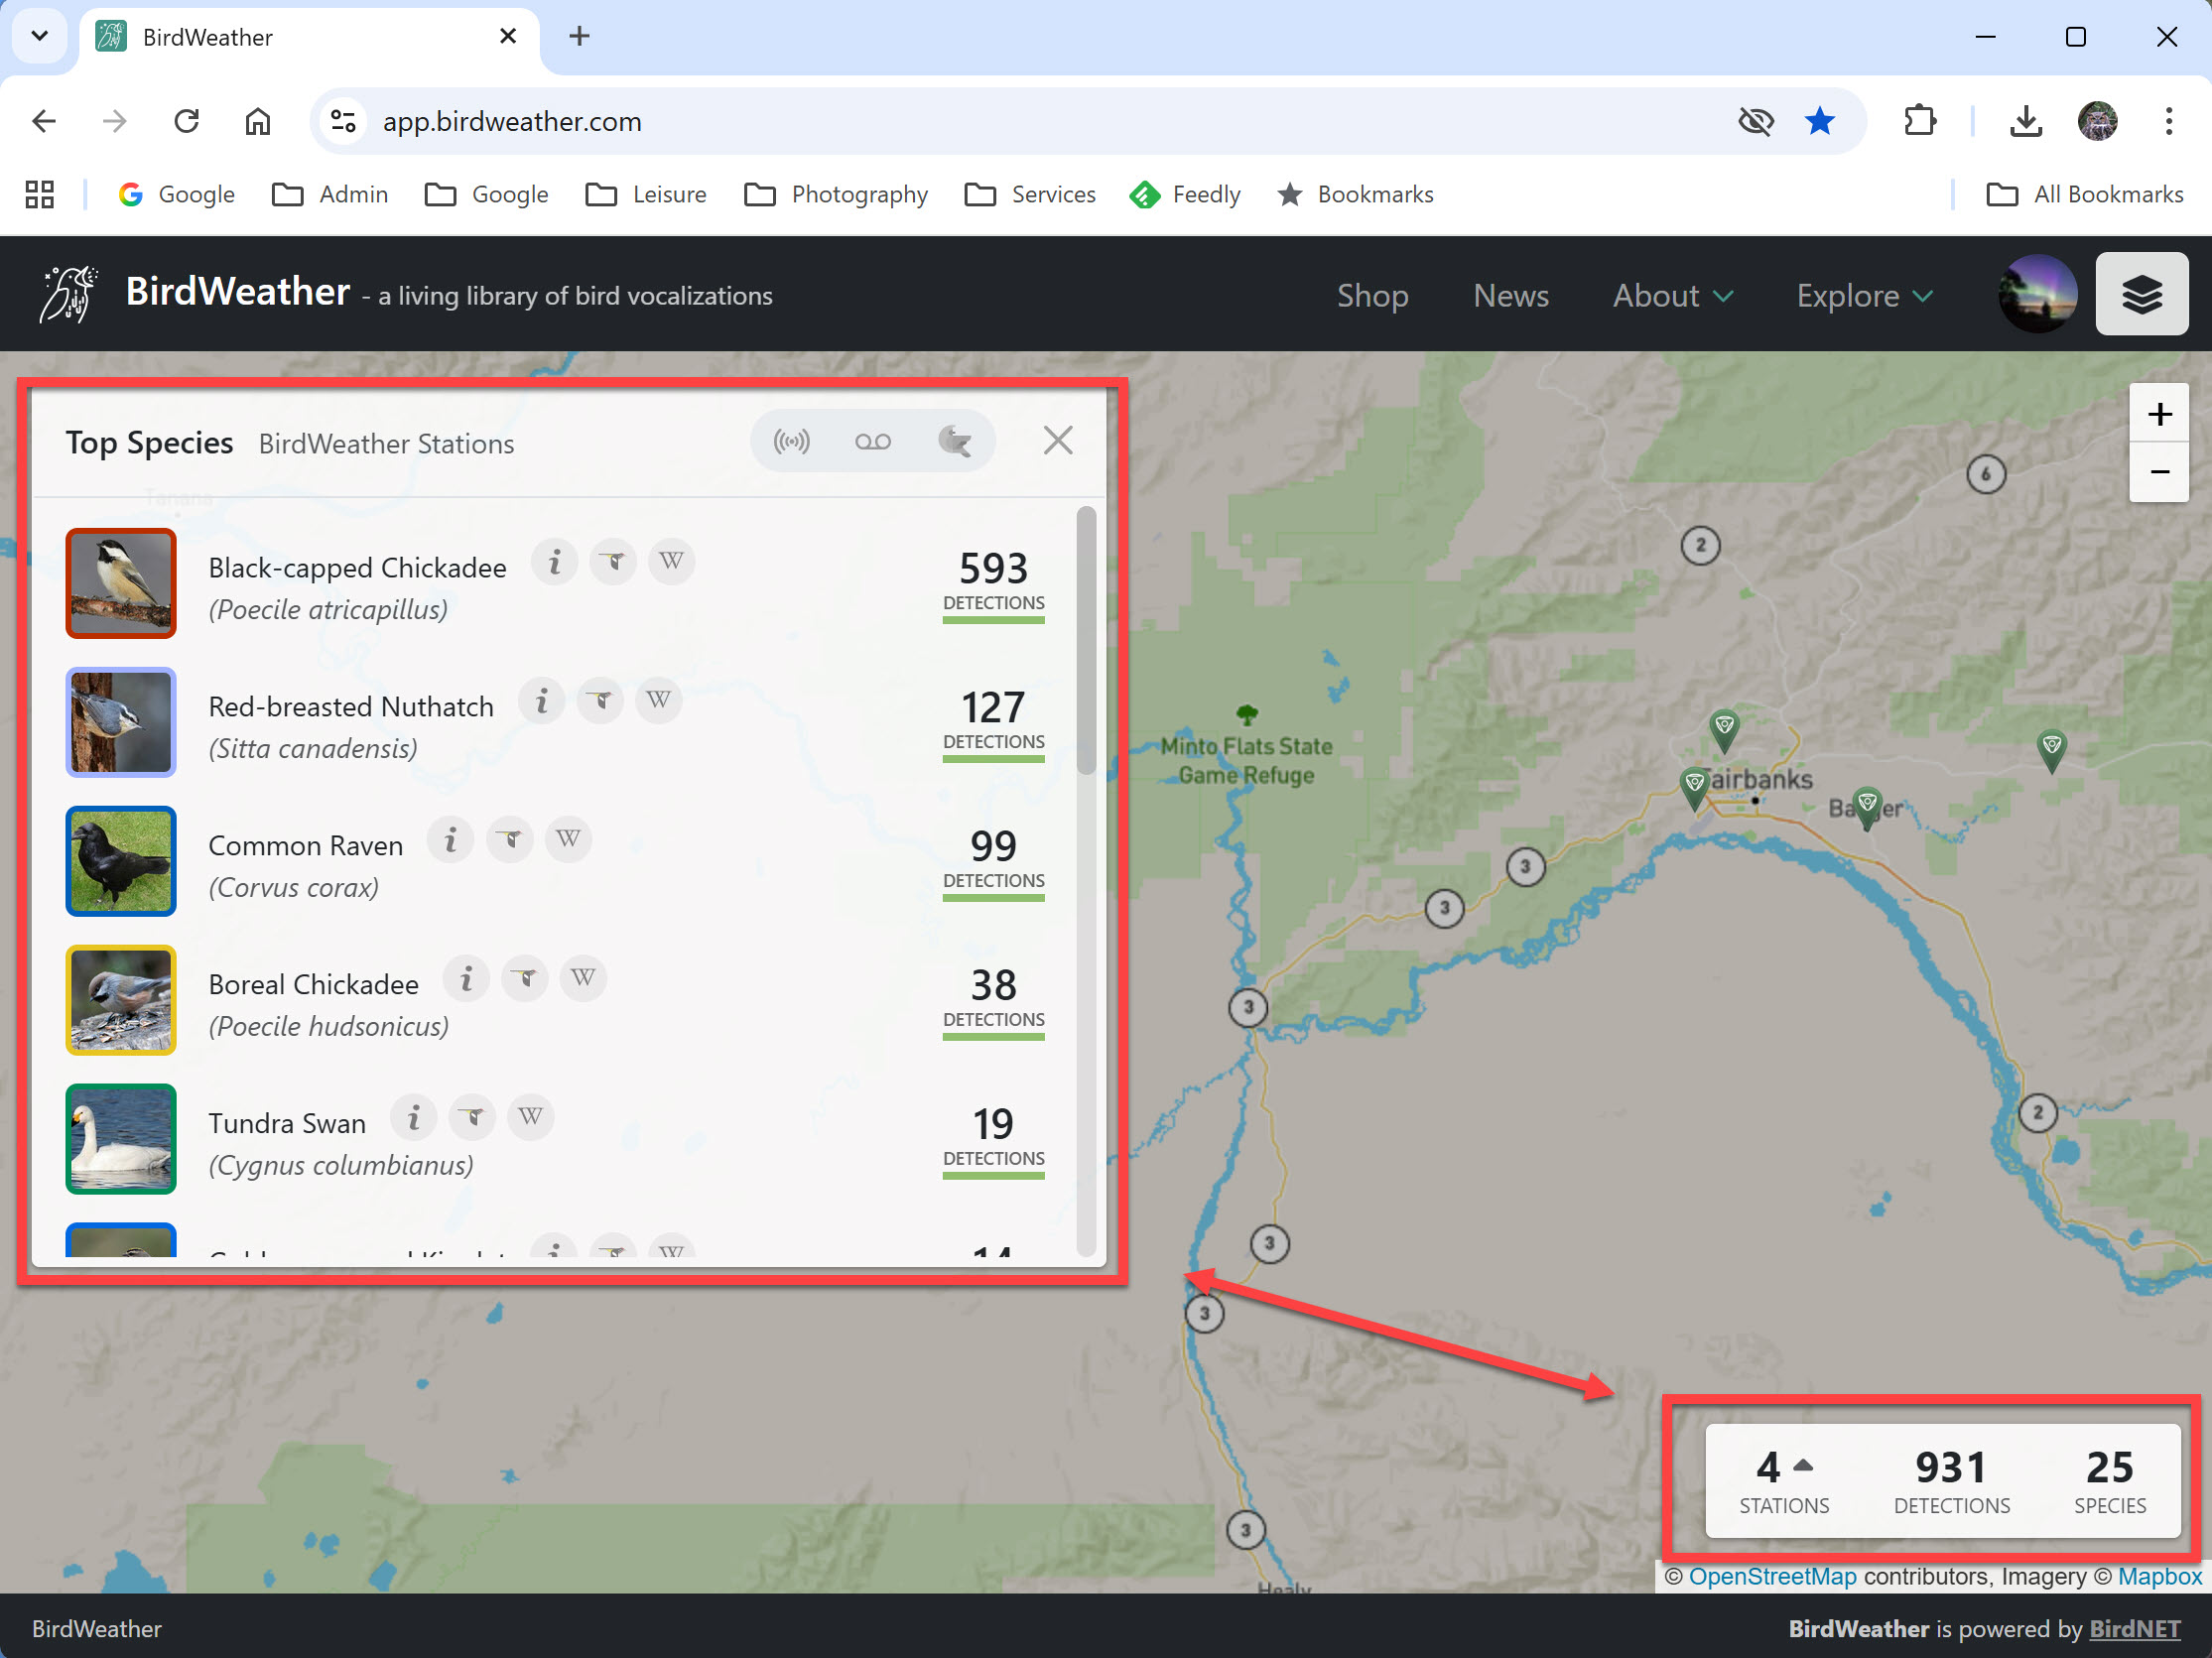
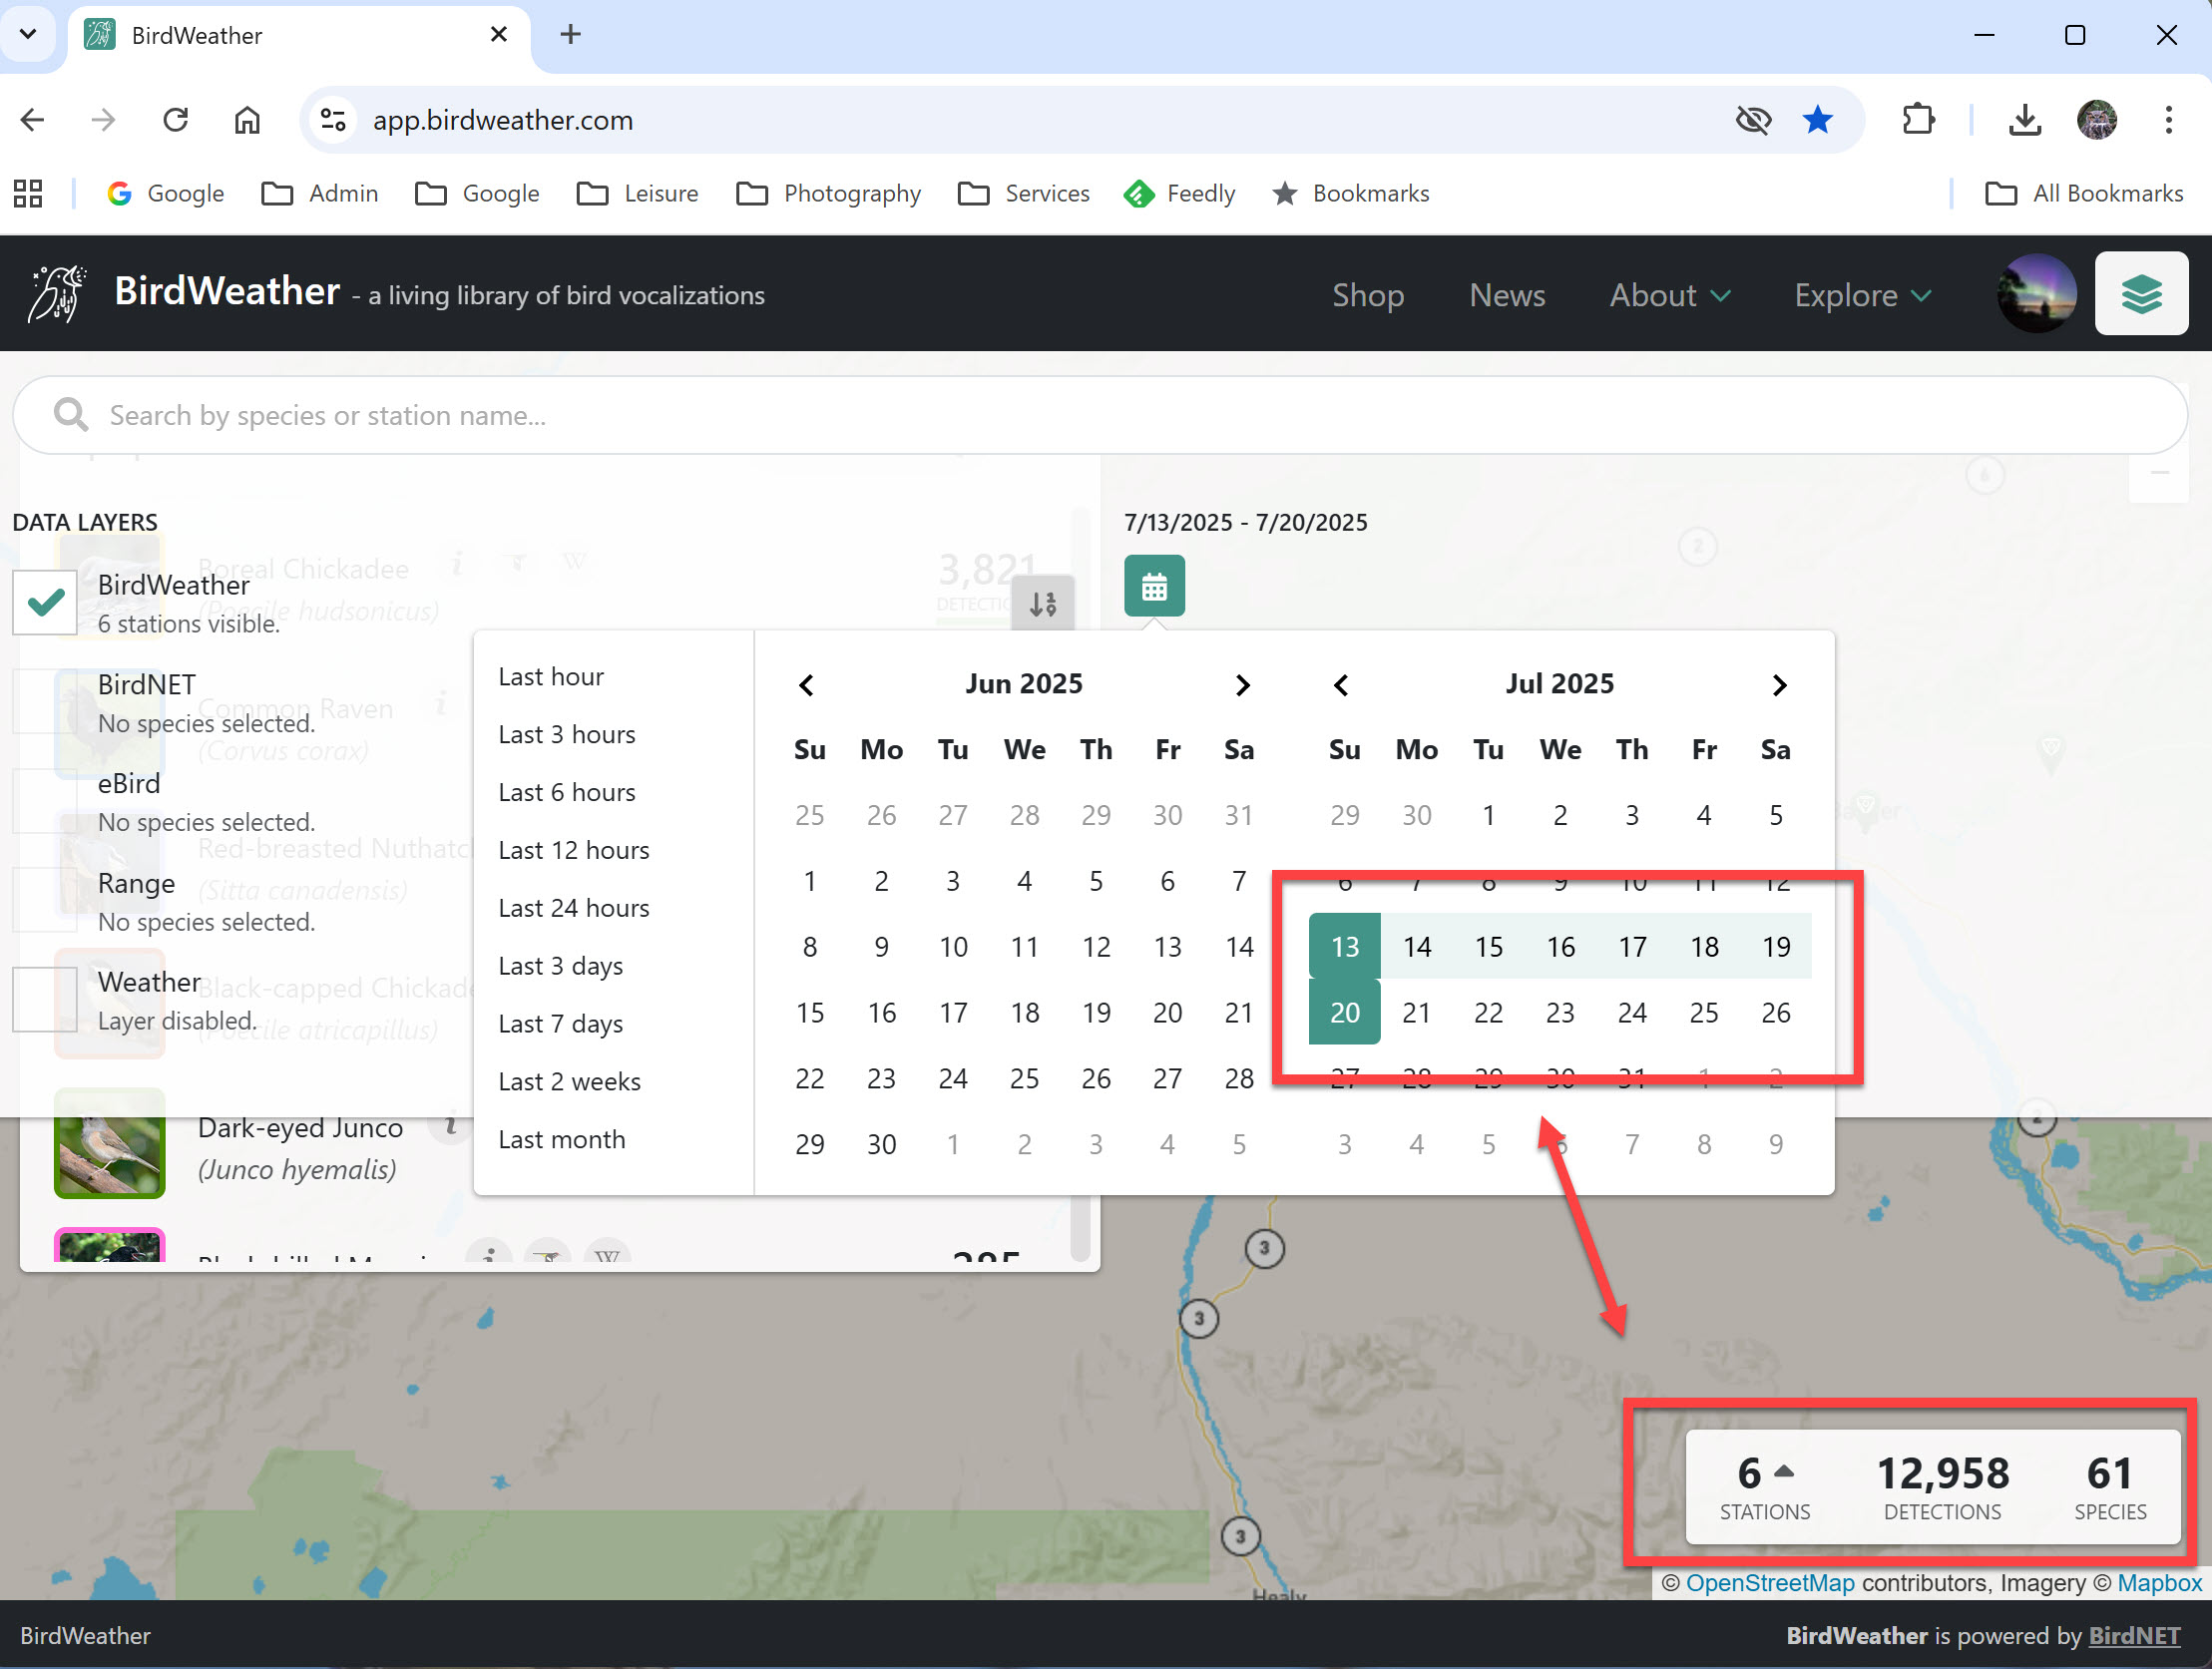
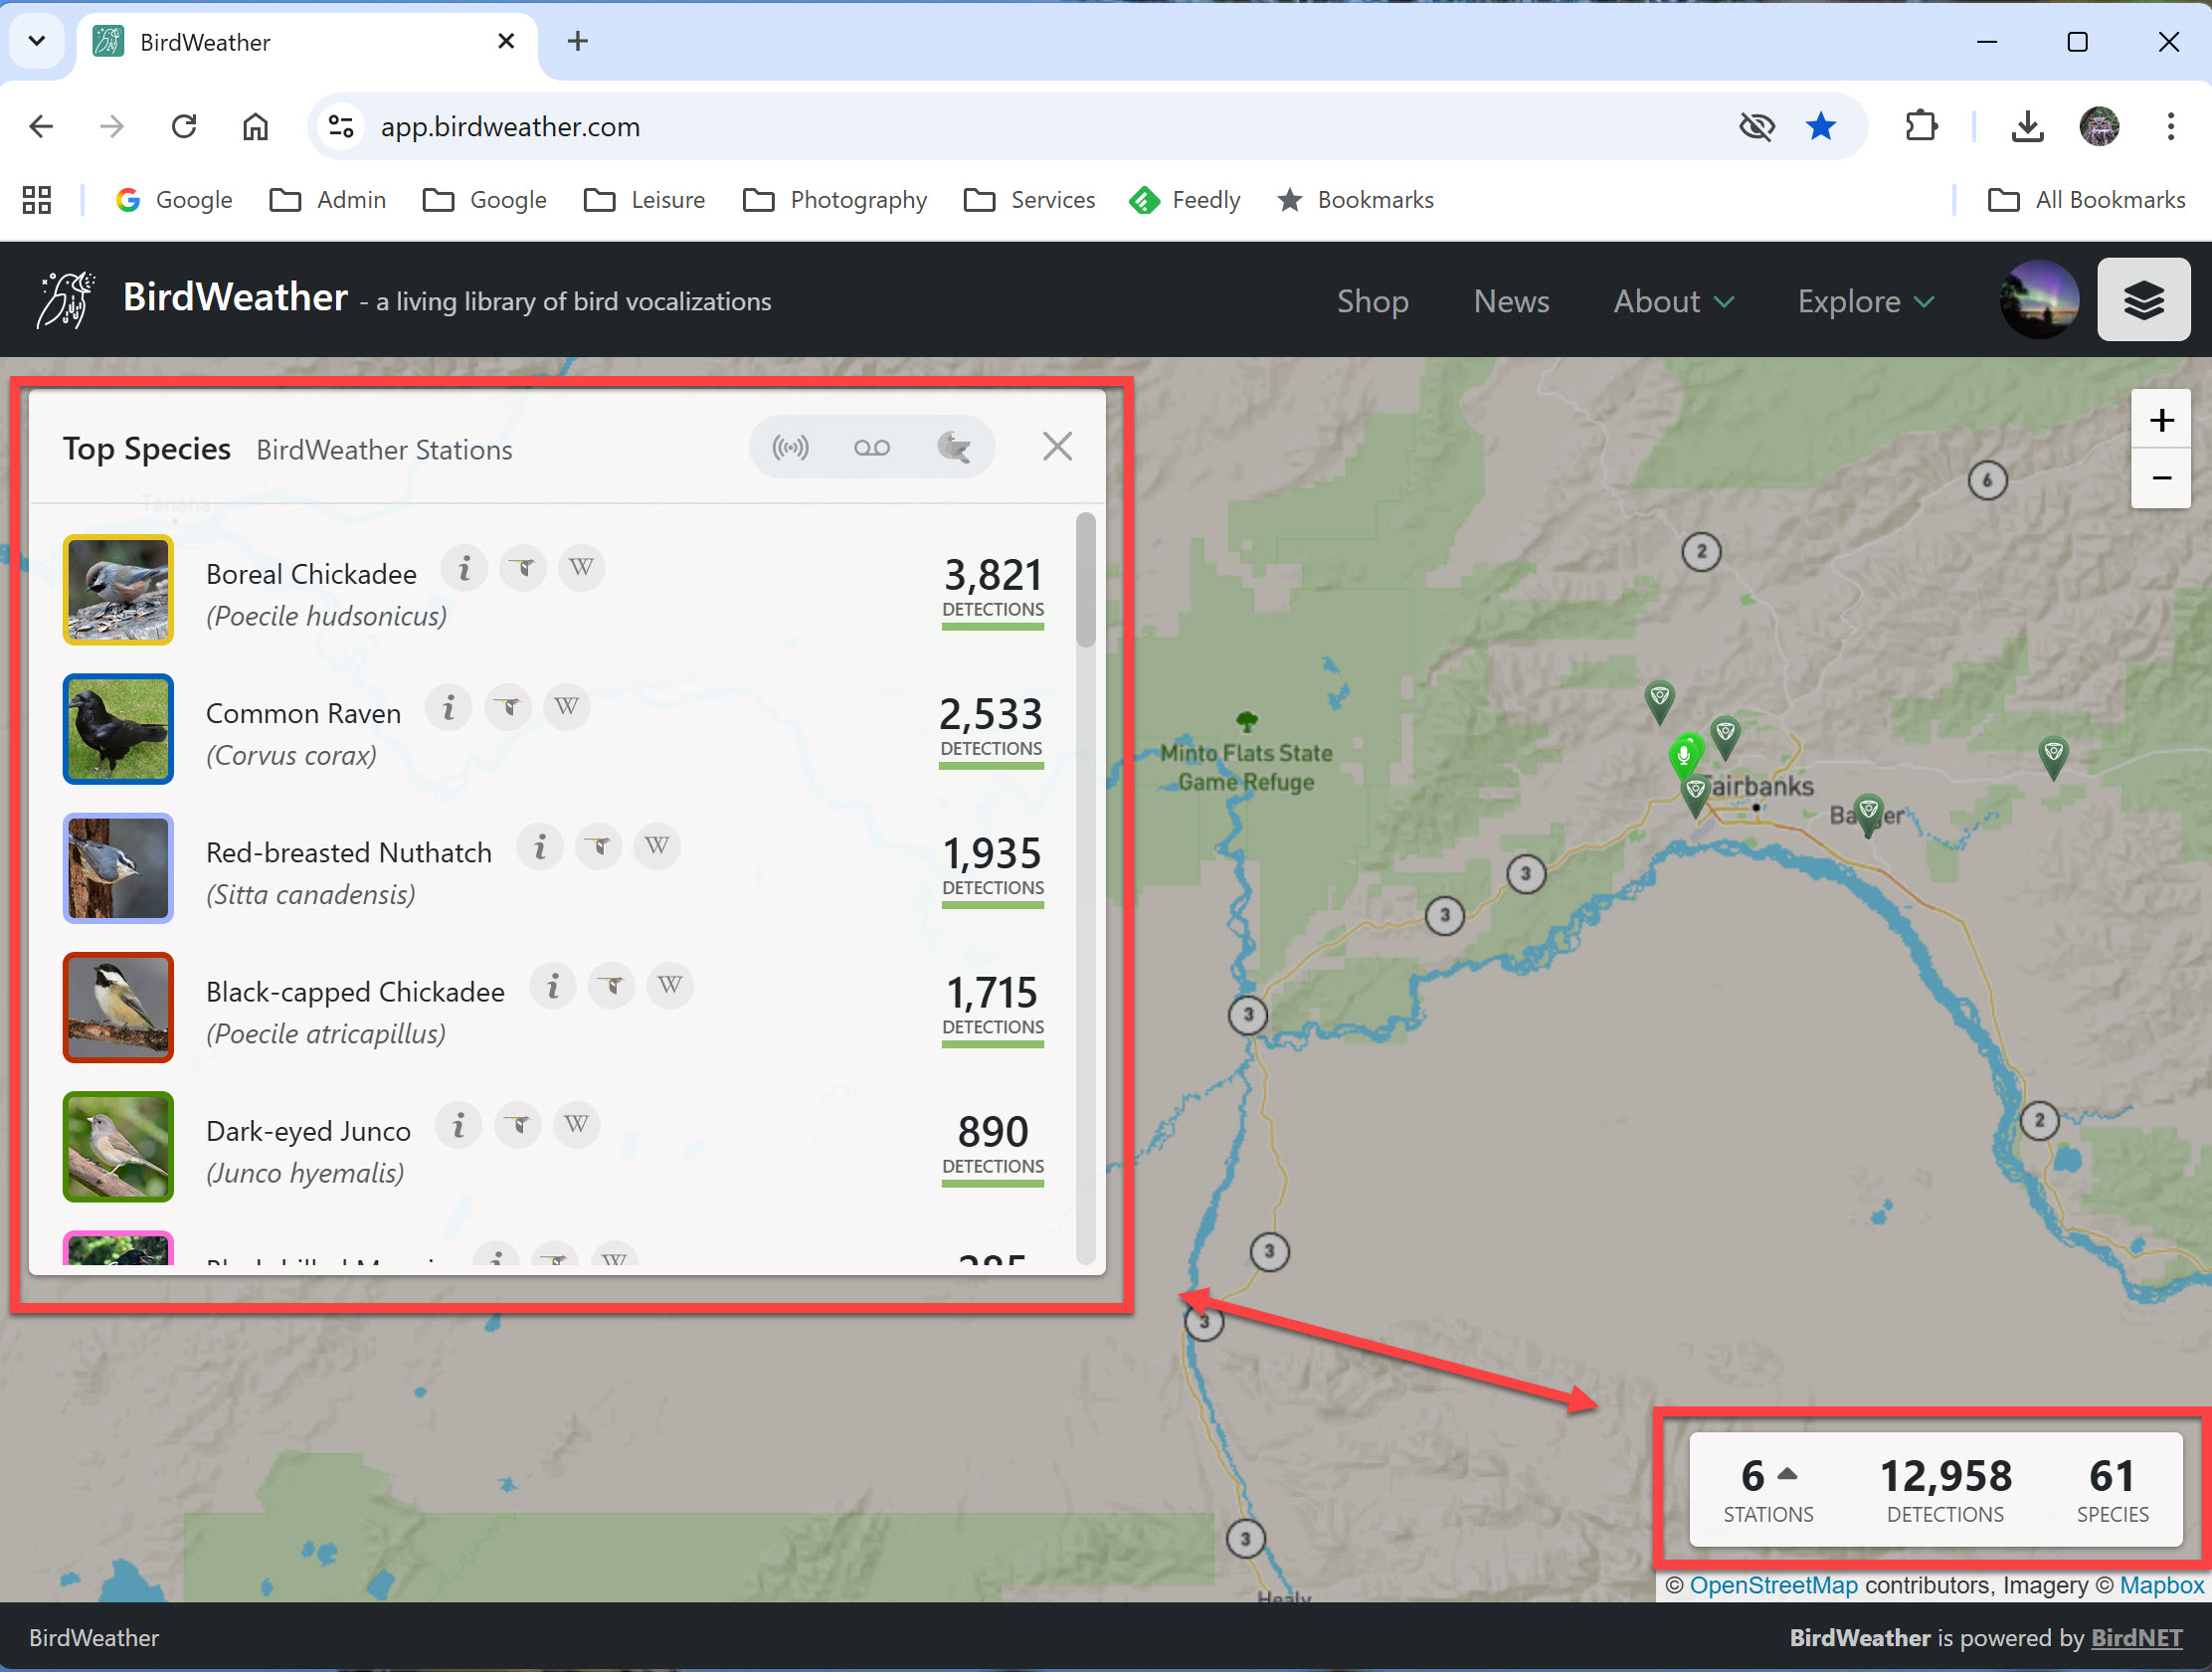
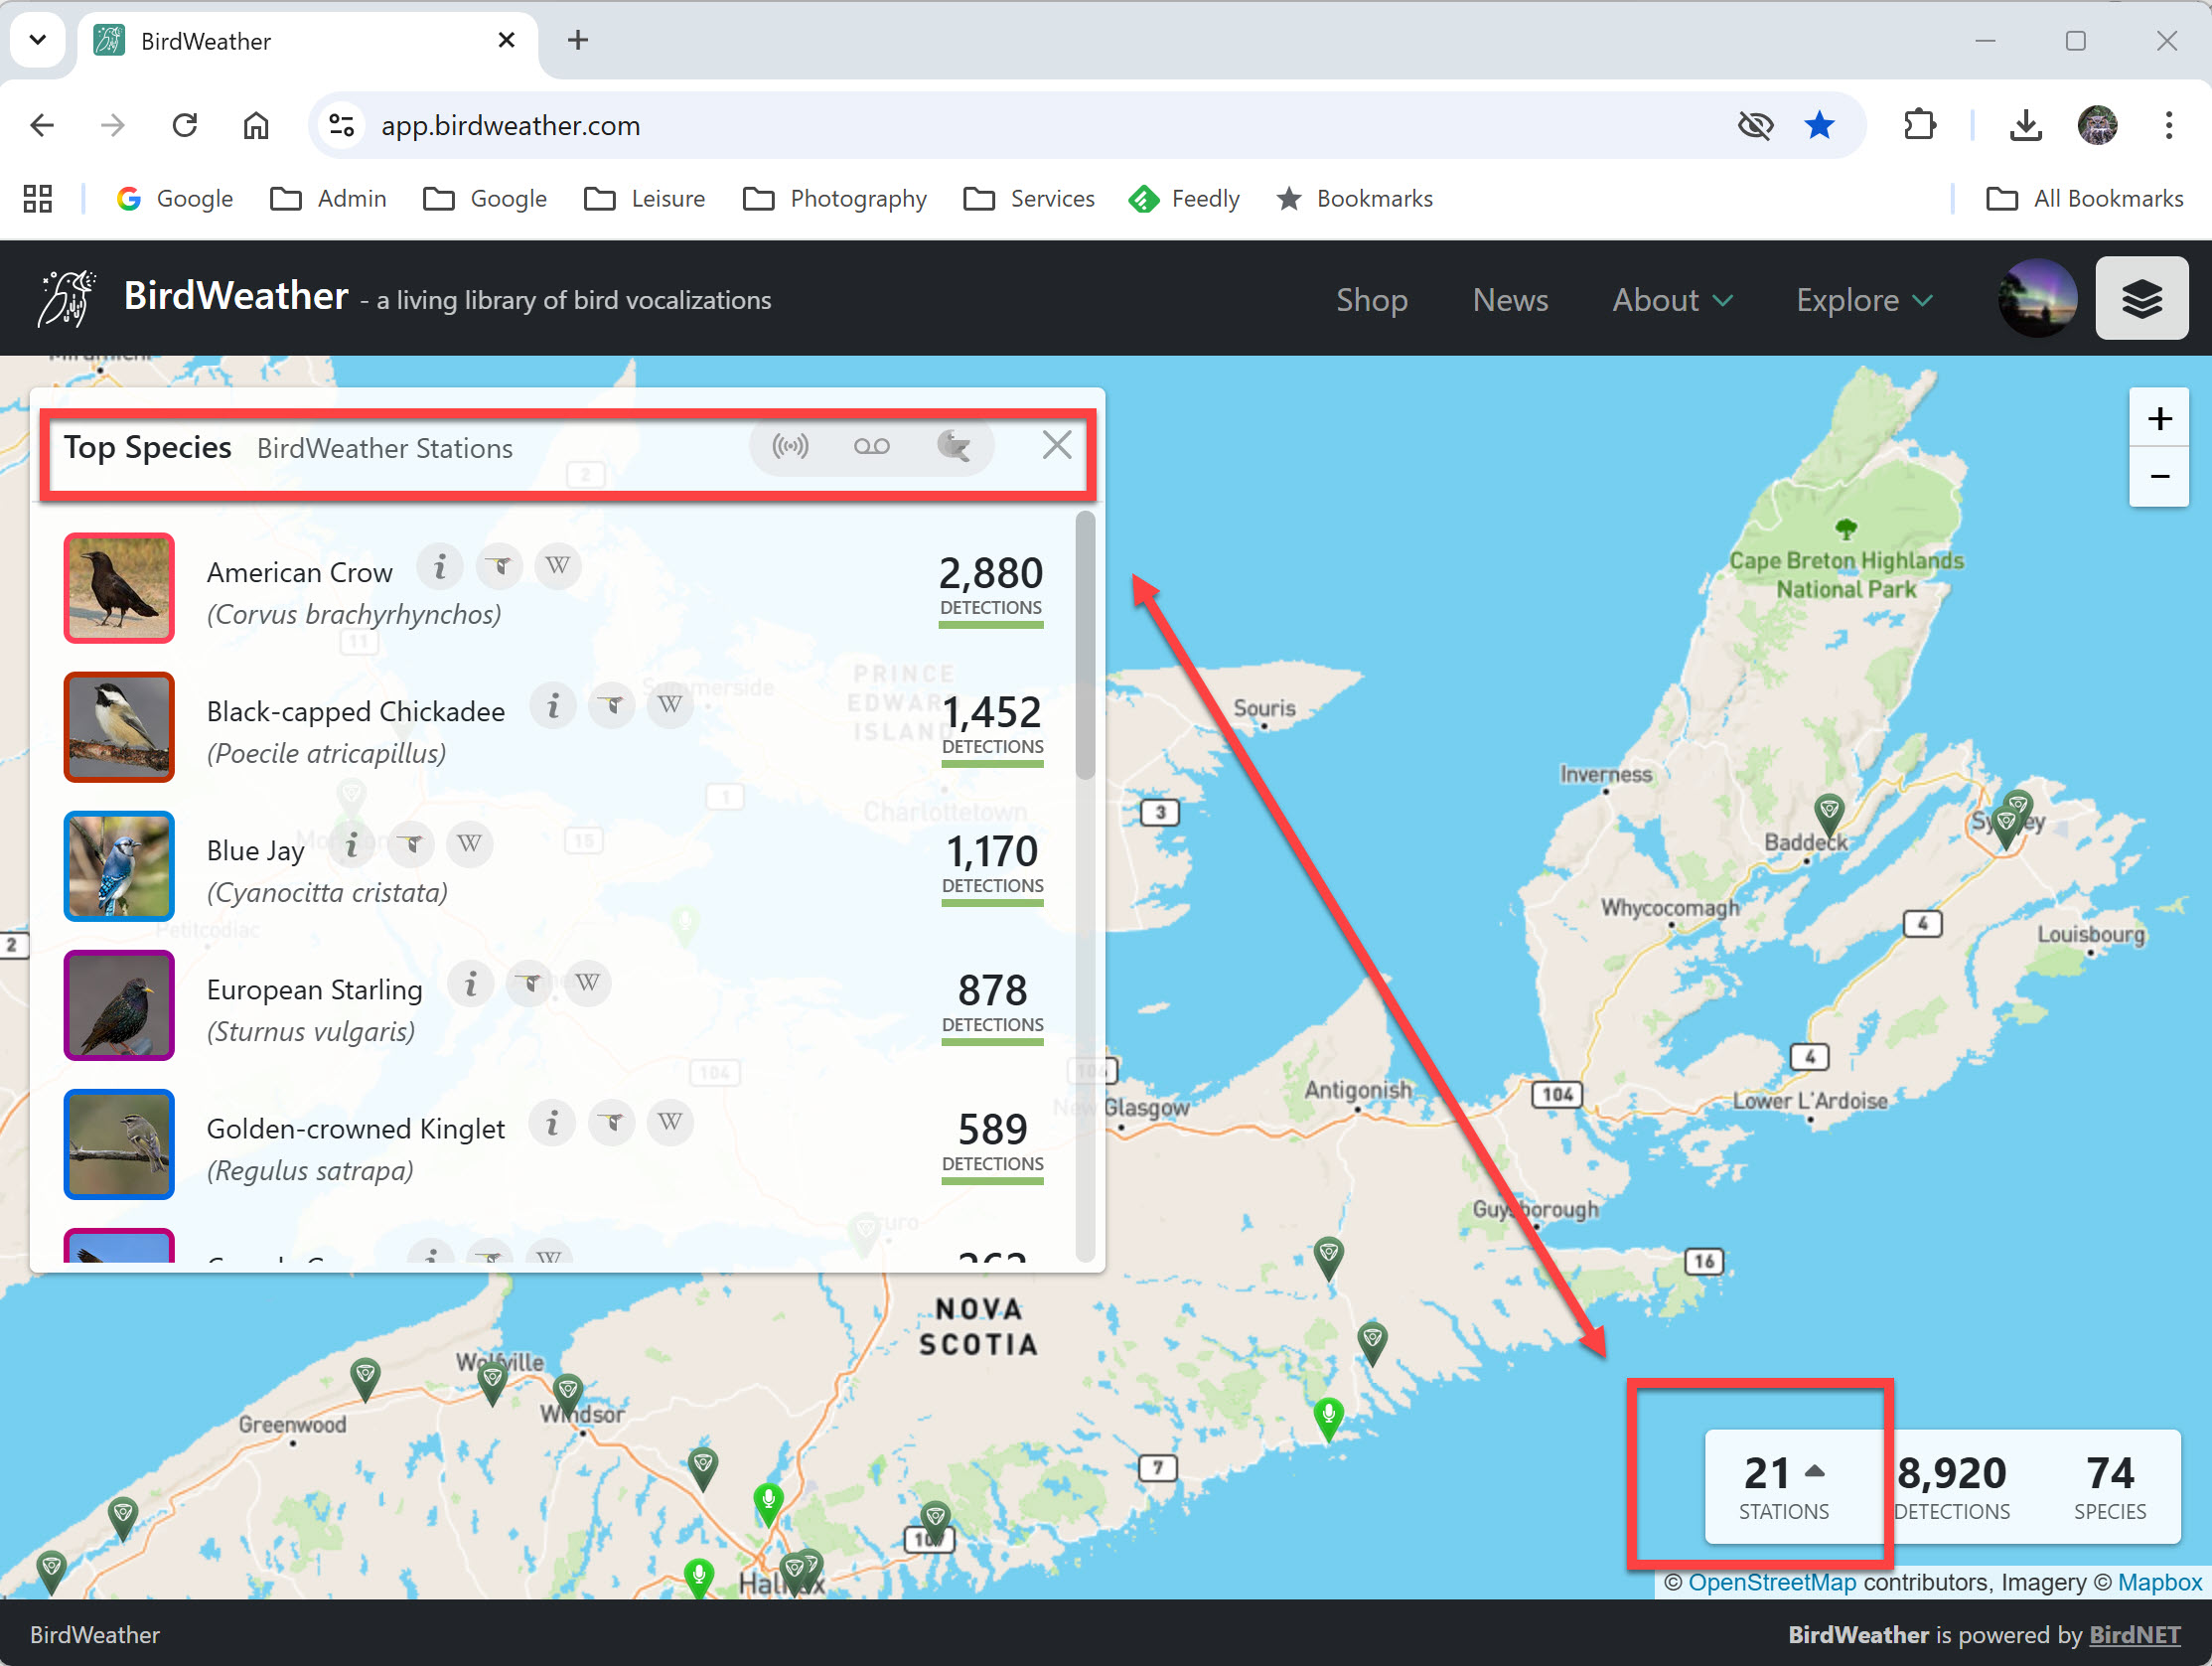
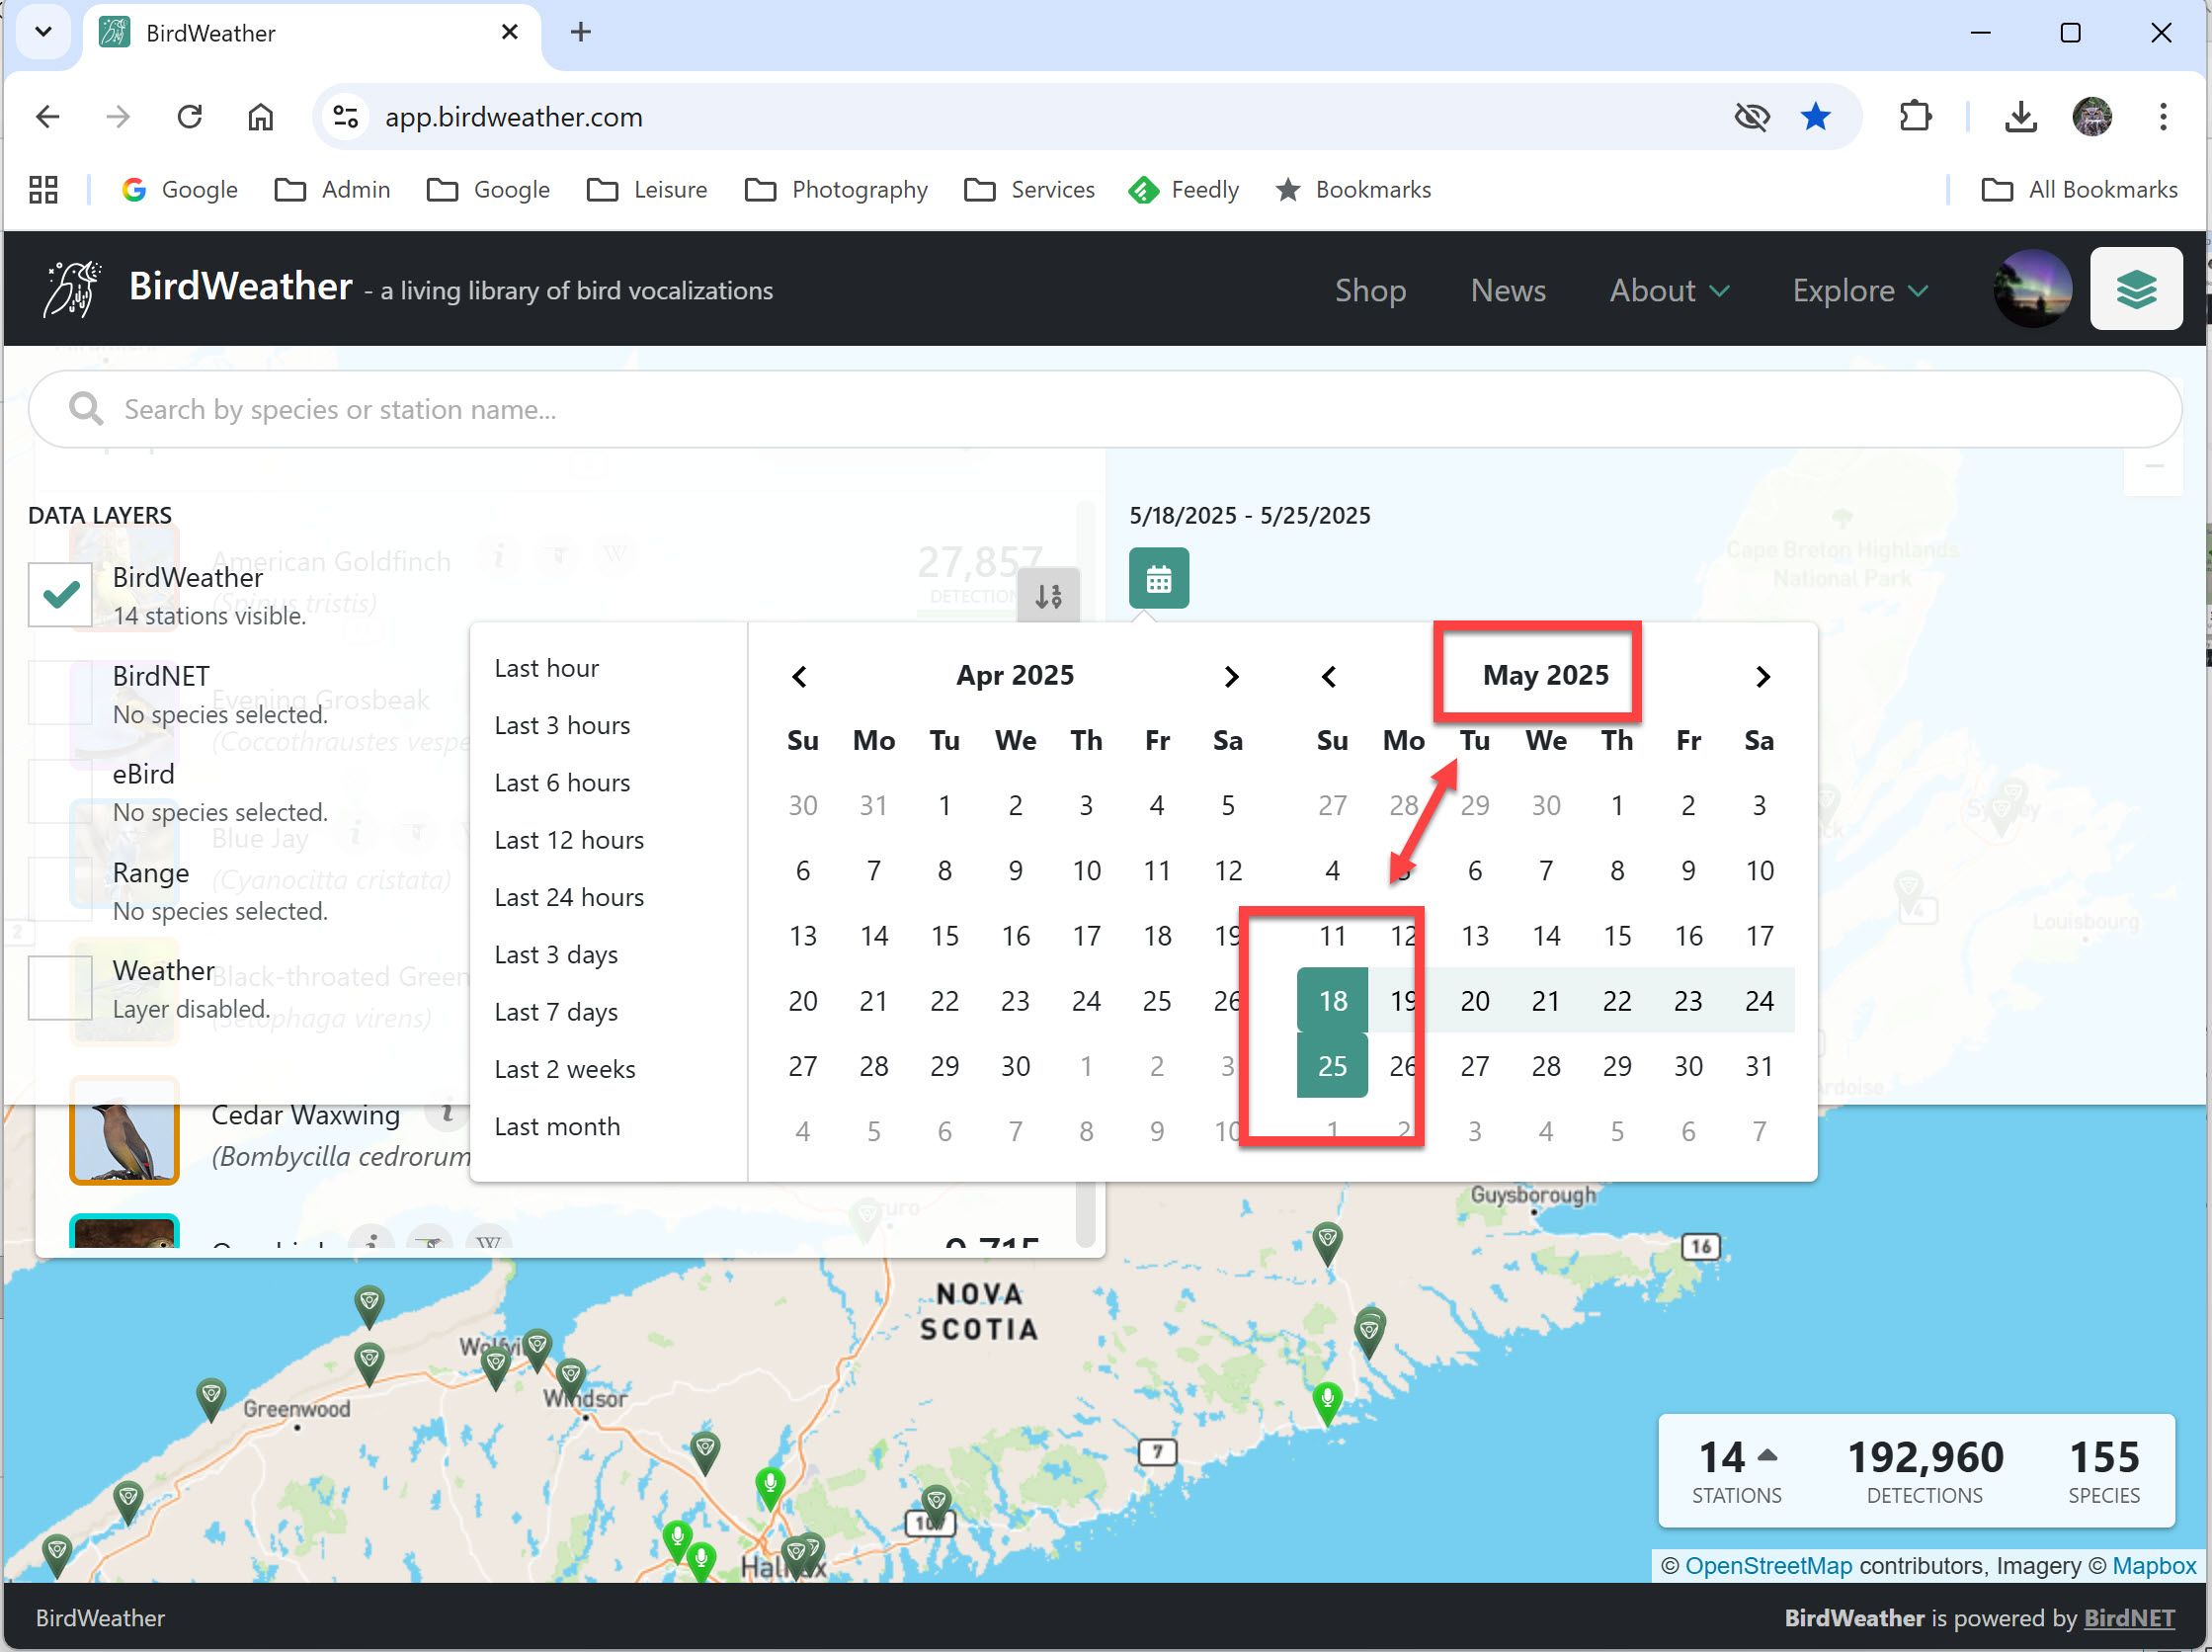
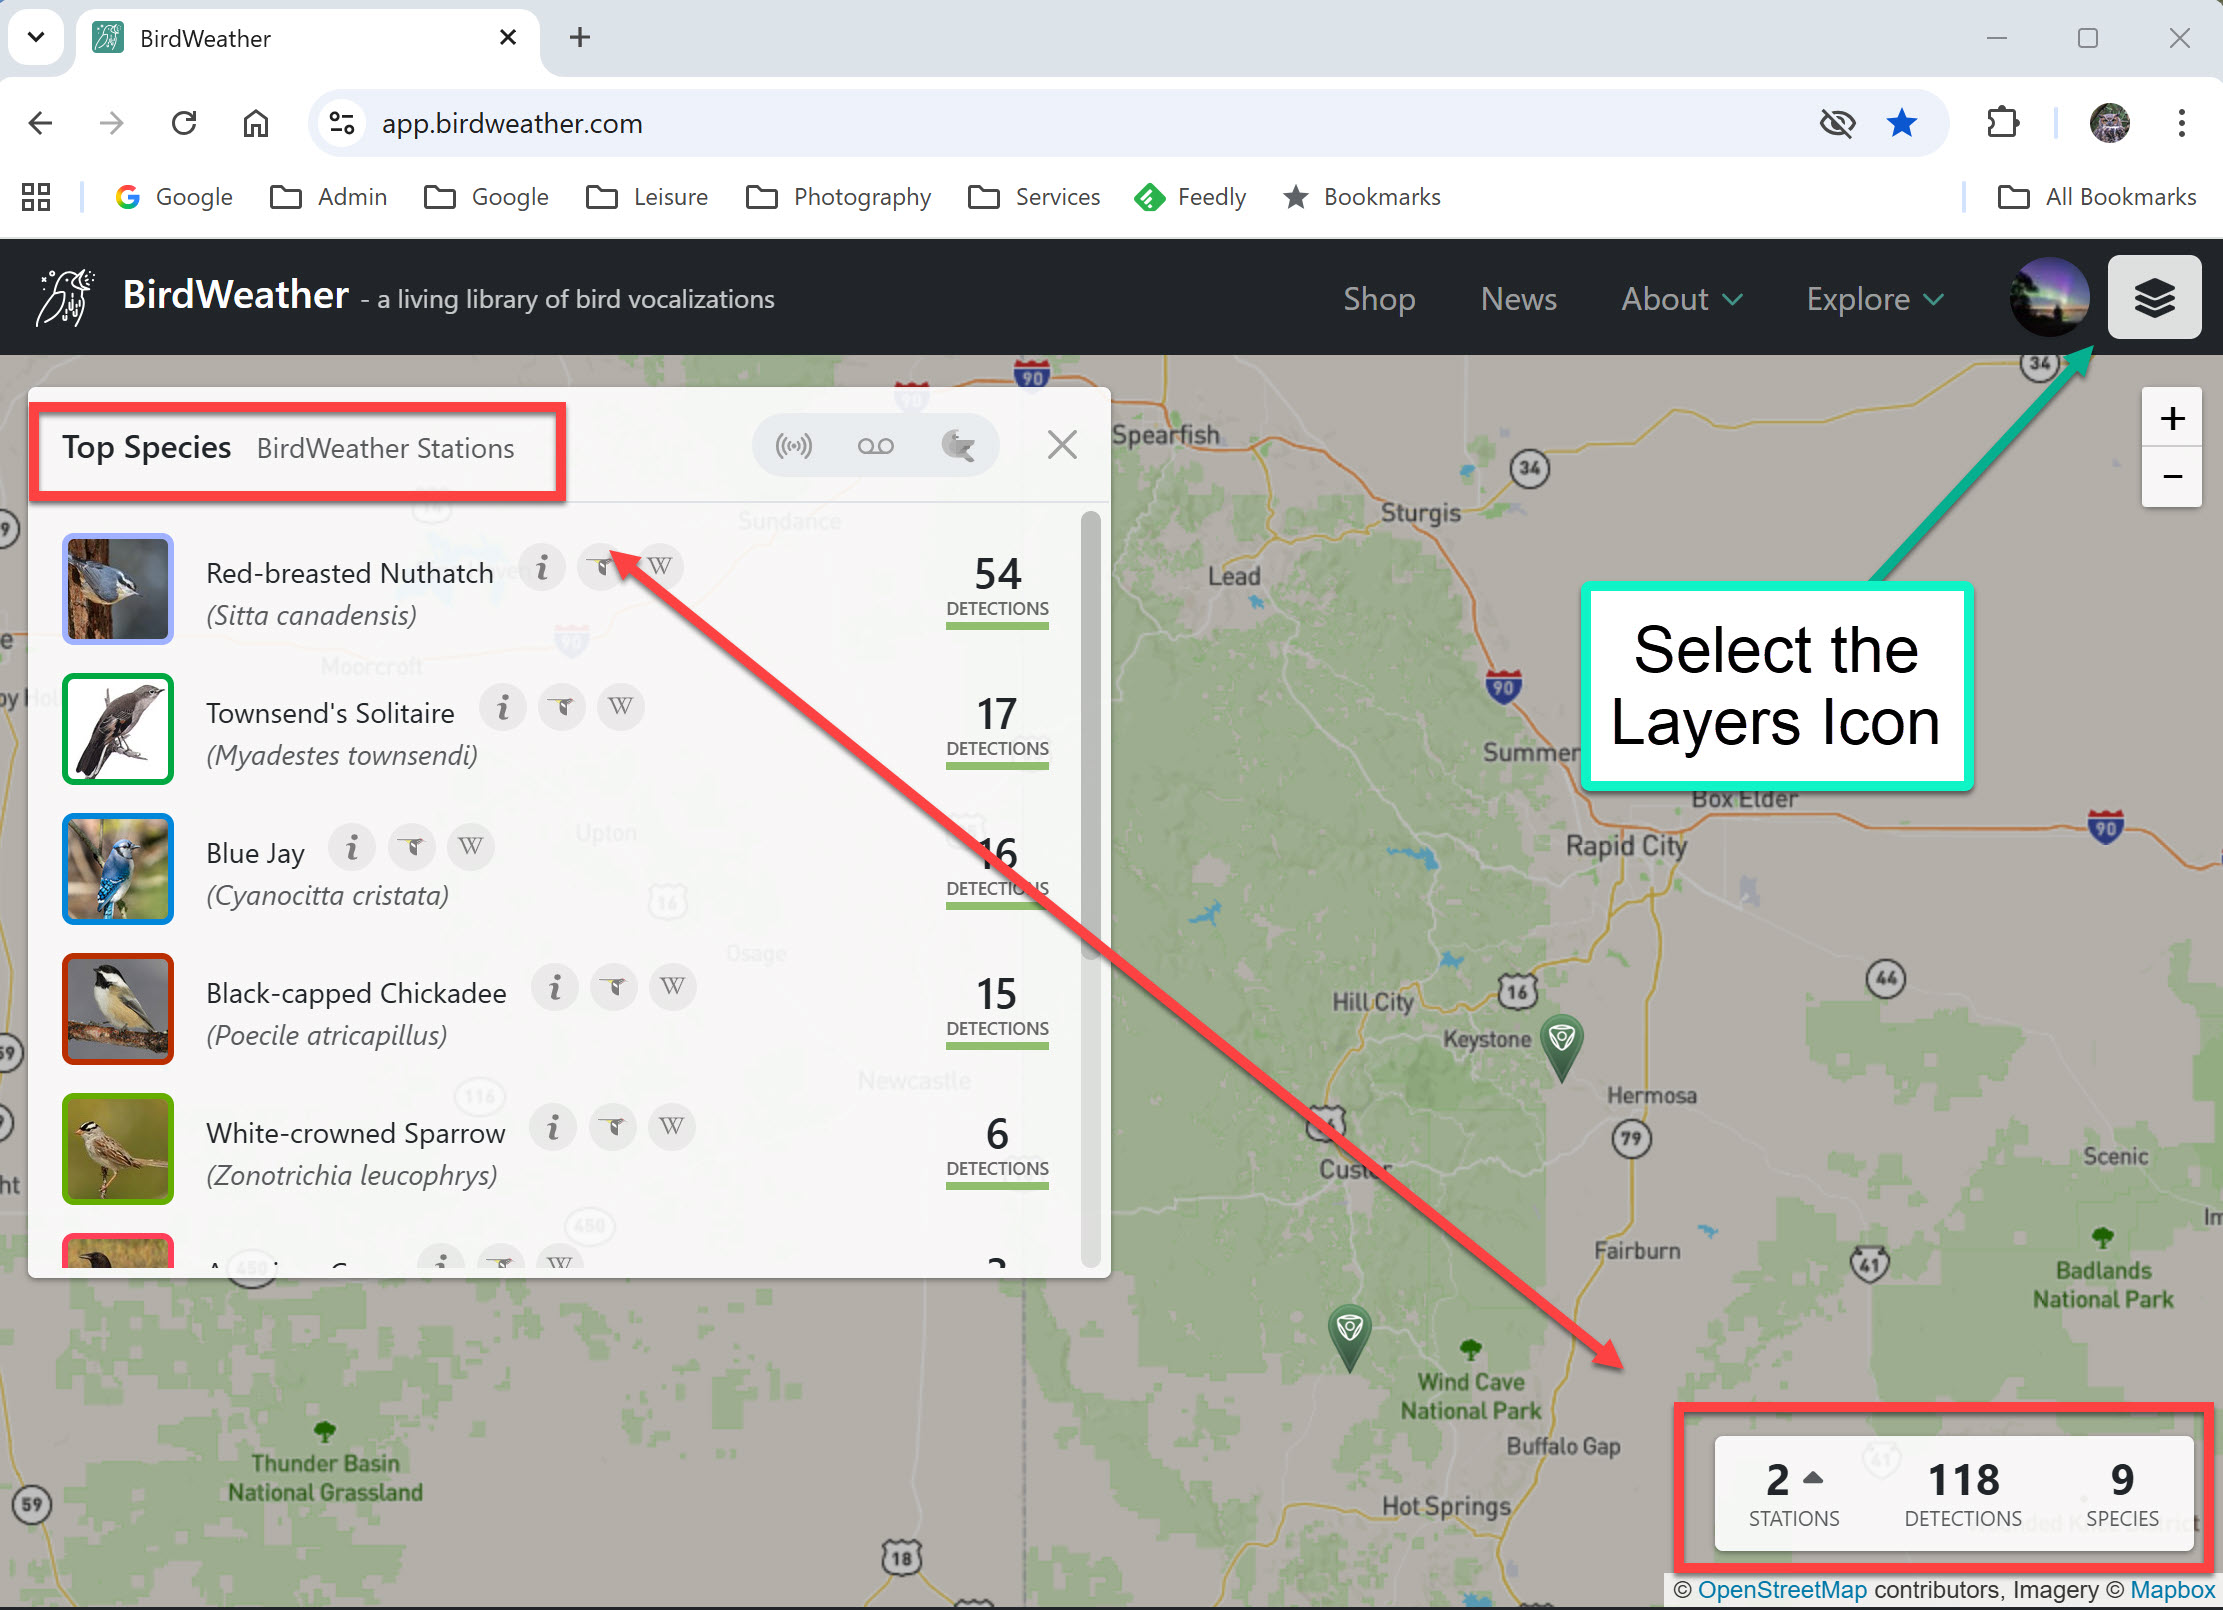
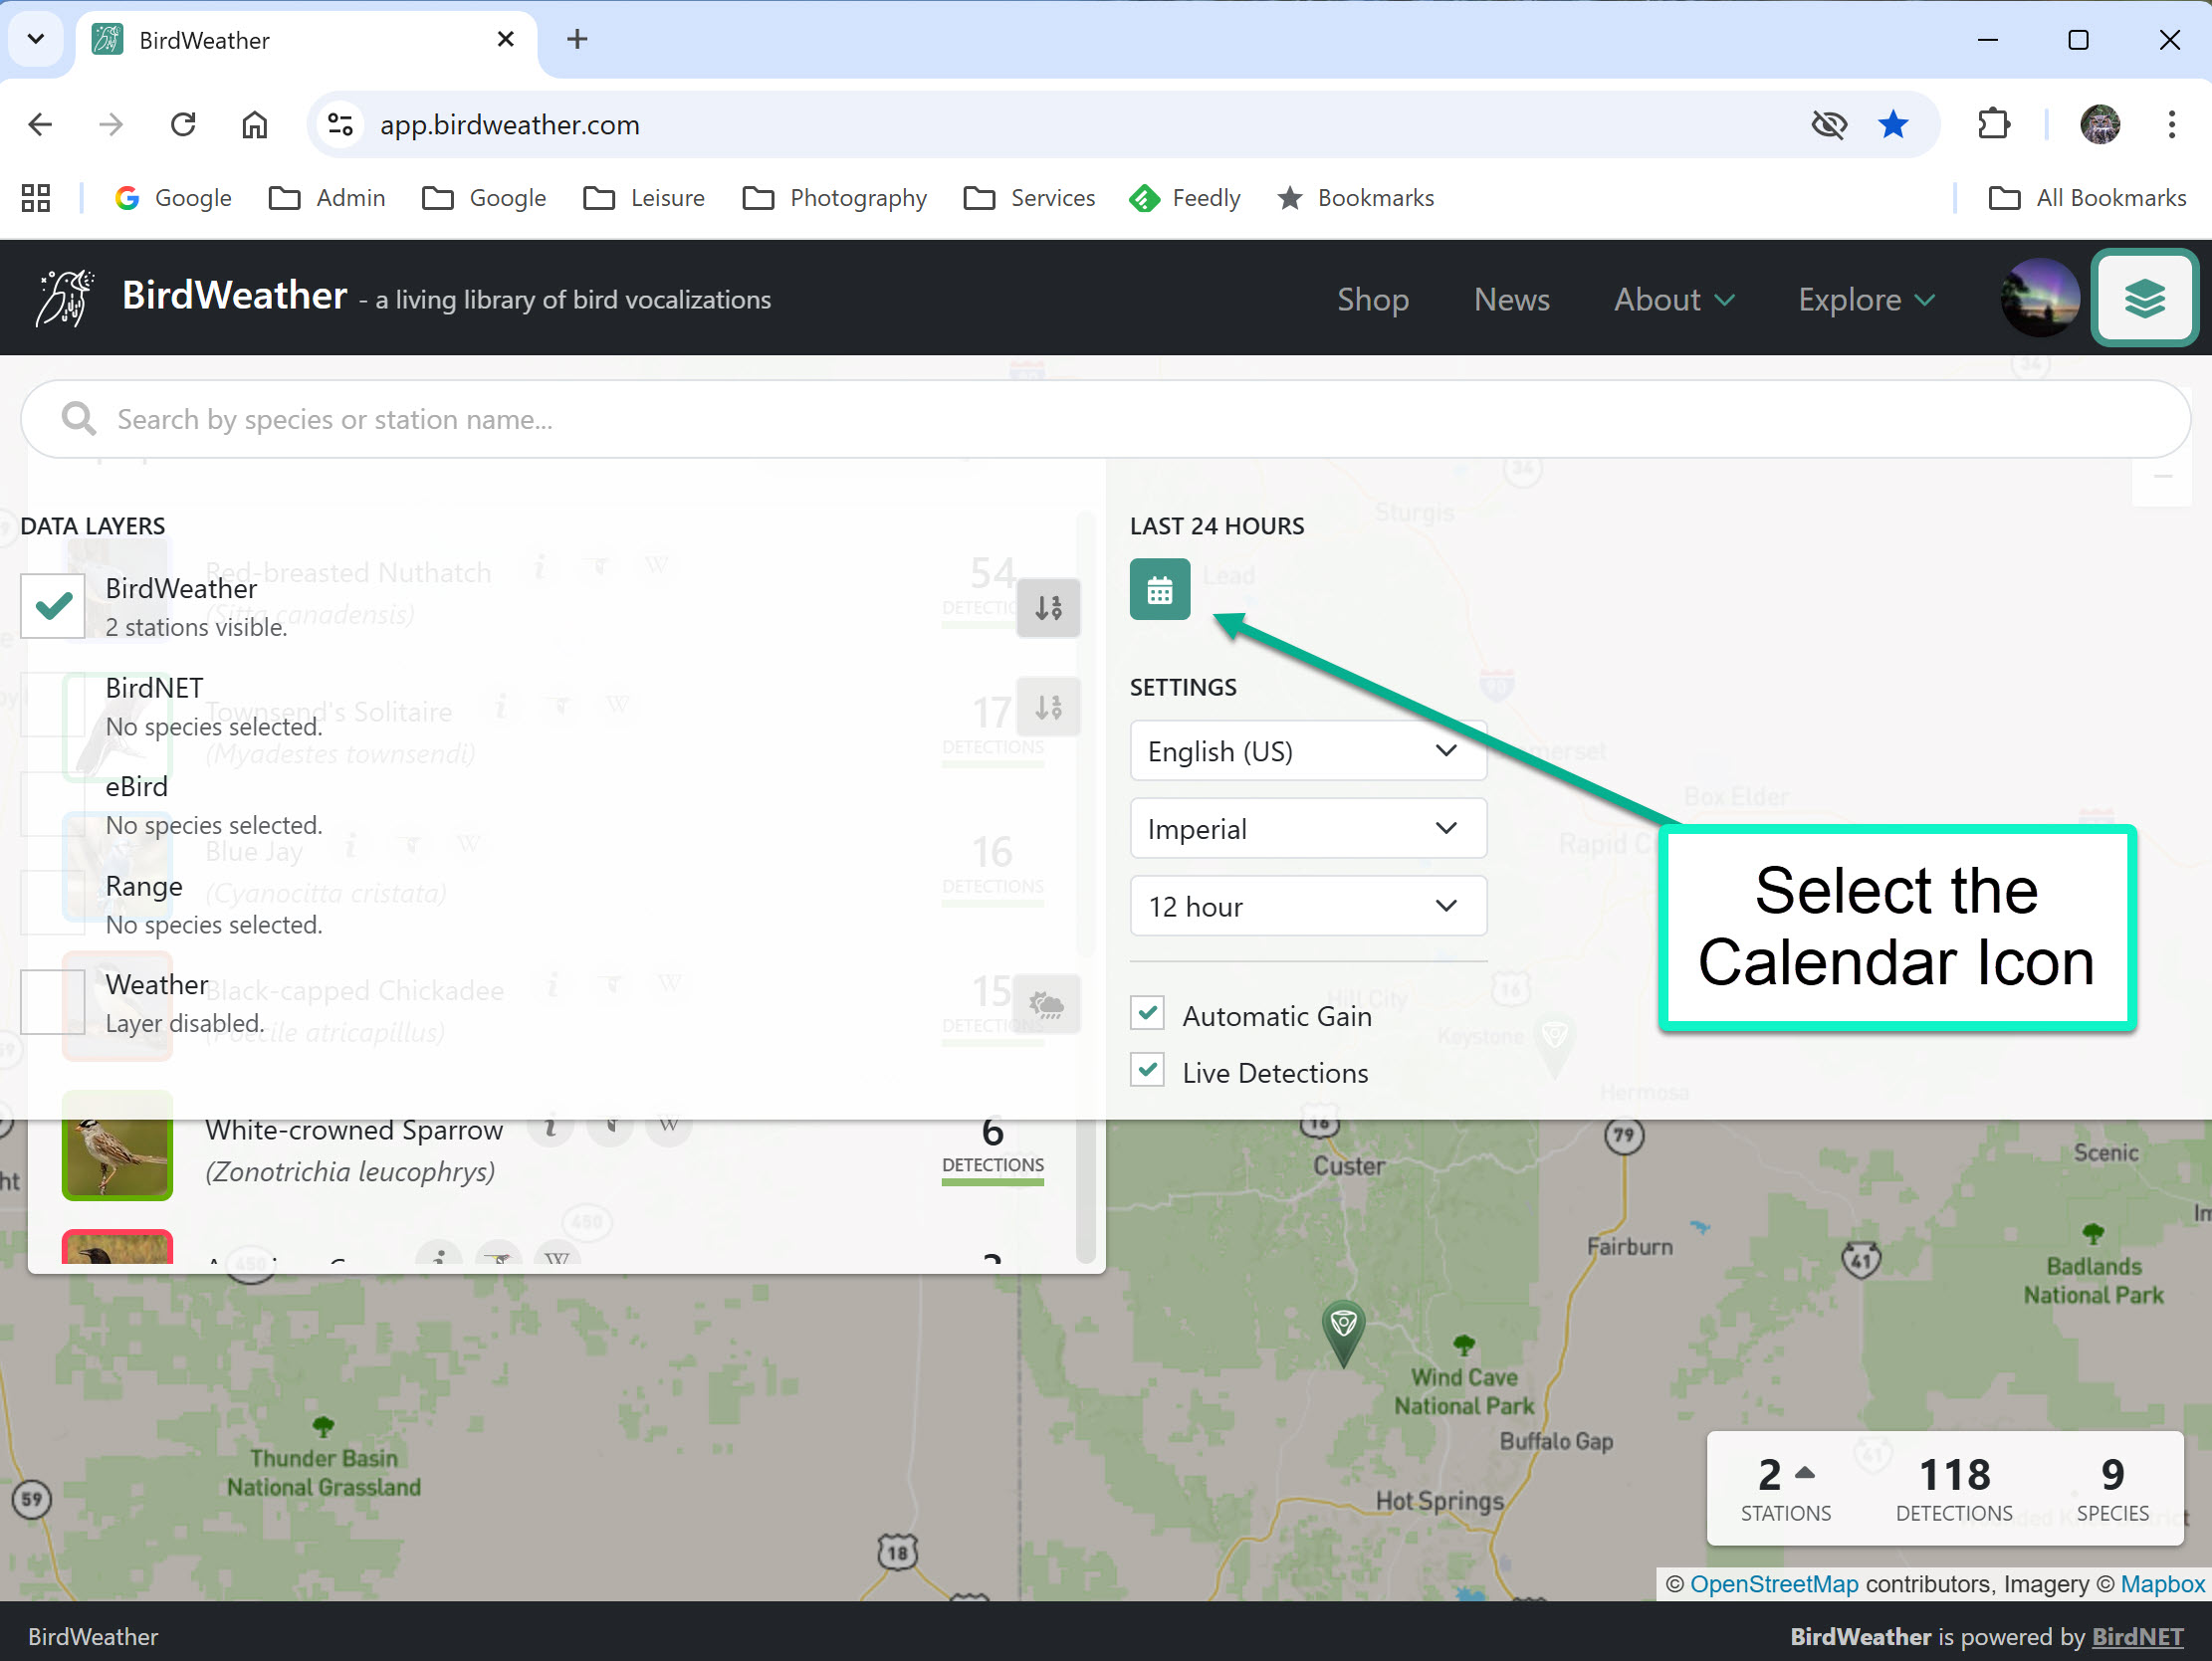
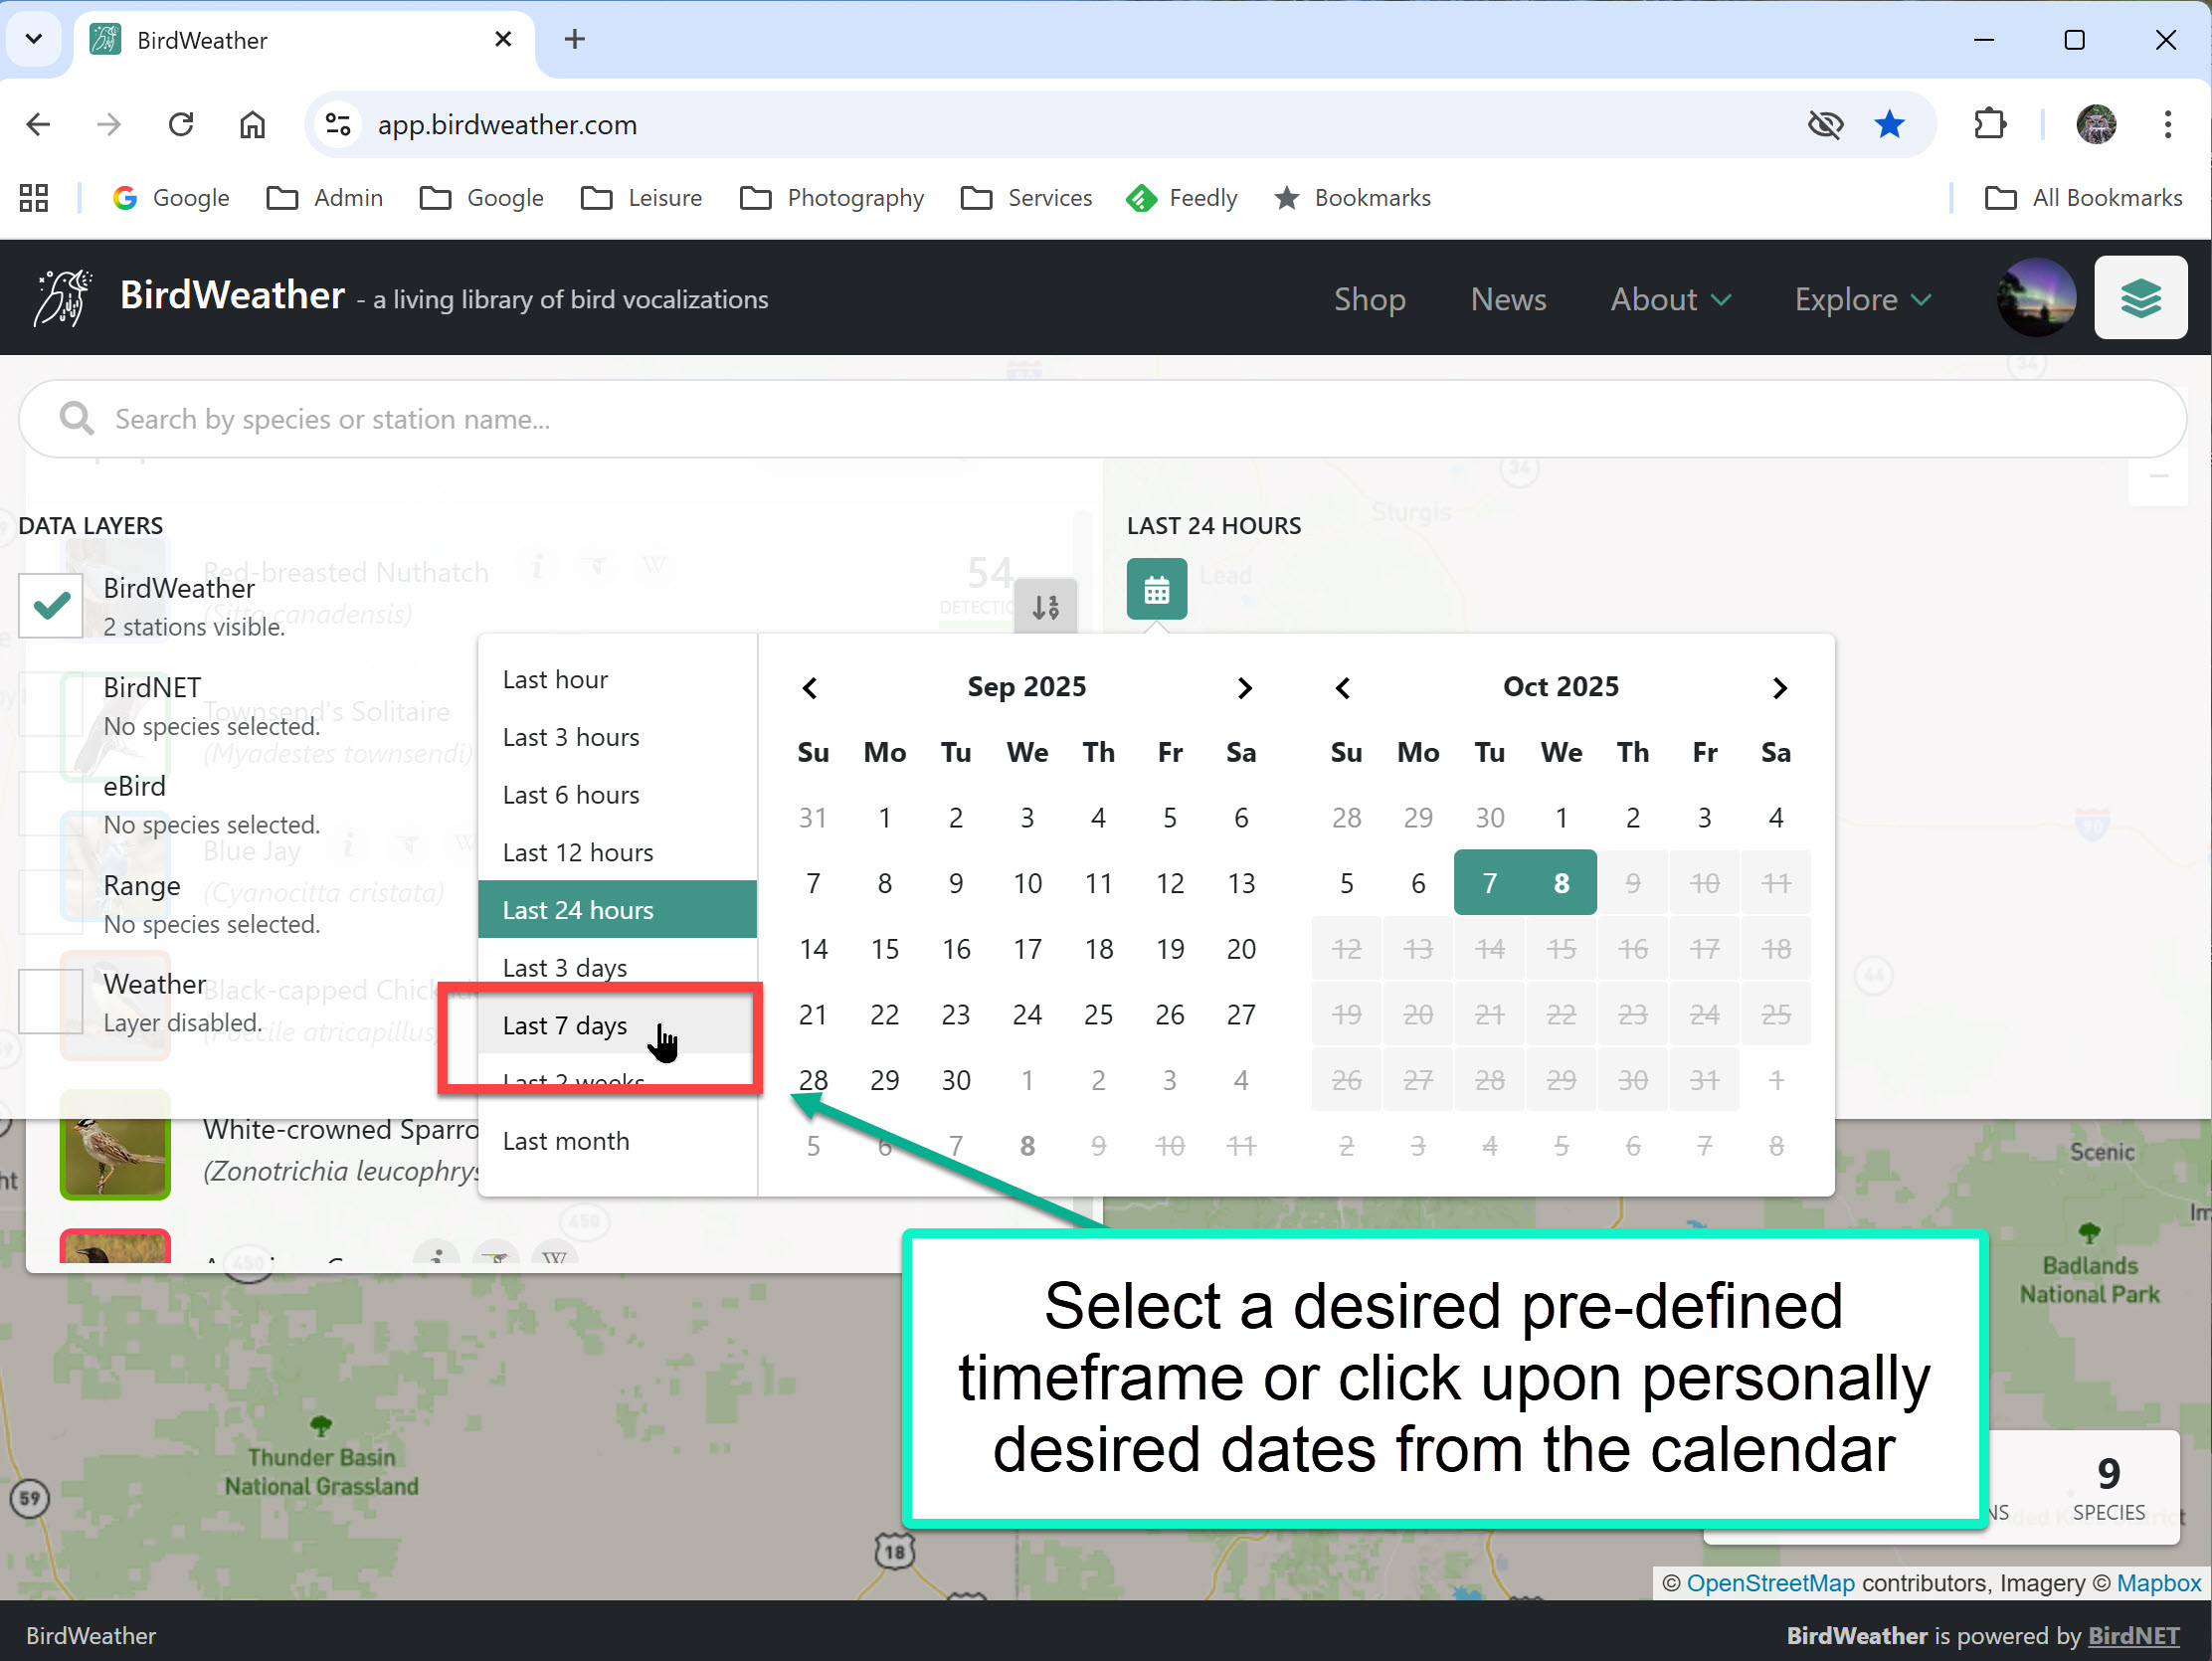
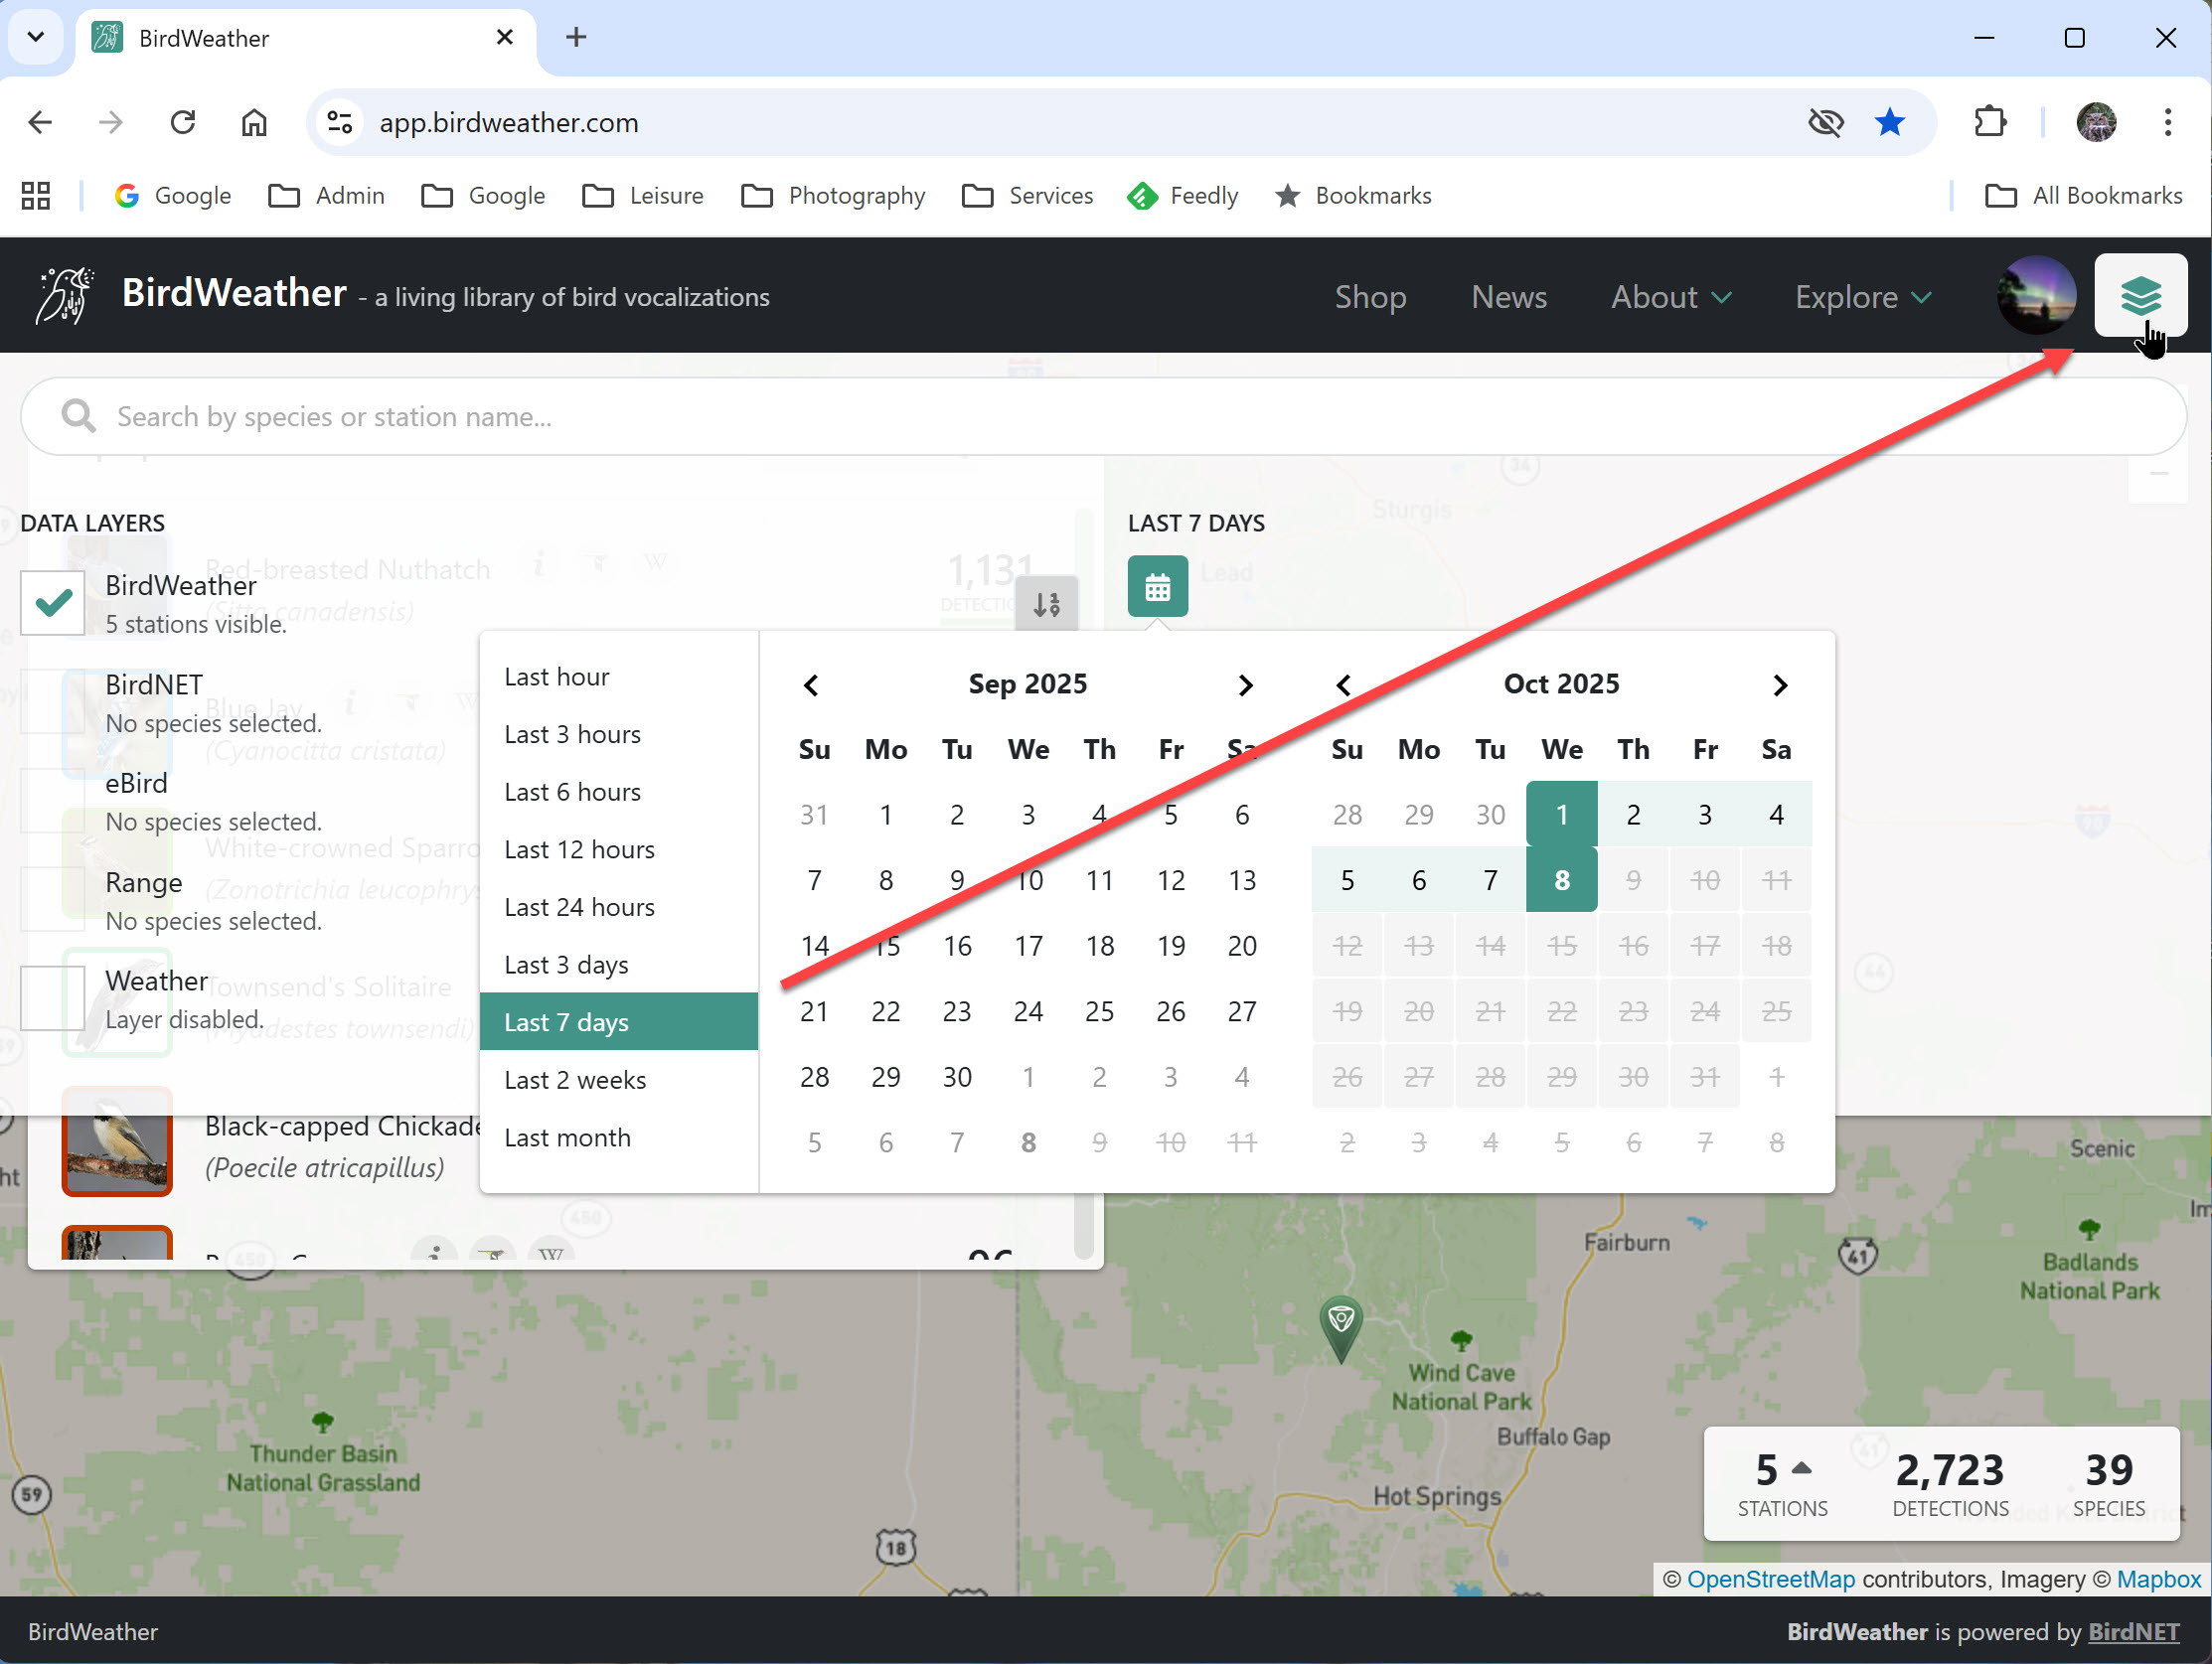
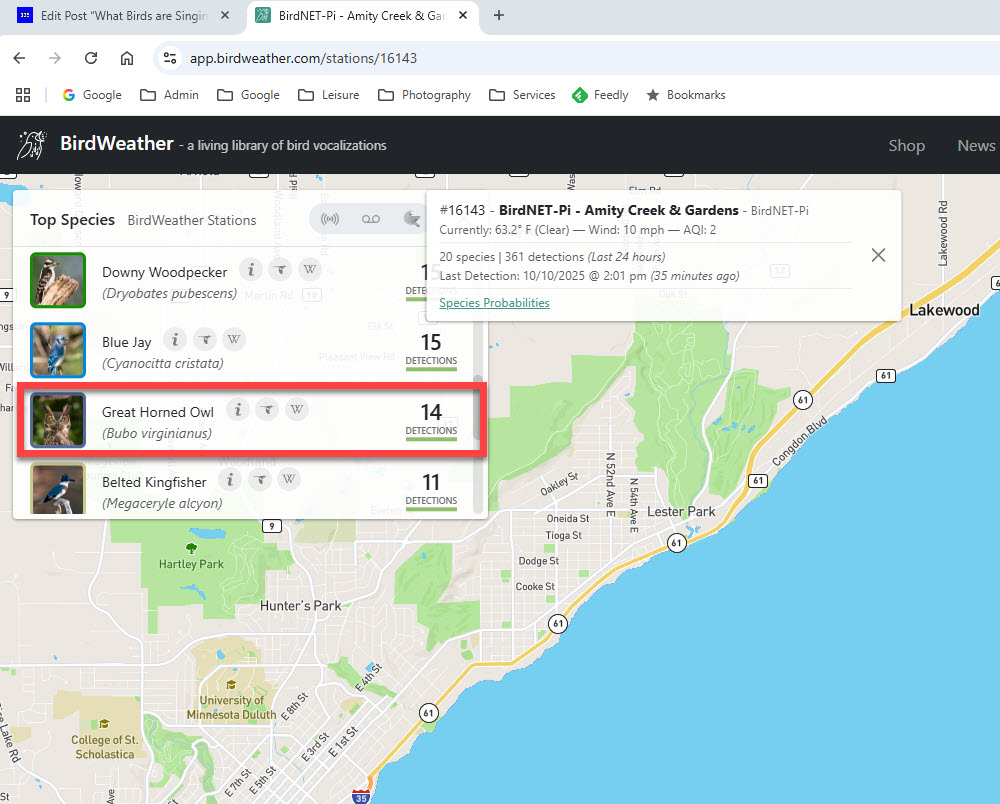
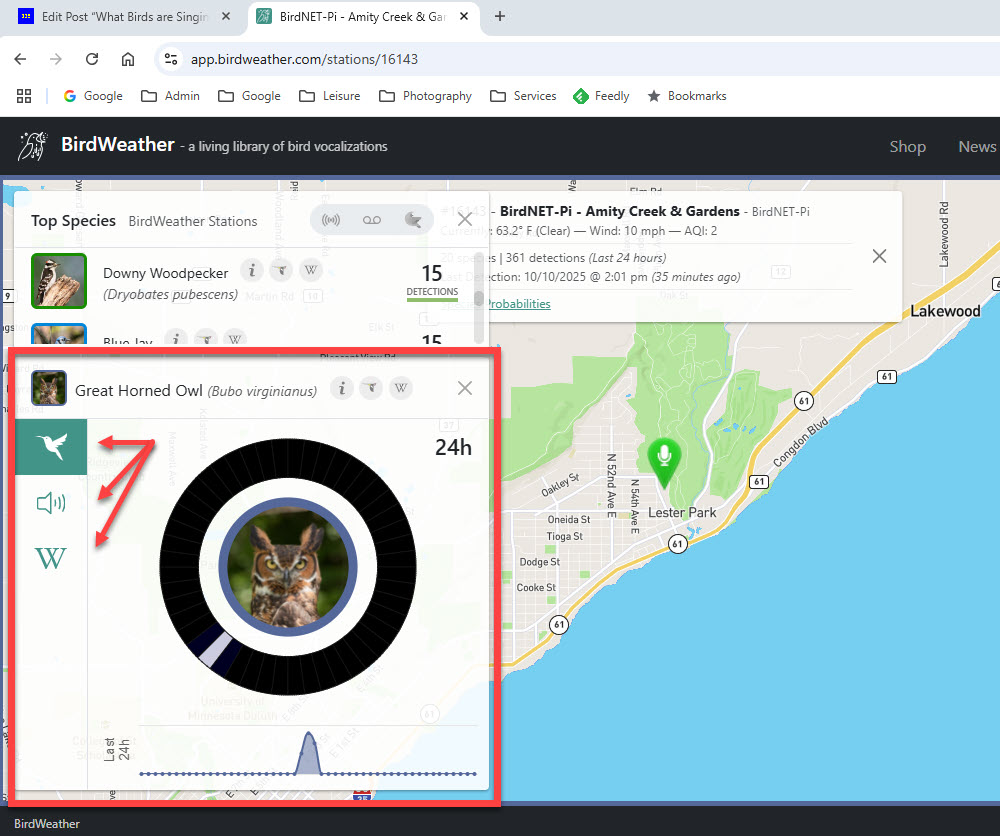
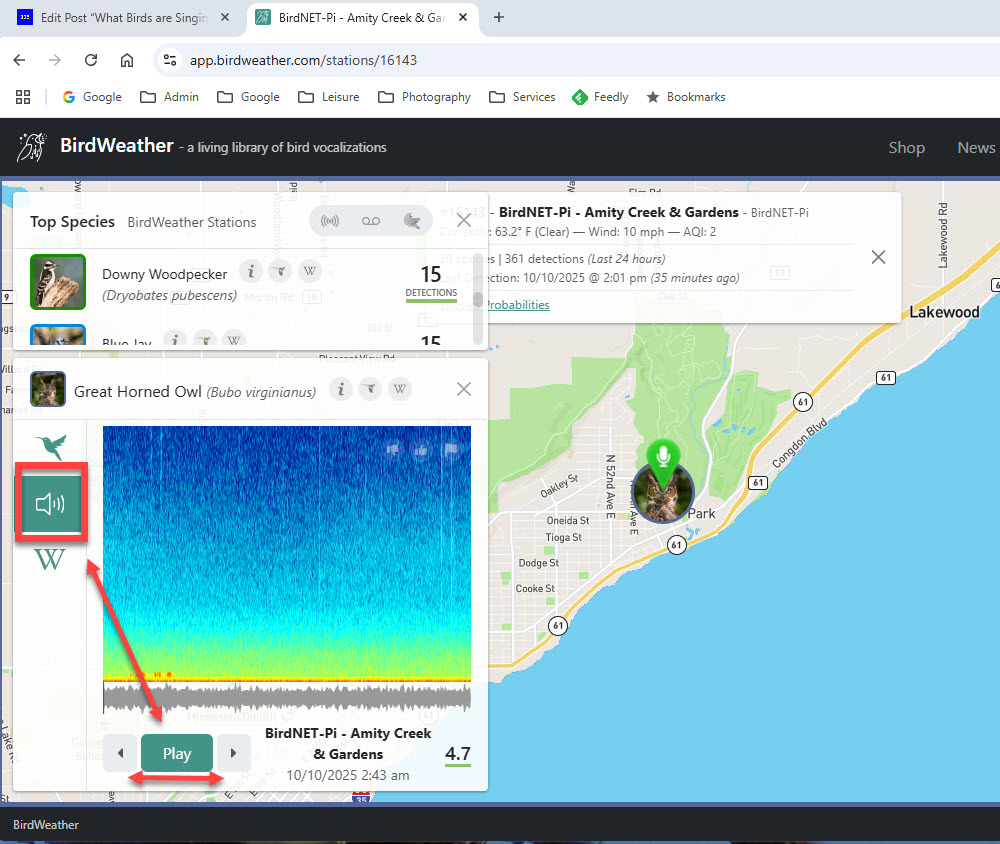
- Using BirdWeather to Learn …
My successes with a connected BirdNET-Pi led me to wonder if I could use the unit for research in the field. Although the small Raspberry-Pi computer/box does not have a hard drive, it does have running locally on its microsim card the Raspberry-Pi operating system, the BirdNET-Pi software AND the Cornell Birdnet birdsong database. Thus if I could solve power, date / time issues for the database, AND protect the small computer from the weather everything should work fine.
It took some time, effort, and mistakes, but the answer was YES! I now have a BirdNET-Pi which runs perfectly in the field as a research unit. I tend to run my BirdNET-Pi for four to six hours in any given 24 hour period. I then have the Raspberry-Pi automatically shut off and then turn on the next day (or night). In my case I tend to have the unit run at night during the early morning hours through the first hour after sunrise. In this manner my box captures and records both owls singing/hooting at night and then catches the morning songbird sing.
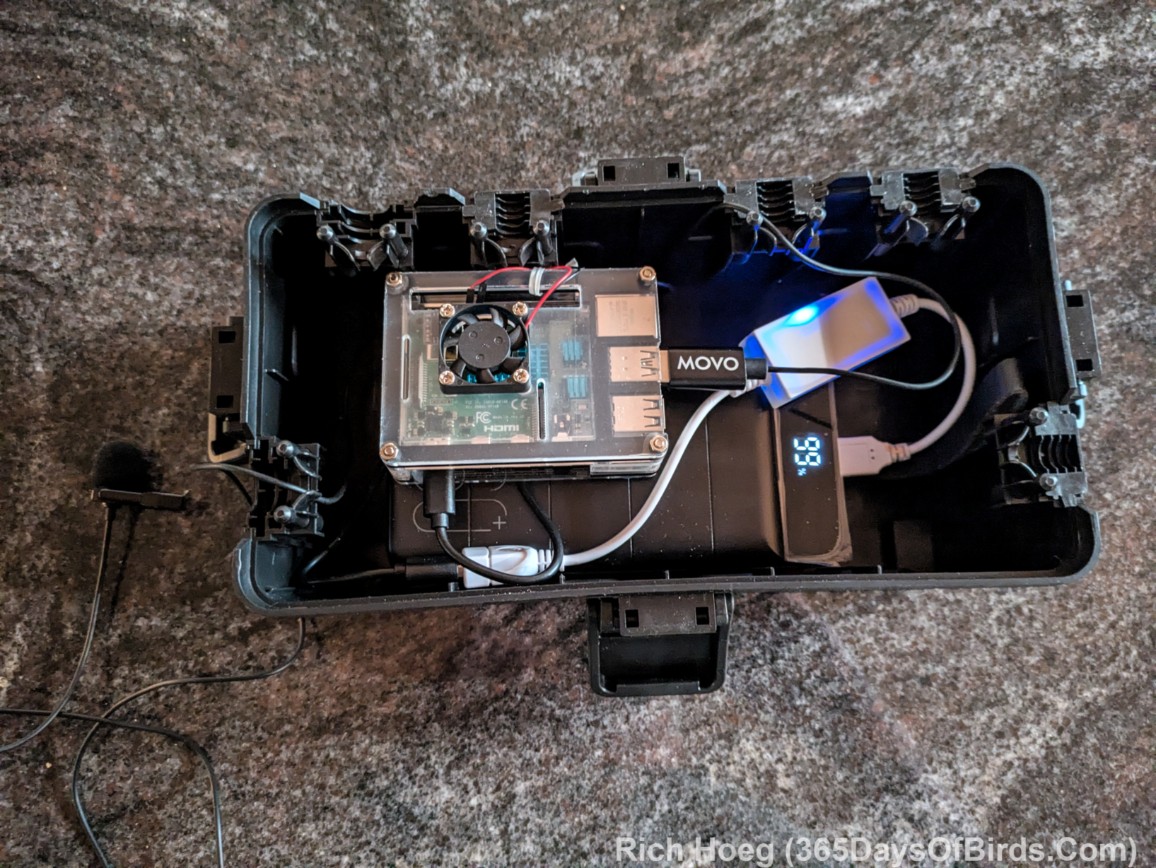
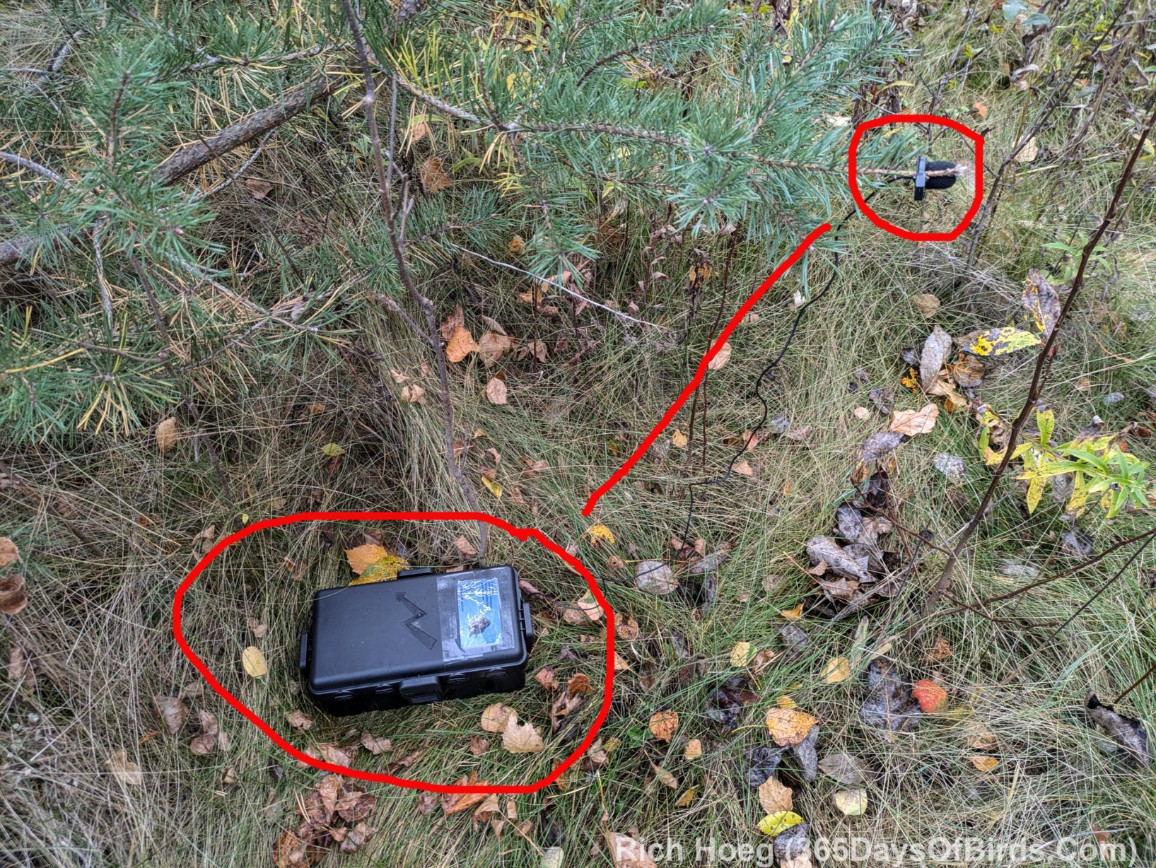
Here is a photograph of my BirdNET-Pi in its weather proof box. It is hooked up to a 60,000 mAp USB power bank via a USB power switch (24 hour cycle set to turn on and off after 4 or 6 hours of run time), and my USB microphone. I just place the entire box on the ground and hook the lavalier microphone to a tree branch. (This begs the question why don’t I use solar power? Answer: Solar is not only expensive, but needs to be deployed in an open area, which even in remote wilderness like northern Minnesota encourages theft)
- Amazon links (not sponsored)
- Weather Proof Box
- USB 60,000 mAp power bank
- USB Timer Switch
- RTC Chip (real time clock)
- Total costs (as of Oct. 2025): $73.91
- Your cost above a home unit
Pi Power Adjustments
I actually turn off my Raspberry-Pi’s cooling fan (disconnect the pins given cold temperatures in Minnesota), wifi and Bluetooth. This helps conserve power for a remote unit running on a battery in the field. This configuration yields me about 36 hours of run time in the field.
Hardware Pi Modifications
Installing the RTC (real time clock) is simple. This chip, which has a battery and clock, allows your Raspberry-Pi 4b which has neither to always know the correct date and time. This data is then fed to your BirdNET-Pi installation such that every unique sound ID has date and time information for each database entry. There are some minor coding changes covered in the “software pi modifications” section of this post.
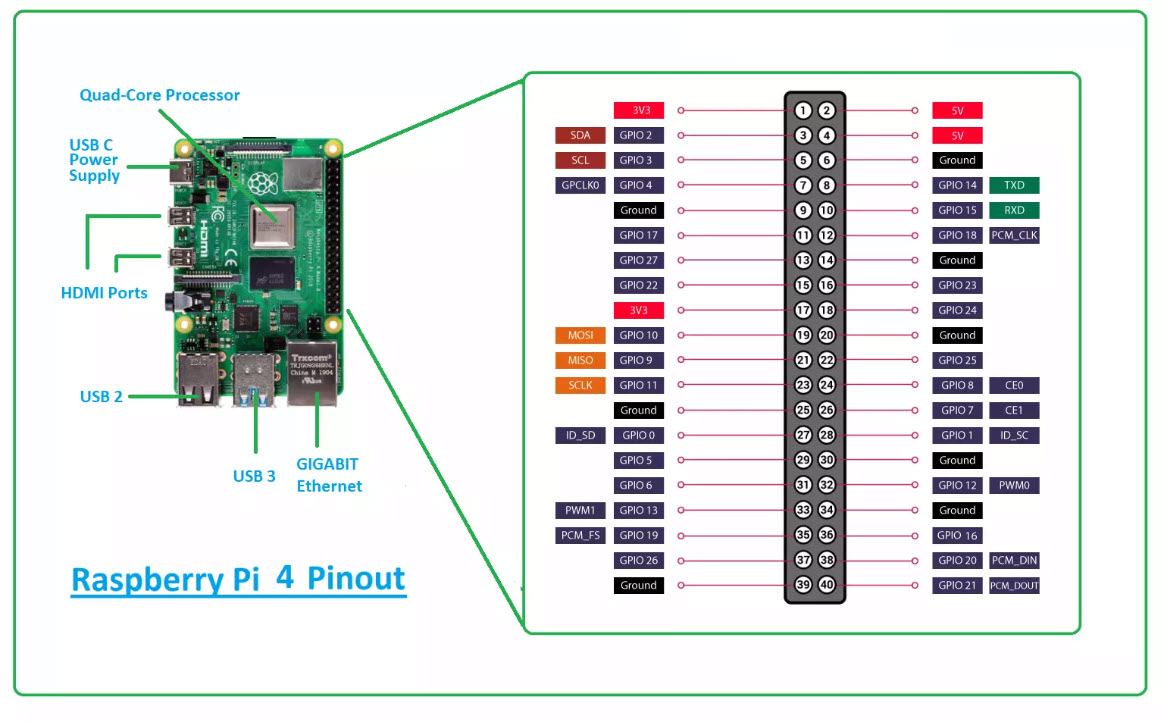
Gently push the RTC chip down onto the last / inner row of the computer pins closest to the end of the case. It is likely you will have to remove the pins for your cooling fan, and perhaps move the fan itself. Don’t worry, there are other 3.5 amp and electrical grounding pins for your fan (see this 4b pin mapping diagram). Your hardware installation is complete.
If you are like me, the location of my cooling fan had to be moved to install the RTC chip. I screwed my fan onto the top cover of the case. It is still easy to connect the fan’s pins through the case’s provided openings. The fan’s case is actually quite sturdy, and your entire unit is protected within your weatherproof box.
Software Pi Modifications
Edit Addition on April 6, 2026: I have discovered that these instructions only work with the older version of the Raspberry-Pi Operating System (Bookworm, not Trixie). I had to rework a recent Pi installation which was running Trixie back to Bookworm. I found “fixes” for the Trixie “hwclock” issues, but could not make those code changes work for me. You may be more successful.
These are the coding and software instructions for installing the RTC chip. BirdNET-Pi normally gets its database time and dates via its network connection, but obviously a remote unit will not be connected to any network. Follow these steps:
- Via BirdNET-Pi settings, turn off “get time from network”
- Via Raspberry Pi turn off wifi (and Bluetooth)
- Shut down your Pi and remove top case cover
- Install the RTC chip (see hardware section directly above)
- Reboot your Raspberry Pi
- Create a terminal window session
Type the code found below. The command shown below brings up the file “boot config.txt” which will be edited by the Raspberry Pi “nano editor” (short Nano tutorial via YouTube)
- sudo nano /boot/firmware/config.txt
- At the bottom of the config file which is now open, add this code (a comment line):
- # This is YOUR NAME’s RTC module code
- on the next line type this code
- dtoverlay=i2c-rtc,ds3231
- Invoke the SAVE Command which is a <ctrl x>
- Accept overwrite for config.txt
Reboot Raspberry Pi and type these 3 commands:
- Create a terminal window session
- Type this code: (note my comments within the parenthesis … “_” or underscores represent “spaces” within your code)
- sudo_hwclock_-r (shows current time on computer)
- sudo_hwclock_-w (writes todays time and date to computer)
- sudo_hwclock_-r (shows current time on computer … did it change??)
If yes … everything is fine. Shut down your Raspberry Pi. Remember to put Pi and BirdNET-Pi back on network time if desired. You may now toggle between using your RTC chip or the network (if connected via wifi or ethernet) for the current time. You also may wish to check the Pi’s time and date again using the commands given above.

