Two years ago for the first time in my life I decided to help fund a Kickstart Project, Pikaboost. With Kickstarter one agrees to help fund the person or organization’s development effort. In return “IF” the project is successful, there is often a reward. However, there is no guarantee that the “reward” will ever be delivered, let alone on time. You legally could receive nothing.
<Read my Pikaboost 2 Review. This page reviews Pikaboost 1>
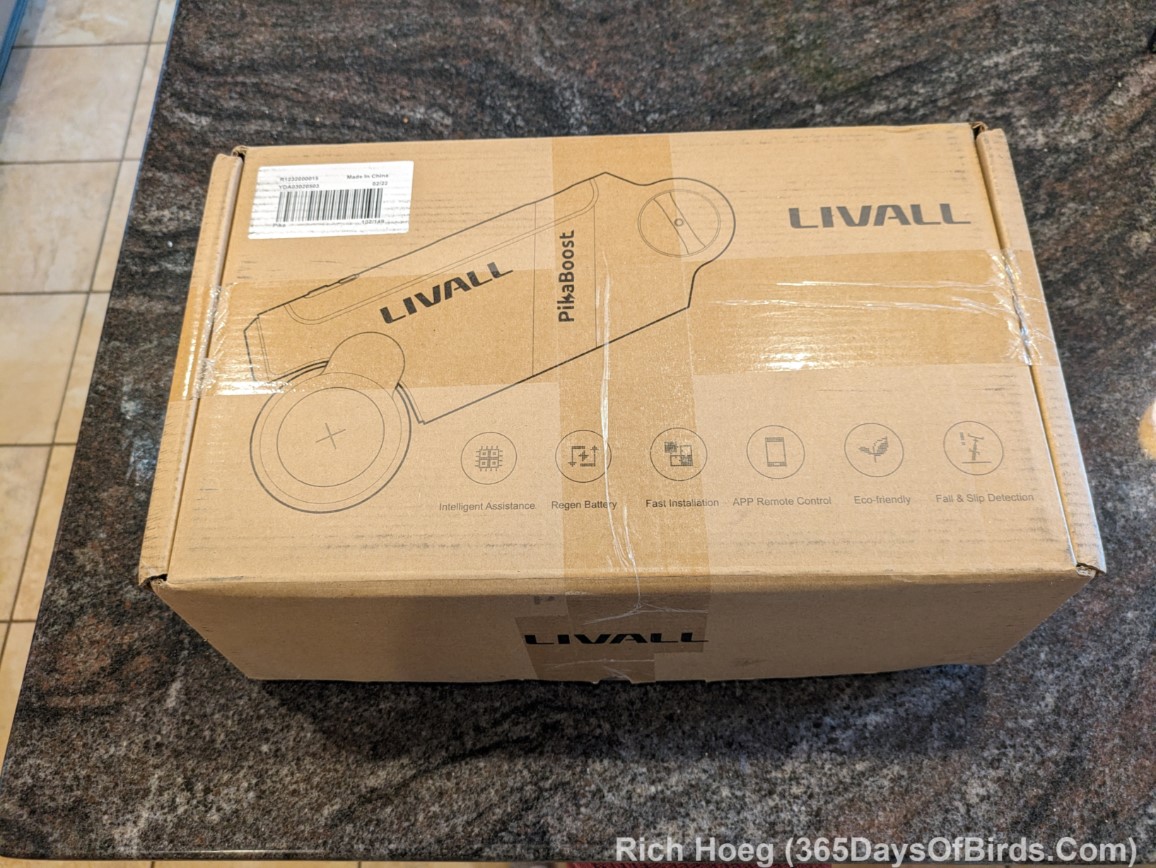
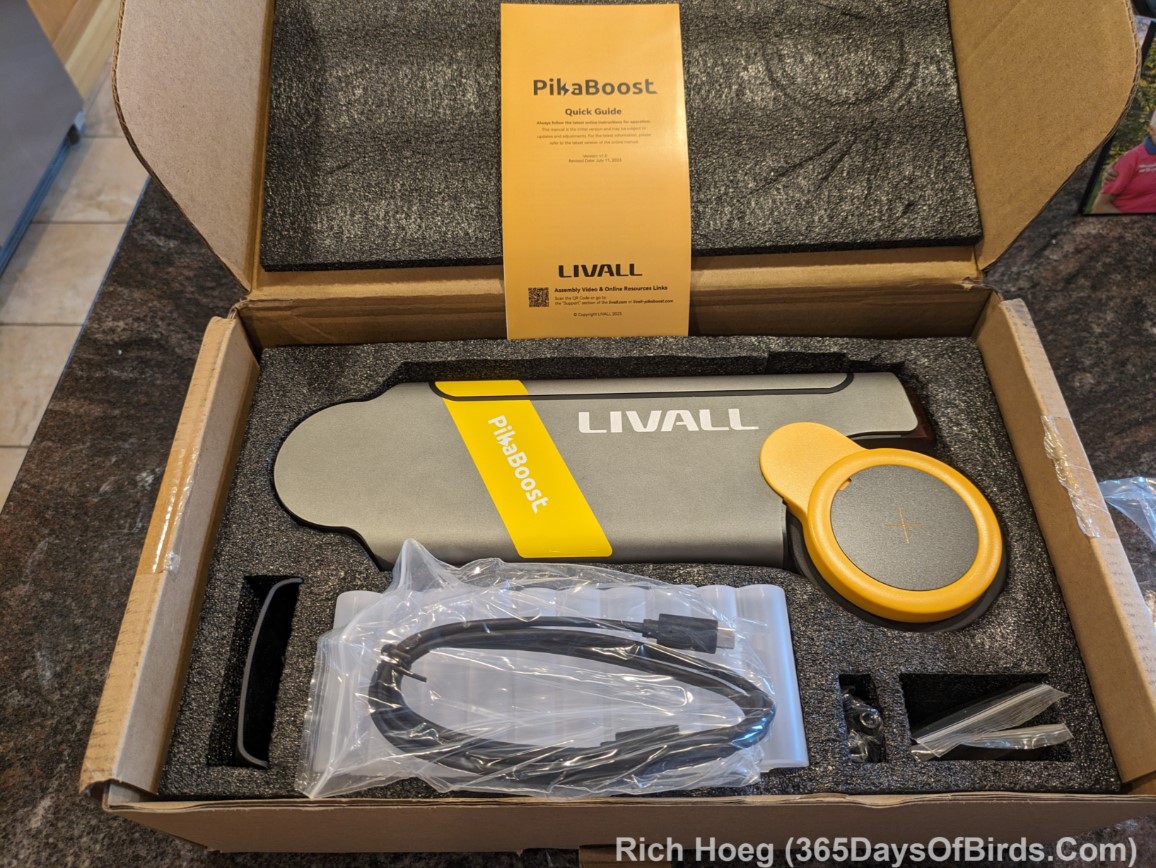
For Livall (the company) the idea was to create/design a simple eBike conversion kit which could easily be installed in ten minutes or less on any bicycle … named Pikaboost. Livall, had successfully brought other cycling products to the market … thus, I decided … “why not?” One week ago, two years after my investment donation and one year late, my Pikaboost arrived. You may see the product via the following photographs. Later in this post I will give my review.
As a fyi, I paid $299 which is less than the product will cost when released to the open market. I receive zero financial benefit if you order a Pikaboost, nor did I get a special discounted price. It is normal as a Kickstarter Project Investor to pay less than what the product will ultimately cost, but remember … project funders like myself might get absolutely zippo!!! You assume this risk as a Kickstarter investor.
My Pikaboost review follows these initial images and overview video. This review is for Pikaboost V1. I have ordered Pikaboost V2, which I hope and expect I will receive this fall (2024). As noted in other spots in this review, I pay for my own equipment and receive zero compensation or support from Pikaboost (Livall the company)

Pikaboost Overview Video (video link for email subscribers)
Now on with the actual review …
High Level … Good eBike Kit Conversion for the Price, but some Issues.
I took my first ride using Pikaboost 3 days ago in Minnesota’s North Shore of Lake Superior. I only had done the basic installation (not the controller) and thus only the “assistance mode” was available. My ride was 12.31 miles with 235 feet of elevation change. Pikaboost worked well on the slightly rolling topography next to the big lake, but on the climb up the hill to my house the assistance was “ho hum”. After the ride I still had 3 of 4 green lights steadily lit when I started to recharge. I was pleased but I need help with climbs after my heart surgery 3.5 years ago.
Here is the Pikaboost basic installation video. I did not find the installation difficult, and it only took me about 10 minutes (installation video link for email subscribers)
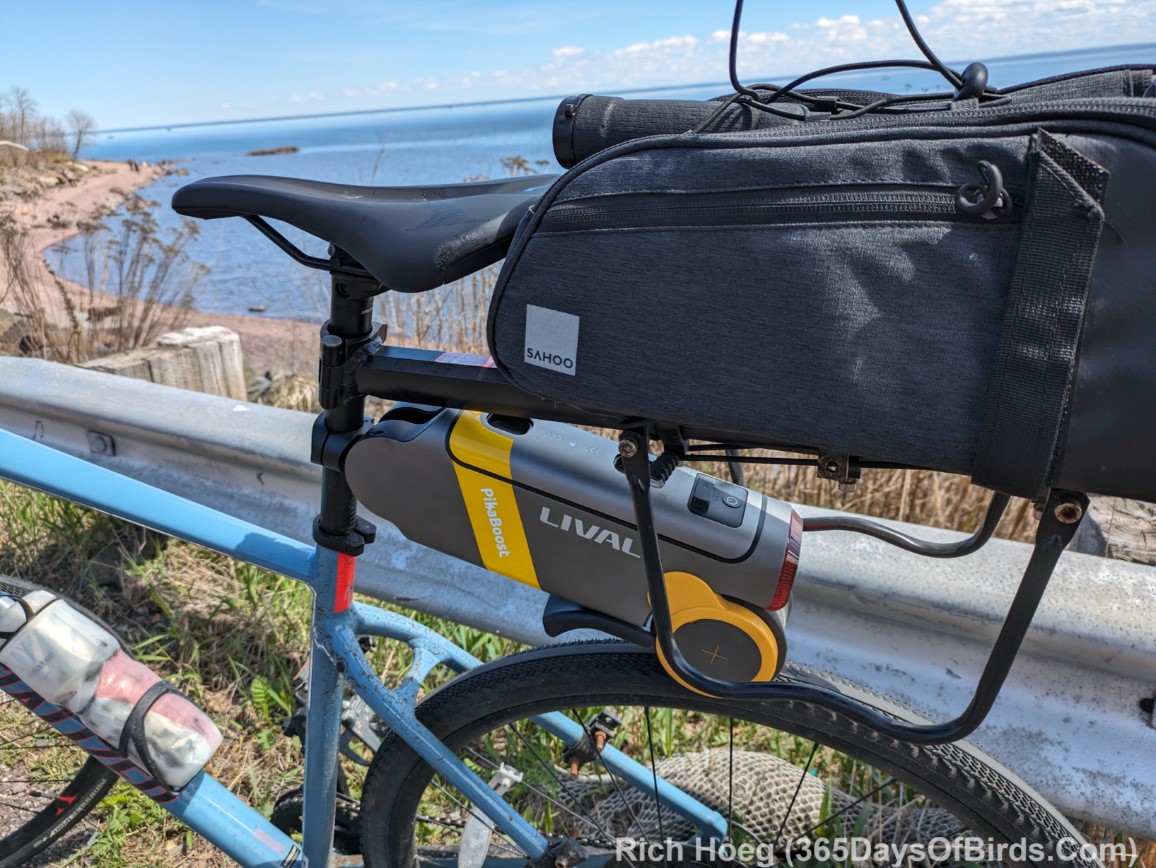
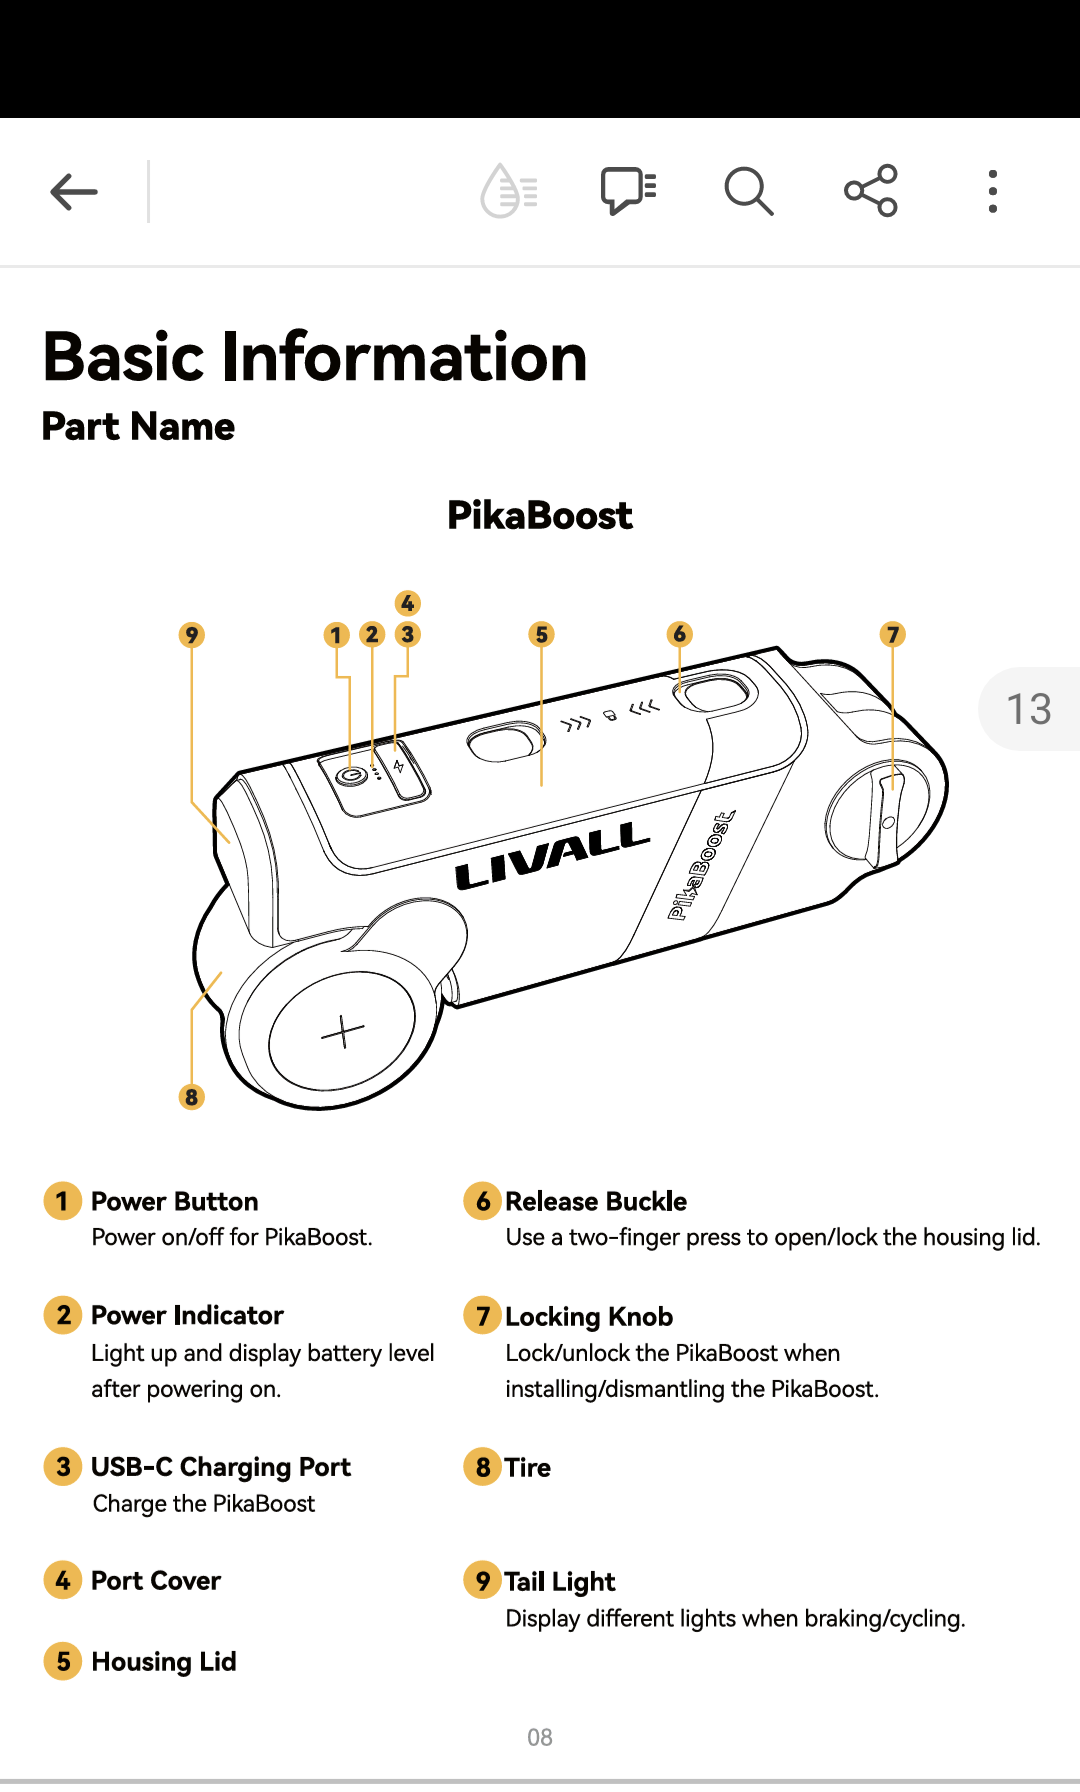
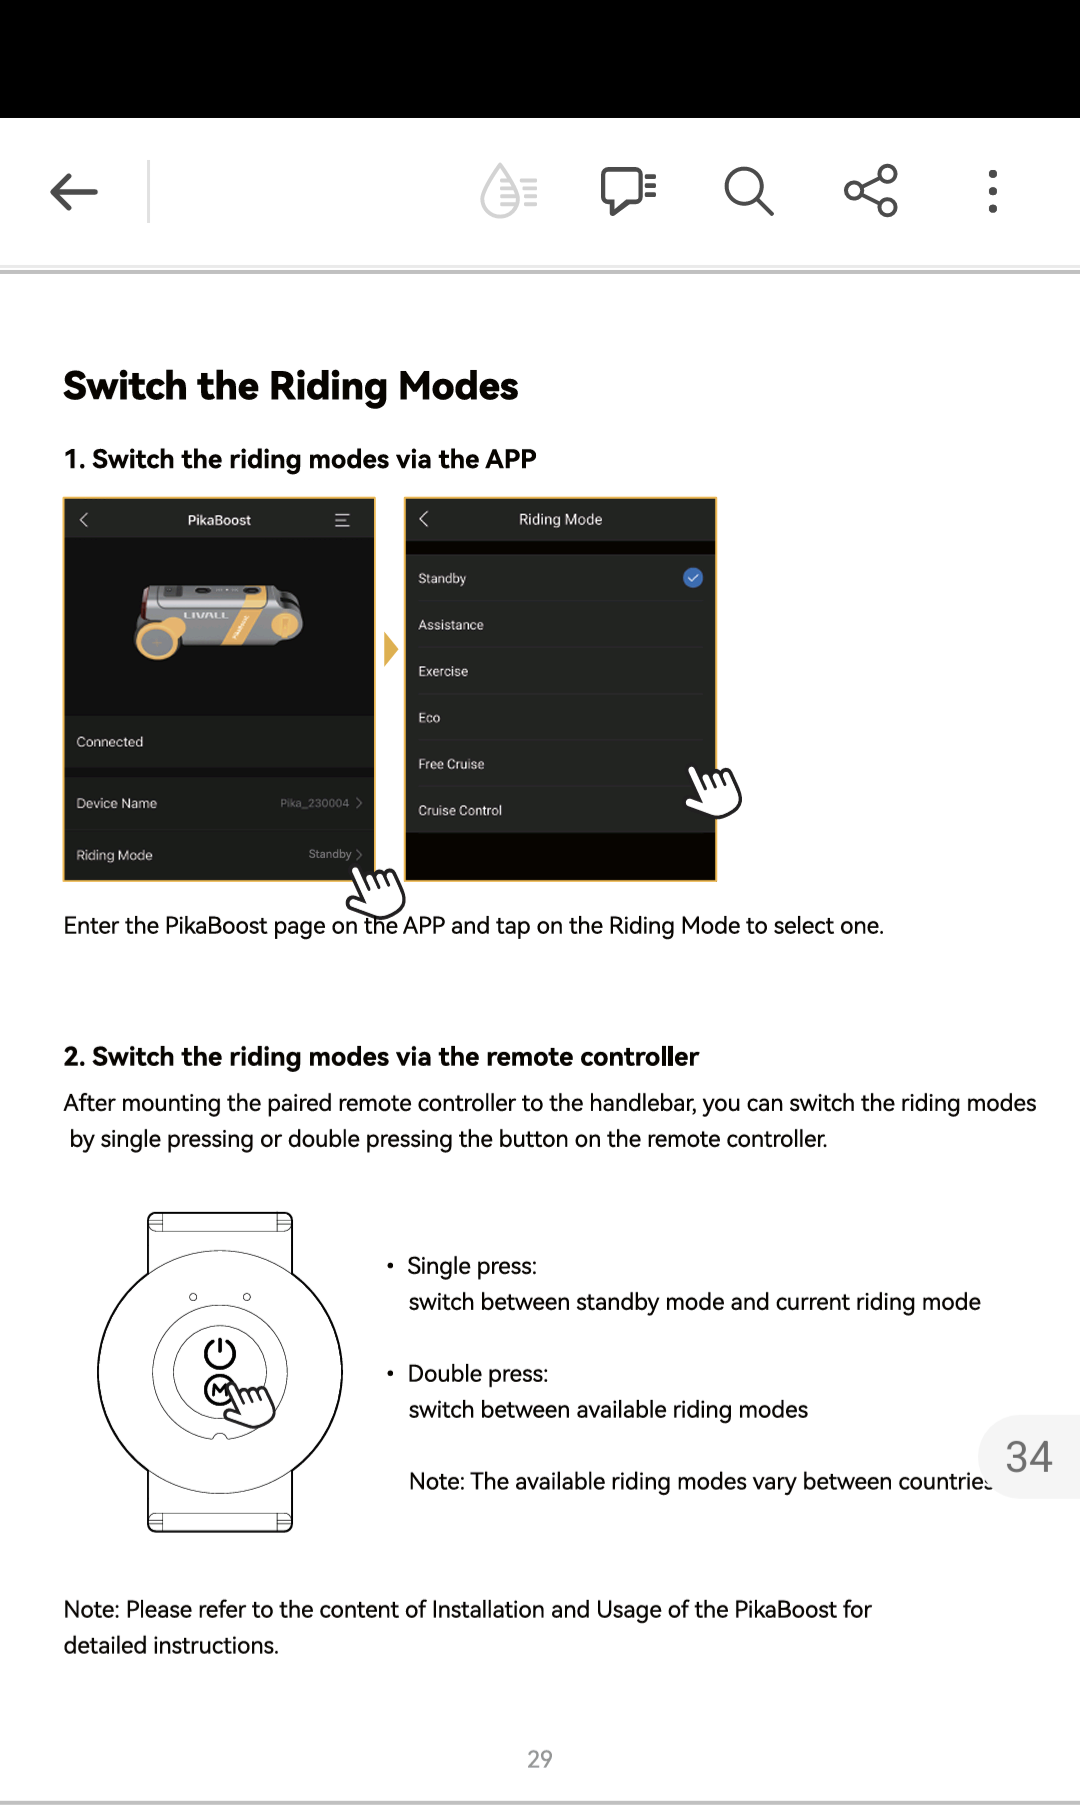
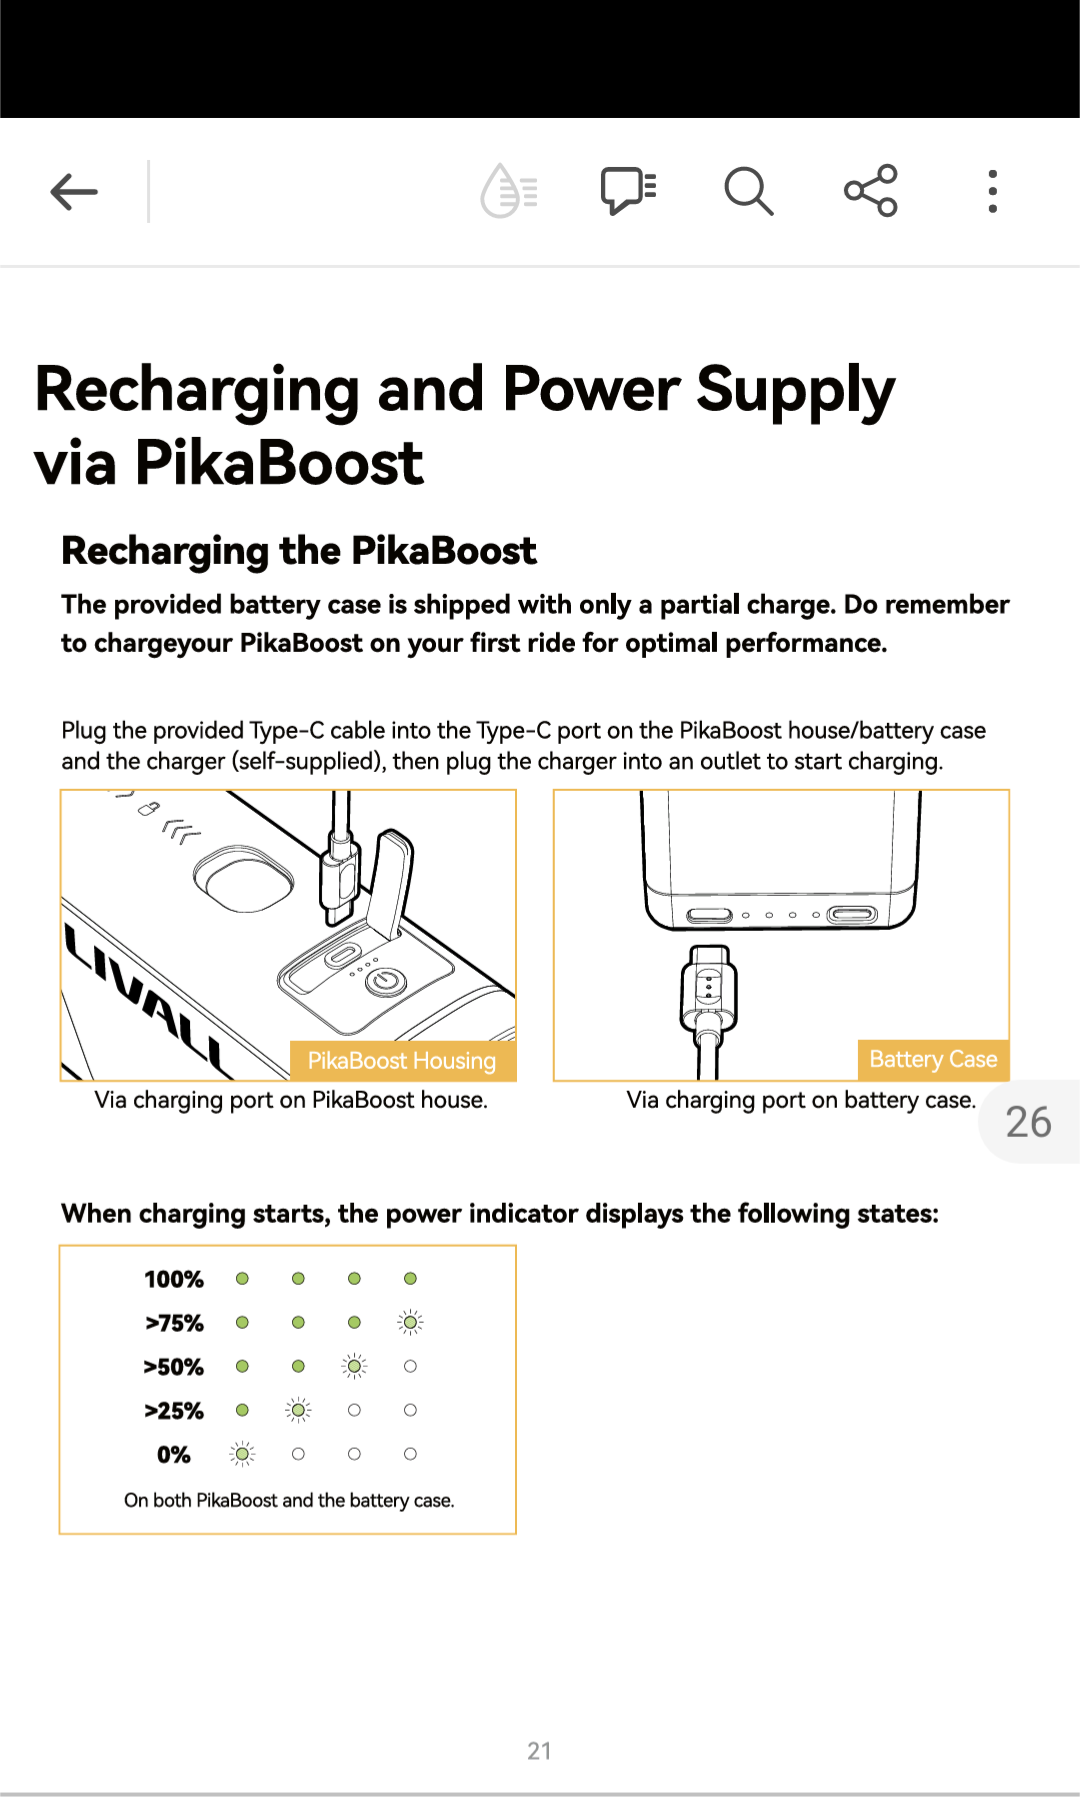
Here are some screenshots from the Pikaboost manual (PDF link) that helps with understanding of this eBike conversion kit. One mounts the basic unit to your bike’s seat post, and then various sensors decided when to activate a wheel on Pikaboost which spins against your rear tire … providing an eBike push.
Pikaboost Legend (press / click upon any image to view at full size)
Pikaboost Ride Modes
Assistance Mode (controller not required … pedal responsive … all other ride modes require the controller to be installed otherwise those modes will be grayed out and not available)

Two days ago I worked upon the controller installation, which provides the other eBike ride options. Although in theory the process is simple, my Specialized gravel bike’s Shimano brakes have little play (i.e. brakes are in good shape) and therefore I was not able to have the 2nd magnet on the brake move far enough away to make the Pikaboost controller activate / respond. I very much played around with distances, and confirmed the controller magnet and 2nd magnet worked fine in tandem. However when I squeezed my brake levers, the 2nd magnet mounted upon the brake lever did not move enough for the controller magnet “to take notice” of the change in distance.
I solved my problem with a trip to the hardware store. My solution for the controller magnet and 2nd magnet involved installing a “slider on my front handlebar”. Using heavy duty 2 sided tape squares I mounted a surface bolt upon my handlebar upon which I attached the 2nd magnet. This installation allowed me to increased the distance between the two magnets enough for the controller to activate. The controller now works perfectly. Actually, I only have to slide the surface bolt at the beginning and end of my ride because I use the embedded Pikaboost controller process which allows for a single tap upon the controller to toggle between whatever drive mode is active and standby mode (i.e. Pikaboost goes inactive). While having the 2nd magnet on the brake would be optimal, given I bicycle in a rural area using the “tap the controller” process and then pedaling using the pre-selected biking mode works fine. In heavy traffic this might not be a good solution.
Remember, although I have provided the Pikaboost’s Controller Installation Video, I was NOT able to get my 2 magnets to work in the desired manner. My installation is detailed after this video.
Here is the Pikaboost controller installation video (link for email subscribers)
My Installation Images for the Controller and the 2 Magnets
Remember … I use “tap the controller” to switch between ride modes and standby. I do NOT slide the “surface bolt” during my rides. The “controller” is the small round device that is yellow and black. The two magnets are black.
Ready for a Ride (Bolt and 2nd Magnet slid to the left)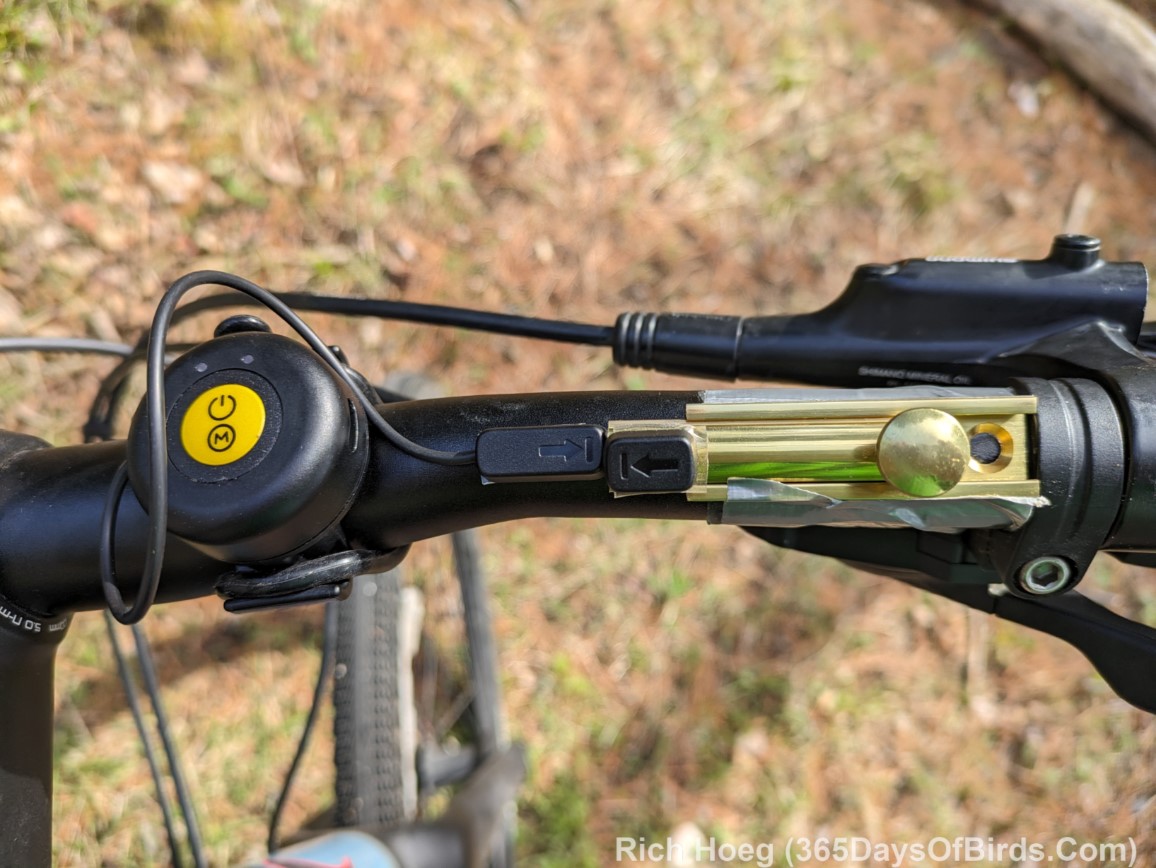
Pikaboost Disabled (Bolt and 2nd Magnet slid to the right)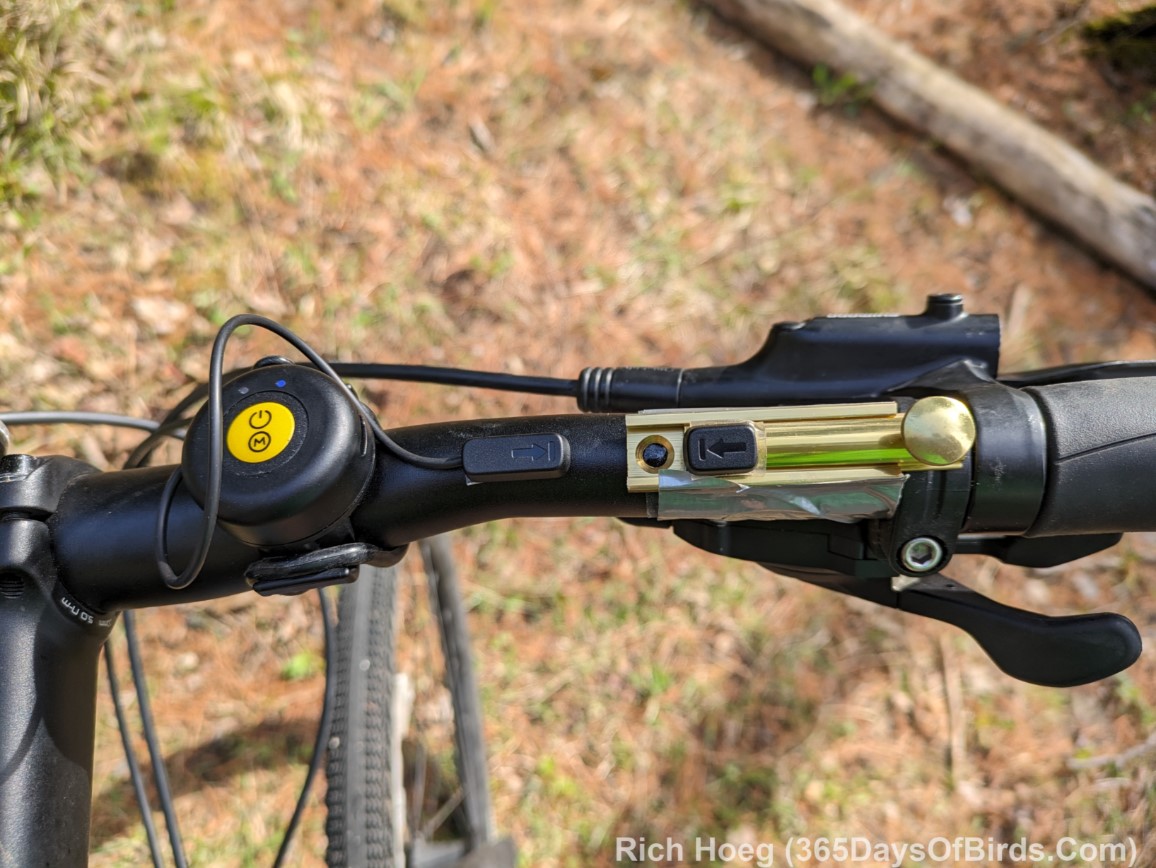
My Hardware Store Purchases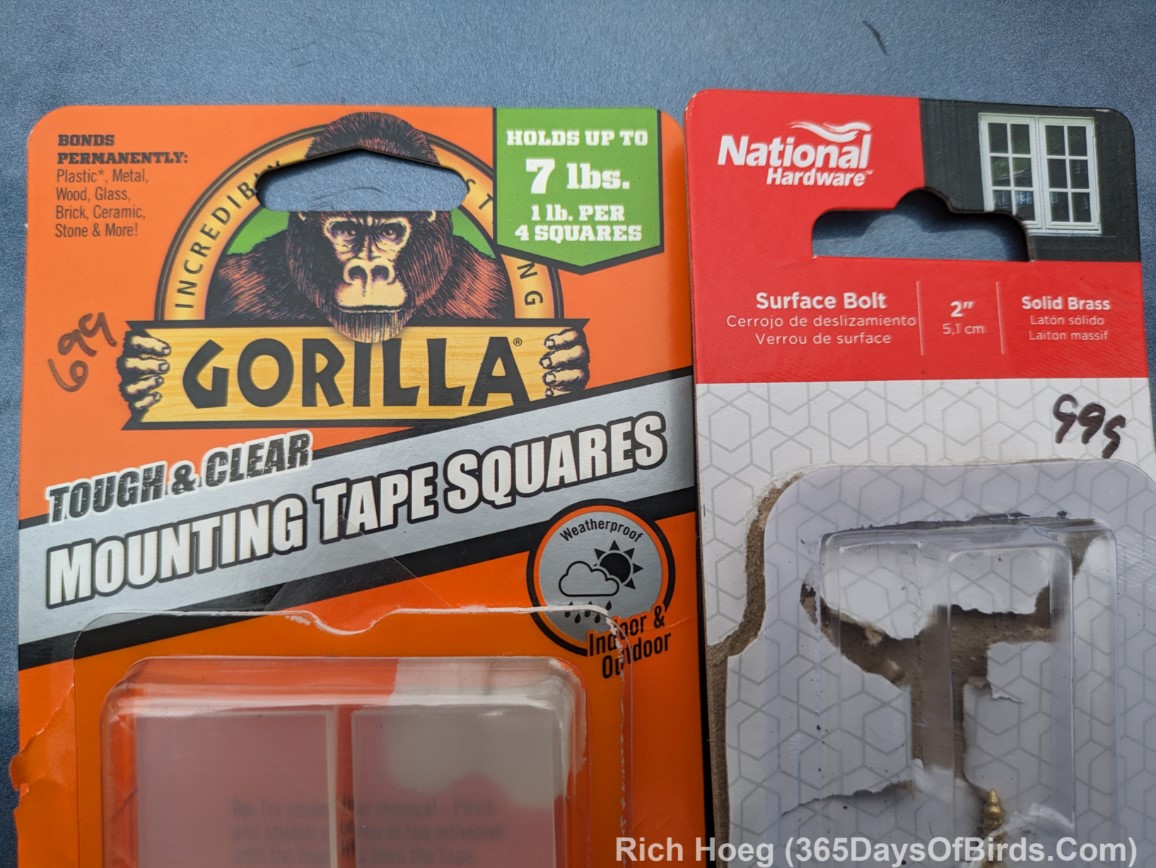
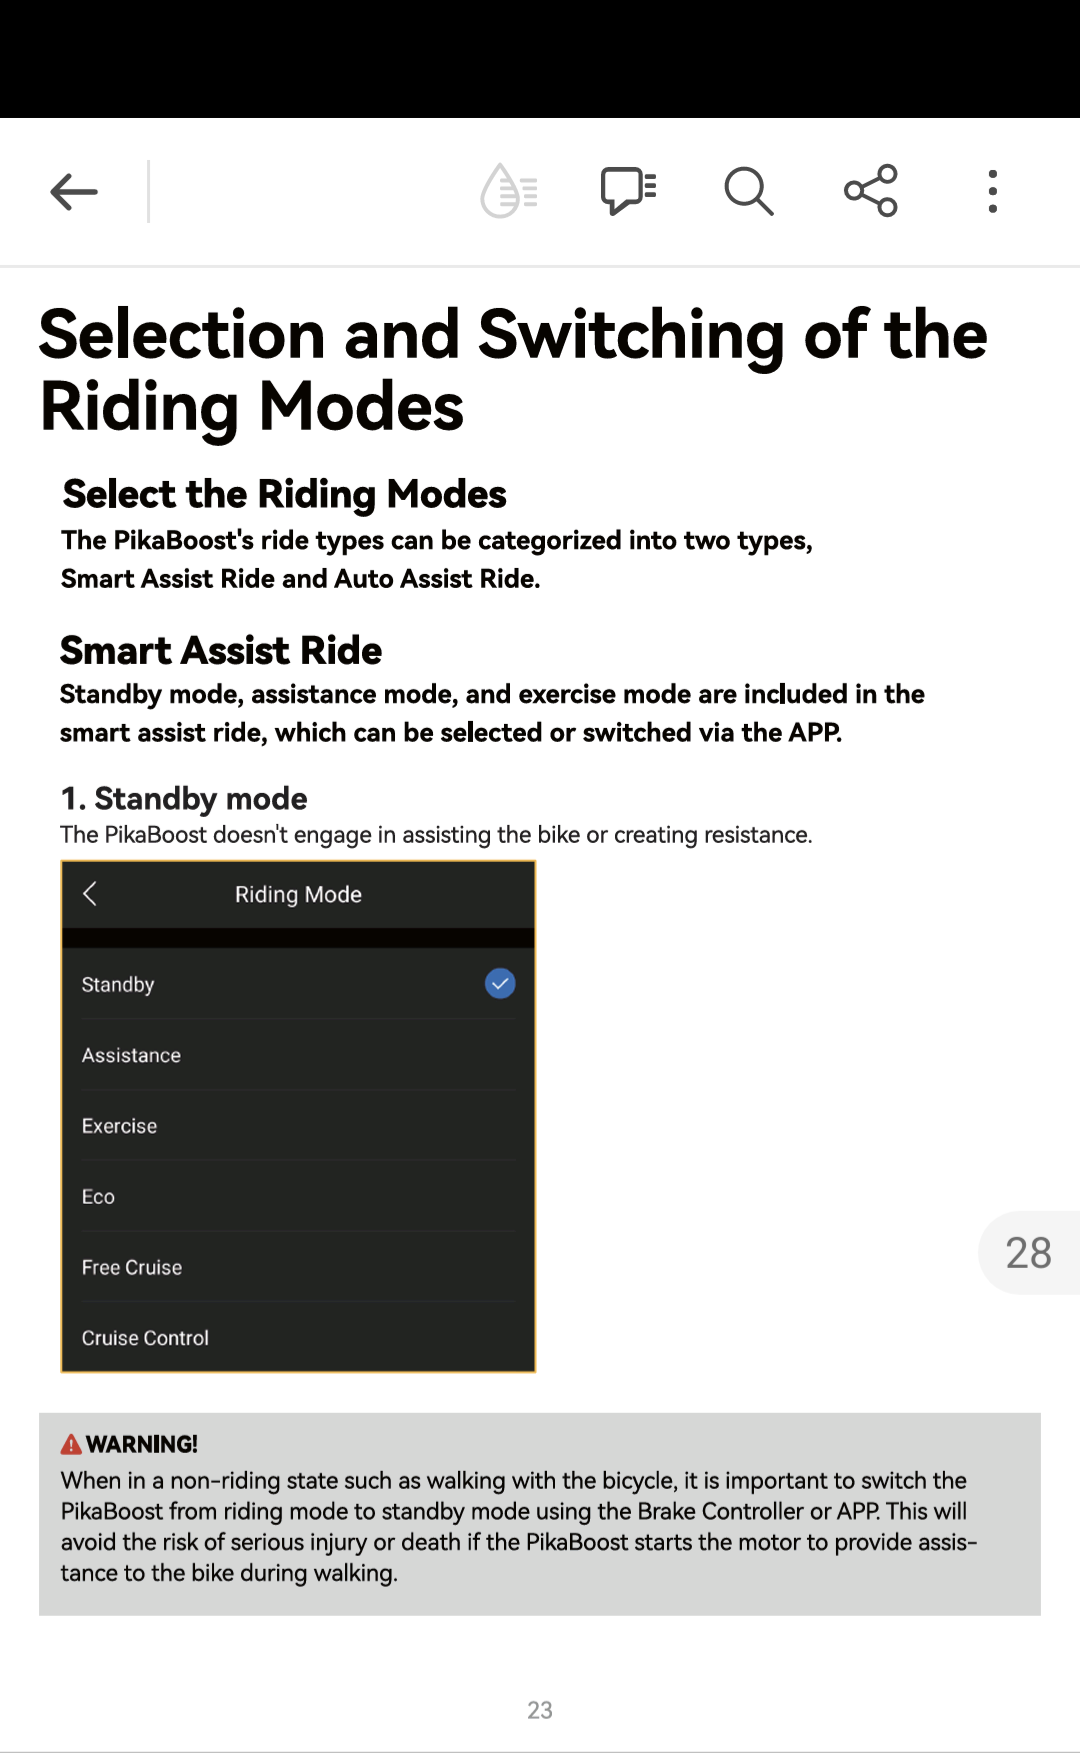
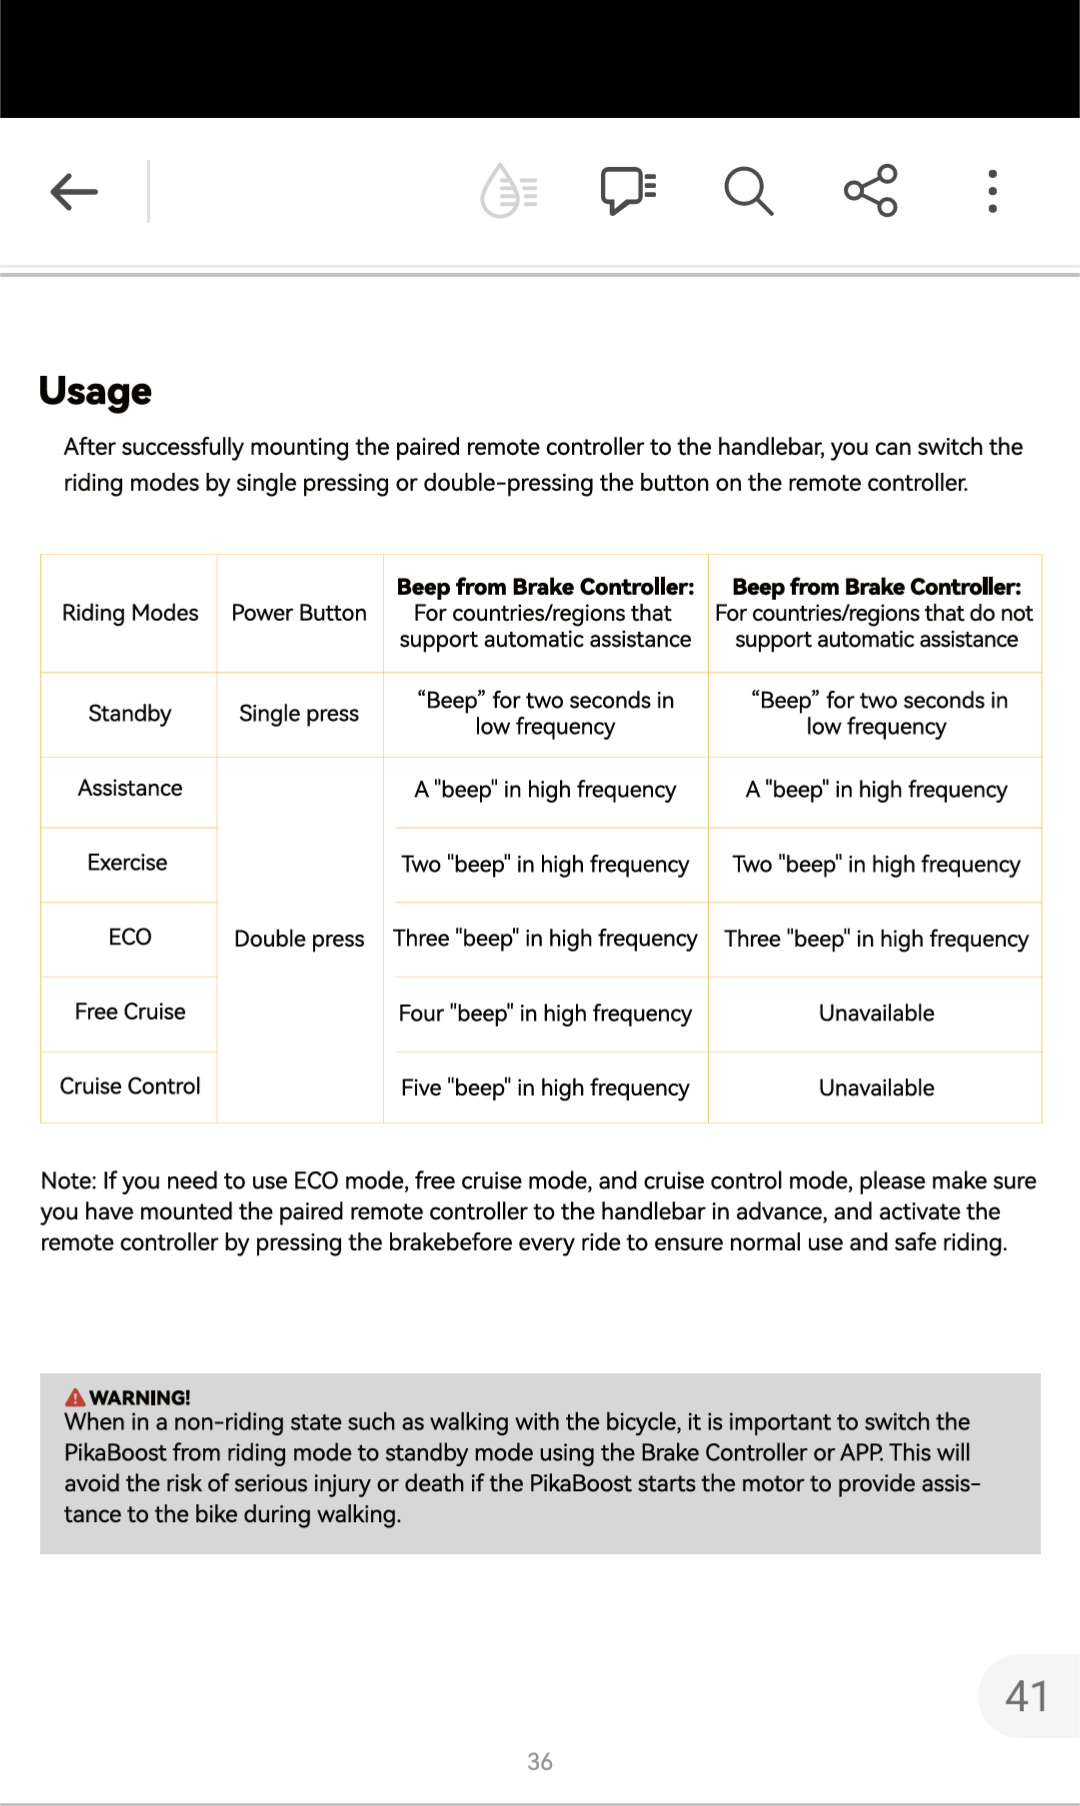
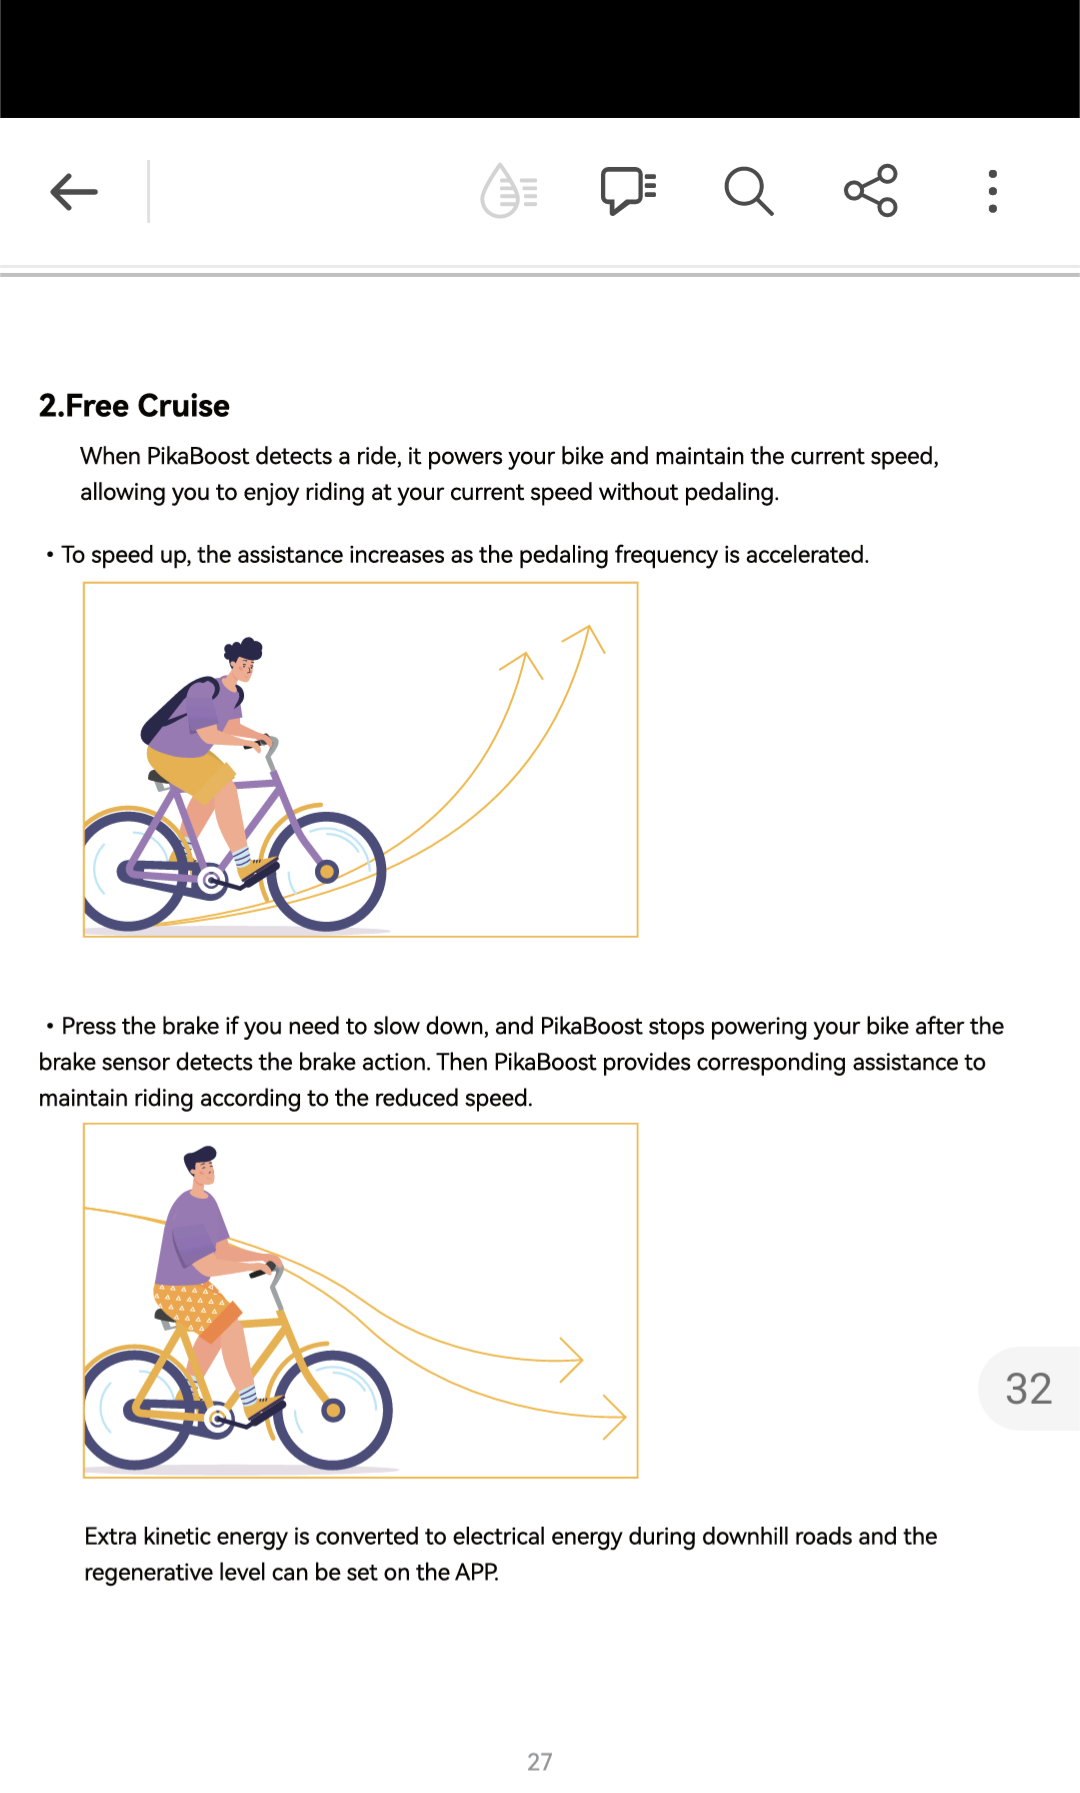
By installing the Controller I activated/obtained the three additional ride modes: Eco, Cruise Control and Free Cruise. These modes are explained by screenshots I took from the Pikaboost manual
(press / click upon any image to view at full size)

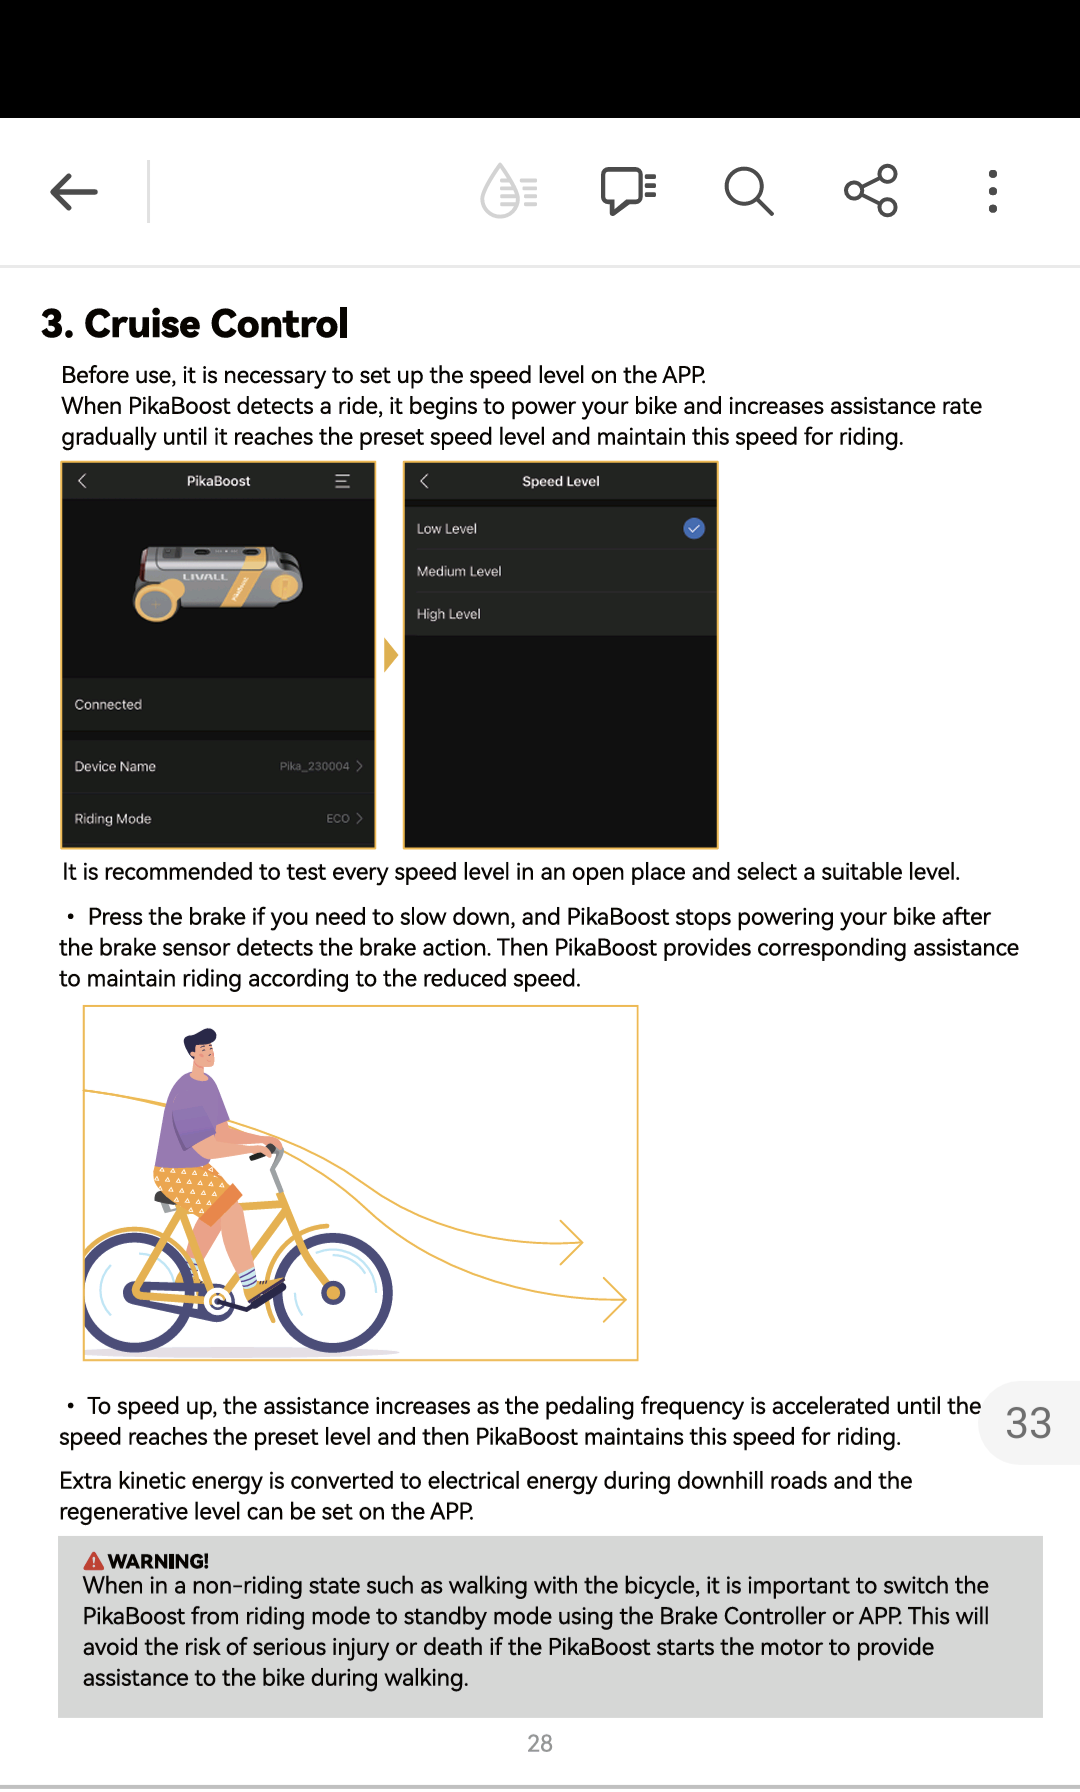
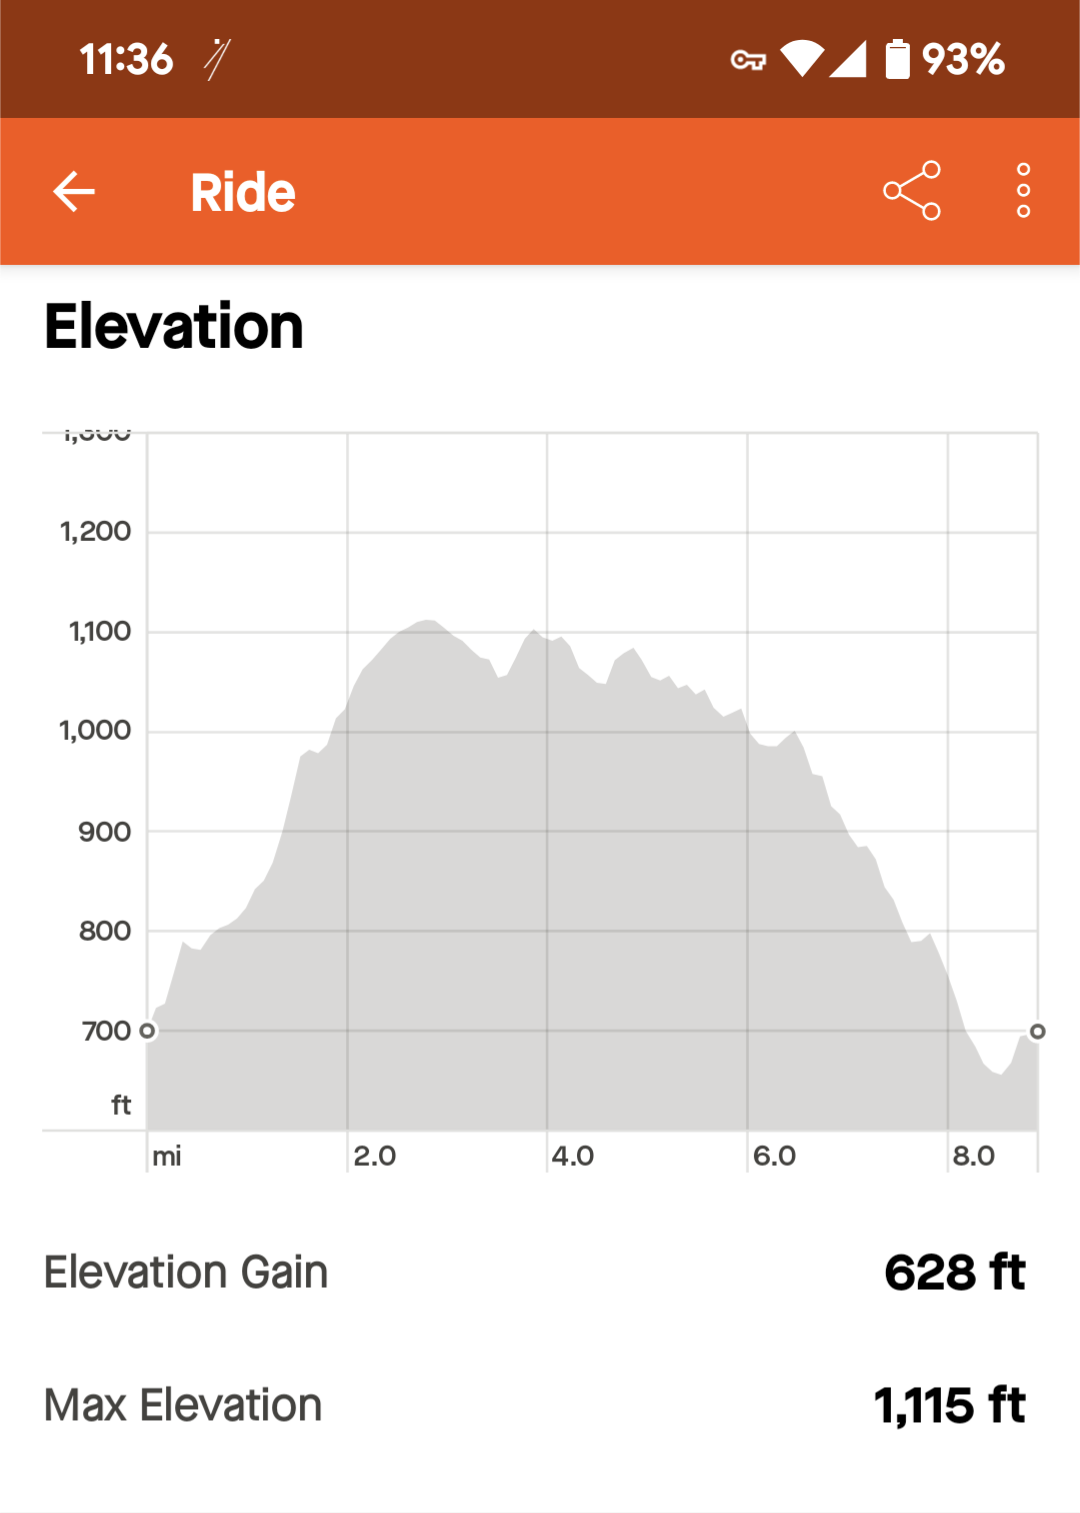
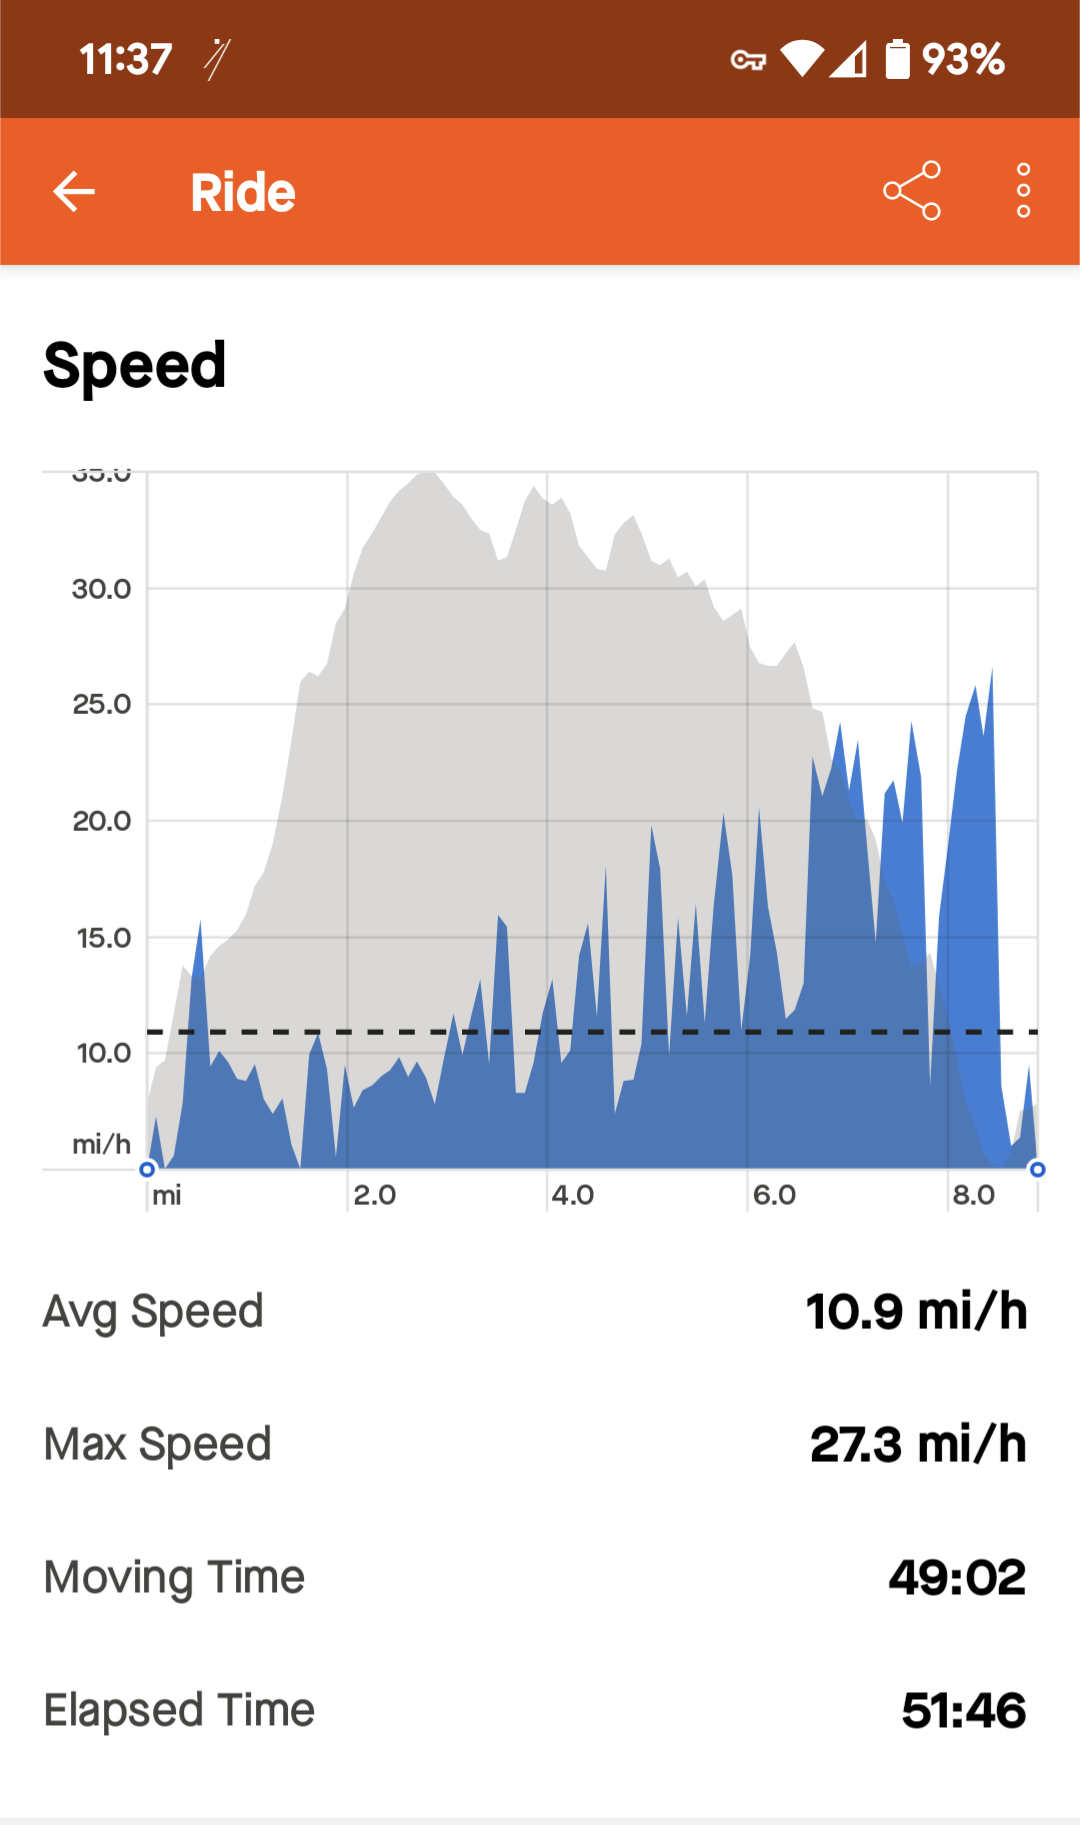
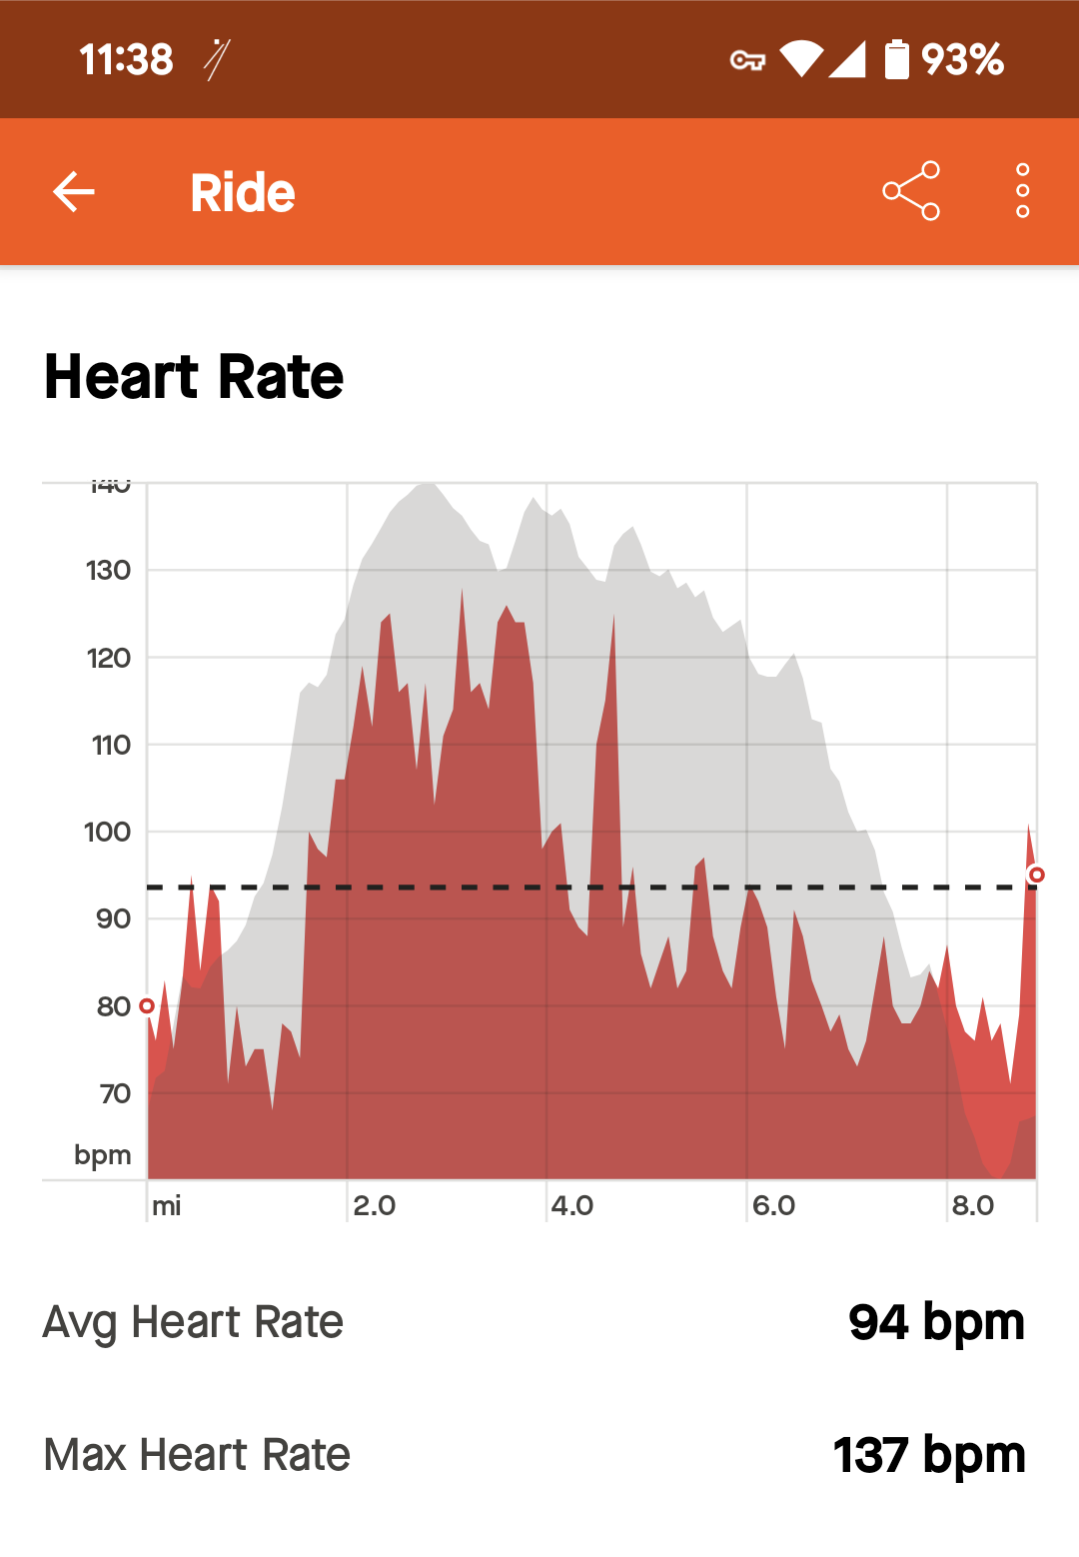
My 2nd test ride climbed the hill from Lake Superior near my home. My nine mile ride had 628 feet of elevation change, which is a steep climb. Preselecting the “cruise control mode” in adance via the Pikaboost app and then using the toggle method during the climb worked fine. I had selected “slow speed” and “high hill sensitivity”. It was necessary for me to pedal while Pikaboost was also pushing. It was a reasonable combination for this 68 year old former athlete still in decent shape. On the way down the hill I normally toggled “cruise control mode” off, and also sometimes on the flat. At the end of the ride my Pikaboost had one light steadily green when I started the battery charging process.
Here are some “ride comments” followed by data from my private STRAVA account.
- Cruise worked much better than Eco for the big climb. Lival had recommended Eco, but I disagree based upon my ride.
- I created my own controller attachment for the magnets because my Shimano brakes did not have enough play (i.e. are too tight and move too little to have the magnet register via the controller)
- Tapping the controller puts Pikaboost into standby mode. This works well for me in a very rural area, but maybe not for people in heavy traffic areas. This assumes a person is has to use a controller magnet workaround similar to me … will post pics of my controller workaround in first comments
- I used standby most of the time on the downhill or flat portions of my ride.
- Without my pedaling, Pikaboost was not able to handle the hill the steepest sections of the hill. This did not surprise me
And STRAVA … my hill climb. I have provided my STRAVA data such that you may better understand the work I did in combination with Pikaboost, which is advertised as having an 18 mile range.
(press / click upon any image to view at full size)

And in summation, given the price I was charged ($299) this is a good eBike Conversion Kit but it has some issues. This afternoon I took my Specialized Gravel Bike … enhanced by Picaboost … on my first remote dirt road … a bird excursion. Jackpot! I explored a wilderness area via a remote dirt road. While I enjoy hiking, my new eBike combination allows me to reach further into the wilderness!
And of course a photo of the ride …
Canosia Wildlife Reserve Bike Ride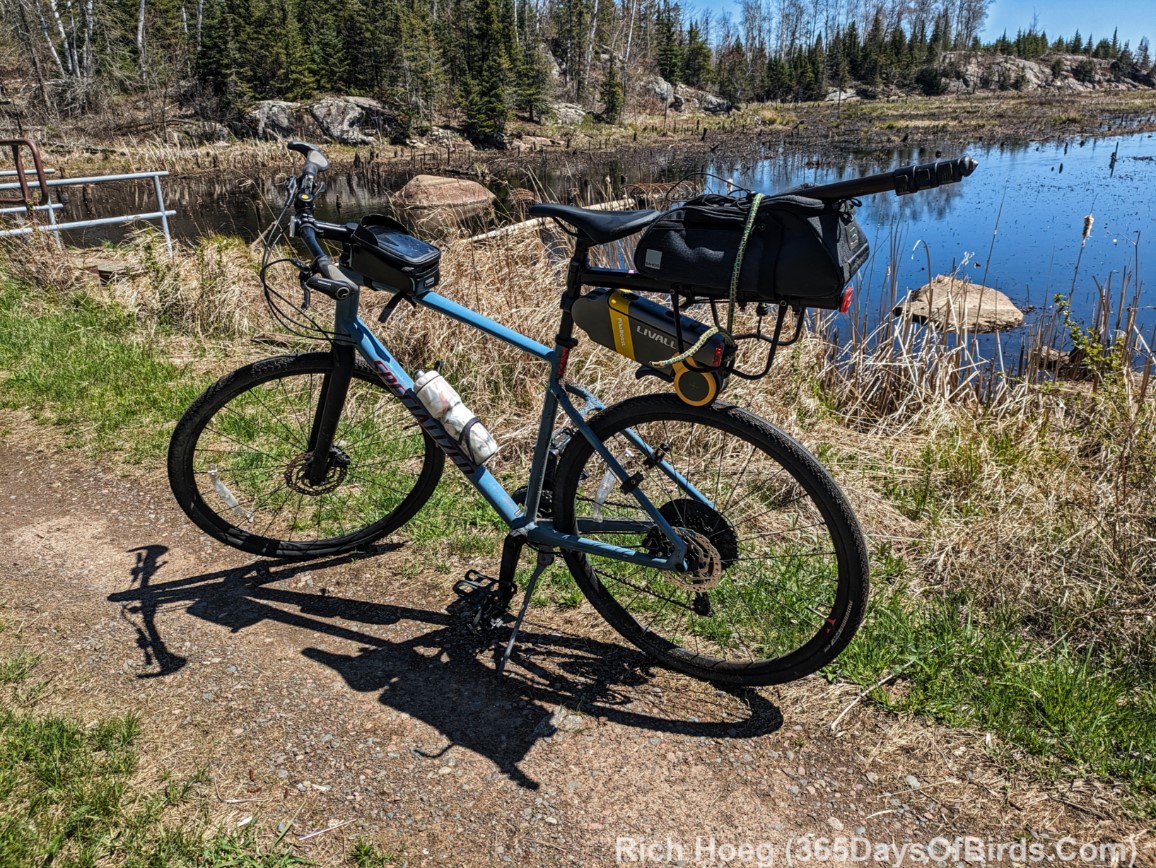
Discover more from 365 Days of Birds
Subscribe to get the latest posts sent to your email.
I thought you might like this 3D model I have made to install the brake light on hydraulic brakes (Mine being a Shimano) Of course you will need a printer or someone to print for you.
https://makerworld.com/en/models/1500841-pikaboost-braking-adapter-for-shimano-hydraulic?from=search#profileId-1570014
How much do you weigh? Assuming the bike is not more than 30lbs, I’m guessing the performance of the motor would be noticeably different from a 130 lbs vs a 280 lbs rider.
Also, would you recommend the PikaBoost 2 with the extended battery. It seems to be improved over v1.
Any bike’s performance is affected by the weight of the rider. At 195 pounds I have been very satisfied. I did not get the extra battery option for Pikaboost 1. Whether you want the extended battery depends both on your weight, how you cycle, and the topography / distance you intend to ride. I always am “pushing the pedals” and never let the bike just move me along. With that knowledge I invite you to review the Strava ride reports from my rides. Sorry, there is no perfect answer to your question … as always, it depends. I have ordered Pikaboost 2 as of September 16, 2024, but the device is not to my knowledge yet shipping
Hola. Soy de Argentina. Tengo una bicicleta todo terreno. Pero muy básica. Quiero agregar un motor eléctrico. Y vi está publicidad.Pregunto, este motor, sirve para utilizar la bicicleta, 100% motor eléctrico, o es solo asistencia?
Gracias
I have translated your question in this way … Hello. I’m from Argentina. I have an all-terrain bike. But it’s very basic. I want to add an electric motor. And I saw this advertisement. I ask, does this motor serve to use the bike, 100% electric motor, or is it just assistance?
Thanks
.
Assuming I have translated your question properly, I do not personally feel Pikaboost even in the “free cruise mode” would give you enough power. When I bike in cruise mode, I find a pedal assist is still required. Perhaps if where you live is truly flat with no hills, you would be okay.
does it work when the wheel is very dirty?
Dirt is fine. I use my Pikaboost on dirt roads all the time, but wet dirt / mud is a “no go”. I took a ride two weeks ago where the dirt road into my cabin had some major wet spots, and Pikaboost was horrible in those conditions.
Thanks for this write up. I also purchased a Pikaboost (actually a twin pack) and initially was very disappointed with the performance since it would cut out on the uphill climbs. However, after the last firmware update, performance changed remarkably and while not a “full ebike” experience, it does exactly what it is intended to do and does it well. Kudo’s to Livall.
I am wondering with your “magnetic slider” if you are making use of the regenerative braking function. Instead of using standby on the downhill portion, try sliding the magnet. This will make regen kick in, which is a very cool feature, slowing you down and charging the battery in the process.
I am missing out on that feature. If I can figure out how to get the battery system to work with my brakes, it would be a nice addition.
Always enjoy your adventures and reviews Richard. You are a man of many talents. Have a wonderful weekend.